

In the last chapter, we quantified how short battery life will be on a cruising boat with a standard electrical system, now let’s move on to fixing that.
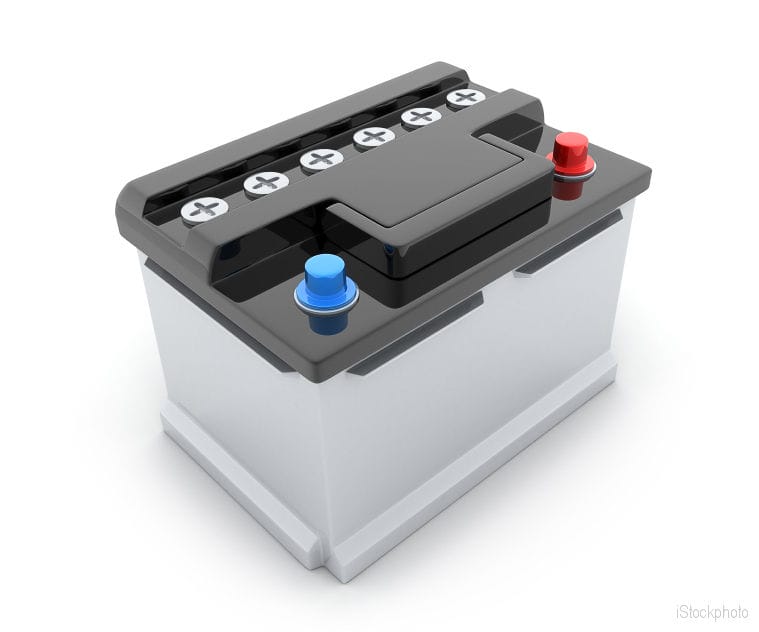
This Applies to All Lead Acid Batteries
AGM, gel, liquid filled and carbon foam are all lead acid batteries with the same basic chemistry and they will all fail if we don’t treat them properly. So the following list will help any liveaboard voyaging sailboat owner get longer battery life.
Just to be clear, none of this applies to lithium batteries, which we cover later in this Online Book.
Commonly Known Stuff
The first three rules are known by most liveaboard voyagers. But if they are all we do we will go through a lot of batteries. Still, they bear repeating:
#1 Don’t regularly discharge your batteries over 50% of rated capacity.
Breaking this rule occasionally is no big deal, but if you break it regularly be prepared to replace your batteries often…really often.
#2 Charge your batteries back to at least 80% of capacity after every discharge cycle.
It’s also important that you do this sooner rather than later. On no account should batteries sit for more than a day or so in a deeply discharged state. Typical battery banks will be close to this 80% status when the charge current (amperage) starts to drop below the maximum that a well regulated alternator or AC charger can supply at the proper acceptance voltage (typically about 14.4 volts).
#3 Charge your batteries to 100% as often as you can.
Now we are getting to the hard stuff. Lead acid battery manufacturers really want you to charge your batteries to 100% after every discharge. But that is simply not practical for us live-aboard voyagers because, although we can honour Rule #2 in an hour or so with good charging equipment, getting to 100% typically takes another five hours! Still, do it as often as you can—read on for how.
The New Stuff
 #4 Make sure you have access to shorepower for at least a week after installing new batteries.

The reason is that batteries when shipped from the factory are not “fully finished” and it takes several discharges, followed by charges all the way to 100%, to bring them up to 100% capacity.
By the way, you do not need to “form” new batteries by fully discharging them and then recharging them as some “pundits” will tell you.
#5 Don’t leave a shorepower charger on for long periods.
There are some AC chargers that are smart enough not to damage your batteries by being left on for long periods but they are few and far between. And that indictment includes most of those that claim to be three stage, all singing, all dancing, etc.
#6 Only buy batteries that can be equalized.
Remember rule #3 that none of us liveaboards can really follow? Regular equalization is the next best thing.
#7 Equalize your batteries once a month or so.
We explain how later in this Online Book
#8 Install a truly smart alternator voltage regulator.
For most of us live-aboard voyagers, or at least those like us who are way too cheap to spend a lot of time in marinas, the one and only time we will get to fully charge our batteries will be when doing a longer passage under power. The bad news is that most alternator voltage regulators, yes even the expensive three stage ones, won’t do the job unless reprogrammed from the factory setting and even then, not very well. We recommend a good regulator later in this online book.
#9 Install a smart measurement system and use it.
Contrary to what many manufacturers will tell you, this stuff is generally anything but “fully automatic”. You need to skipper your charging system, just like you skipper your boat, and to do that you need to know what’s going on.
Minimum acceptable measurement capabilities:
- Volts at the battery (requires a wire going to the battery positive post).
- Amps going into the battery (requires a shunt).
- Amp hours going in and out of the battery (requires a shunt).
We have three chapters later in this Online Book to help you choose a monitory system and calibrate it so it’s actually useful.
#10 Install an alternator regulator and AC charger(s) that have temperature measurement probes on the batteries.
The reason is that the proper voltage to charge and equalize batteries varies with temperature. This feature is particularly important for sealed batteries like gels and AGMs.
#11 Know how your batteries should be charged and how to tell they are full.
There is more inaccurate information about this out there than just about any area of cruising knowledge. And, yes, to really understand the real facts, you’re going to need to read first two chapters of this online book.
But here’s the short version:
- Batteries like to be charged hard until they are fully charged.
- Batteries are fully charged when the current (amps) they are accepting at their specified acceptance voltage—typically about 14.4 volts at 70F (20C) but check with the manufacturer—has dropped to 2% to 0.5% (varies by type) of their total capacity measured in amp hours. This is the only practical way to know that they are 100% charged.
- At that point, and at that point only, the charge voltage should be dropped to the float level, typically about 13.4 volts.
Summary
Sure, there are a lot more things you can do to improve battery life: wind and solar power (if used correctly), and complex and expensive fully automated systems, to name just two.
But these eleven steps are all you really need to do to get the dramatically improved battery performance that we are enjoying on Morgan’s Cloud.
Up Next
Read on in this Online Book for detailed how-to chapters on all of the above.
Hi,
Thank you for the great in depth series of articles on batteries. Your website has the feel and reputation of providing rock solid, practical, objective and detailed information. Consequently, I look forward to every e-mail notification.
Regards,
Norris
All very useful, and for me quite poignant! Late 2010 one battery in a bank of 5 started to overheat whilst charging. In time I replaced all batteries and verified that the battery charger was correctly set for the batteries we had installed. The setting was wrong and was the root cause of the early melt down. This is easily ignored when changing batteries. Additionally, in my case I have dispensed with any split charging system, preferring to use the Blue Seas 7610 SI battery combiners that very accurately determine which/when to charge, and when to isolate the batteries. I would commend this system as an alternative to the dubious claims made by all manner of battery split-charging devices. It proved to be easy to wire up, and has worked very well.
Excellent, Excellent
I would like to reiterate a point I made earlier as to temperature sensors and temperature compensation.
Make sure you understand sensor failure modes, and have some means of compensating for the failure — particularly if the boat is left unattended.
Most (actually, I think it is “all”) report a battery temperature of 0 deg F in the event of a failure. The higher the battery temperature when this occurs, the worse the impact. For us it meant 15+ volts delivered during Acceptance to a 90 deg F battery (and a resulting $1500 loss).
Make sure your temp compensated source also has the ability to specify a “not to exceed” voltage.
If not, I would recommend setting the charge source for the highest battery temperature expected during an absence, and adjust for the possible under-charge on return.
Again, excellent advice, thanks John!
Hi Chris,
A really good point. This is just another reason why we on “Morgan’s Cloud” keep a careful eye on what our chargers and alternator are doing using our Link 2000 meter.
Unless there is a really good reason (very rare) we don’t leave our AC chargers on when we are not on the boat either. Aside from the danger of ruining the batteries, you can burn your boat if a cell shorts in one of the batteries and you are not there to shut things down when you smell burning.
Hi John, a great series, very useful. However, this statement: “But one of the first things we learned is that it really does not matter whether you buy AGM, gell, or liquid filled batteries” could be interpreted ambiguously. It is true concerning how to treat batteries, but it is not true in evaluating the cost/performance/convenience trade-off in choosing between types of batteries to buy. As you know, it matters a lot!
Hi John,
Good point. My statement was in relation to these 11 rules, not the issues of deciding which battery type will best meet a given need and price point. That’s a whole new set of posts!
Excellent series of posts! One thing I am still not certain of is how to make rapid, maximum possible charging foolproof so you don’t burn the boat down, as has happened to several folks I know of. Inherent in the process is generating lots of heat and possible gasing of explosive vapors in an enclosed space. A recipe for danger.
Also, I am not sure about this statement: “Batteries like to be charged hard until they are fully charged.” I suppose it depends on the definition of “like,” but my understanding has always been that fast charging shortens a battery’s life.
Hi John Kettlewell,
Thanks for the kind words.
I have it on pretty good authority (Justin at LifeLine) that their batteries, at least, have, in exhaustive testing, shown that they actually last longer if charged at high current (amperage). This helps to stop them sulfating, which is usually how boat batteries die.
In fact LifeLine are quite happy to have their batteries charged at currents up to a number equal to the capacity of the battery in amp hours. In other words, our two 8Ds could take 240 amps each, or a total of 480 amps, without damage or overheating—way beyond what most alternators or wiring could possibly produce.
The key parameter is not the number of amps going in, since the battery’s own internal resistance will limit that (ohms law) but rather that the battery’s maximum acceptance voltage is not exceeded (generally about 14.4 volts at 70F). Also, Rule 10 is important to prevent overcharging as the battery heats up from charging since internal resistance drops.
In summary, the old idea that batteries like to be slow, or even trickle charged, is, I am really pretty sure, simply wrong.
I realize they aren’t Lifeline AGM batteries, and they are a different technology, but the new electric cars all seem to suffer degraded lifetimes if you do a lot of fast charging.
I understand AGM batteries can withstand higher charging currents, but does that mean that is ideal?
Very helpful article. As I read, I kept wanting to add “or use solar panels!” to every mention of shore power. We installed a bank of four house batteries and four solar panels on our boat before embarking on our 6 month cruise in 2009. We removed two of the panels last spring when we returned to the US and have never used shore power. All of the house batteries are still going strong. In the Caribbean our bank was typically fully charged by noon each day. While I realize that four solar panels might be overkill for some people, it was awesome to not have to worry about our battery strength. There was only 1 occurrence I remember where the battery strength dipped below 50%.
This year we are finally removing the other two panels and switching to shore power at the marina. I’ll make sure we follow this guide to ensure that our batteries continue to survive.
Hi Beth,
Really good point on how solar can help. Our problem is that, in large part due to the computer demands of this site together with our publishing efforts (Norwegian Cruising Guide), our usage is up around 250 amp hours a day.
To satisfy that load, or even make a dent in it, with solar would take a lot of panels. And the big issue for us is where to put so many in a seaman like way—we absolutely abhor deck clutter. More on that in a coming post.
I have found these articles very good, thank you John. It certainly makes me appreciate my simple system, but has given me some ideas for improvements. I use standard wet cells, but have only about 140 amp-hours capacity. My main charging system is two (soon to be three) 40W solar panels. They work through a reasonably smart regulator/battery monitor that has an equalization cycle. For more info about my setup see http://snowpetrelsailing.blogspot.com
I have found this to be a good and simple system for my boat. But then I have no fridge and have to be a bit careful with power. I rarely have to run the main engine for power, normally only if I am using the big inverter with power tools. My batteries have lasted 6 years, but are pretty stuffed now.
I can relate to the desire to keep clutter on deck to a minimum but accept this trade off for the safety of having a truly independent power supply. My third panel will be removable so I can store it below in a serious blow.
Cheers
Ben
Hi Ben,
Thanks for the comment. Just to clarify, I don’t have a problem with one or two solar panels well secured in an out of the way place like you and Colin have (see this post). But to make a dent in our considerable power use, we would need a whole bunch of panels festooning the boat, which would not be seamanlike, particularly given the places we go.
Congratulations John, I have really appreciated these articles and the light that they have shed on an often misunderstood subject.
Before anyone believes that the wheel has been re-invented however, can I just caution that the conclusion this article is leading to is pretty much what serious battery maintainers have known since WW2.
The issue that John has identified (correctly and thankfully) is that the purveyors of certain battery control equipment have, for some years now, ‘pulled the wool’.
The battery care system that John is now leaning towards is, as he rightly says, based on the fact that most modern batteries (despite the fancy labels) are simply variations on a simple chemical equation.
I hope that the discussion progresses to more detailed issues regarding equalisation (for example ventilation and hydrogen percentage monitoring during that process) and whilst not quite as important, quarterly (or similar) discharge which is almost the mirror image of equalisation.
Then we may be getting somewhere (without the fancy bits).
Steve
John, first thanks for the excellent series of emails. Yesterday I ordered five Group 31 Lifeline AGMs here in New Zealand (four house and one starter – constrained to Group 31s by the location of the batteries). Your work and research will hopefully lead them to have a long and happy life.
Question on leaving batteries on float (as when at a marina). Is there any way to do this safely? We are using a Mastervolt MassCombi inverter/charger with adjustable (via a computer link) charging and float voltages.
Thanks
Tom
Hi Tom,
In answer to your question, I guess it really depends on whether you mean safe for the batteries, or safe for the boat. If the former, then the answer is yes, as long as you either have a shunt that allows the charger to measure actual amps going into the battery, so that it can determine when the batteries are fully charged and drop back to float voltage (typically around 13.4 volts) from acceptance voltage (typically around 14.4 volts) without being confused by loads. You can also do this manually. This is all explained in this post.
However, if you mean safe for the boat, then our answer would be no, not really. Any time you charge a battery there is the potential for fire if one of the cells in that battery shorts out. So, for us on “Morgan’s Cloud”, we don’t leave any batteries charging unattended if we can help it. We don’t even leave the rechargeable AA batteries that we use in our photography strobes and flashlights (torches) on charge when we are not around to keep an eye on things. In fact we have a friend who lost his house when an AA battery charger caught on fire when he was out.
Of course this second point may just prove how totally anal retentive we are, rather than that there is a real risk!
I just don’t have enough data on fires started by batteries charging to know for sure. But I think we have someone who visits this site regularly who can give us some real engineering information on this.
Matt, are you out there?
You talkin’ to me, mate? (Sorry I’m late….)
I don’t have any statistics on how often marine battery chargers start fires.
Regarding Chris’s broken temp sensor causing his charger to cook the batteries: Returning a reading of “0” when the true condition is “no clue” is wrong; control systems are generally supposed to have a fault condition that is easily distinguished from an extreme but correct reading.
I have no idea how such a flawed design could have passed QA, but an awful lot of junk does sneak through, even if it has fancy brand names and high price tags. Caveat emptor; unless you actually wire the thing up on a test bench and force it into fault states, it’s hard to tell what it’ll do.
If autonomous operation is important to you, then by all means, feel free to pay for it. Put two extra thermocouples on each battery and use them to drive redundant logic circuits that’ll cut off the power if anything gets too hot. Have alarms and interlocks for main bus overvolt and main bus undervolt conditions. Have an alarm and independent cutoff for the charger over-current condition. Have a thermal interlock in the shore power inlet.
If you don’t want to install and integrate all those sensors and interlocks, simply turn all high-power equipment off when you leave the boat.
(I would have no qualms about leaving a 2 amp trickle charger unattended, but anything that is able to cause an overload should either have a fully independent emergency interlock system, or should be shut off when unattended.)
Thanks, Matt. Great information as always.
Clearly, I’m not Matt, but I can tell you we had the temp sensor for our charger fail while away from the boat and float charging.
The sensed voltage went to zero, and the supplied voltage was accordingly bumped up by the firmware to 15+ volts— appropriate for a temp of zero, but not for a temp of 90 deg F.
The result was $1500 of Dekas destroyed, and H2S contamination and damage throughout the boat. One battery had boiled and had begun swelling…
More details are available in a comment made on 11 Feb (see above) and in prior posts.
John,
Thank you for this lucid, practical series. We have a Balmar 612 and a house bank of Lifeline AGMs, being replaced this spring. Here’s hoping they live a long life!
Do you have any update on the manual settings to your Balmar 612? Specifically, are you still using the 2 hour minimum setting for the absorption stage, and the 40% field voltage for the transition to float? Also, I am curious as to the logic of choosing 40% field voltage… Did you simply take 1.5% of your battery bank capacity in amp-hrs (definition of a charged battery) and add this to your average electrical systems demand while motoring?
Hi Colin F,
We have made a few more small adjustments on the Balmar regulator since the original post but I really don’t want to get into publishing them as a recipe for success since each boat will be different. For example, we often turn on our fridge that draws 60 amps just before the regulator is about to go into float mode to keep it in acceptance for another hour or so if our batteries are not fully charged.
The key is that you need to monitor how your regulator is working on your boat with your batteries and typical loads and then slowly tune the settings to do the best job of fully charging your batteries without overcharging them excessively.
As to the 40% of field voltage. That was just a starting point that we tried. There is just no scientific way to calculate it since different alternators will put out different amounts at a given field voltage setting.
In summary, there really is no other way than trial and error for each boat. And even after you get it about right, it will be important to keep monitoring what the charger is actually doing. I think that this is why Balmar sets their regulators so conservatively when they ship them. Higher settings would overcharge some boats and undercharge others. So they go for settings that undercharge just about everyone—understandable in our litigation filled world since overcharging can, in rare circumstances, cause a fire!
Have you considered a whispergen? There are some downsides like there is only one manufacturer of Stirling powered generators however it would seem idea for your type of application. In comparison to a diesel engine it’s very efficient even at low output and it’s quiet. You could set it to charge every night when you went to bed and in the morning you would be fully charged. With the low nighttime load it would “see” the correct amperage going into the batteries.
Hi Reed,
Thanks for the great suggestion.
Yes, I have looked at the Whispergen Stirling engine and on the face of it it solves many or even all of the problems with charging batteries on a cruising boat. However, we have a policy of only installing mainstream technology on “Morgan’s Cloud”.
With the places we go we just can’t afford to experiment.
An interesting comment by Ample Power saying that with their testing they couldn’t recommend AGMs.
Hi Dave,
Thanks for the pointer. I think the key point is that they had not had an AGM battery manufacturer come up with a recommended protocol. But we have exactly that from LifeLine batteries and since we have applied it we are getting great service from our AGMs.
Having said that, AGMs are not for everyone or without disadvantages. But if you want faster charge acceptance and zero self discharge, as we do, they are worth considering.
I found Ample Power’s dis-recommendation of AGM batteries interesting, since I have been getting excellent service from my Lifeline AGM batteries under heavy deep cycle use, presently still healthy at 5 years which is double what I got from West Marine gel batteries under the same usage conditions before they died. Note that the Ample Power tests were ‘years ago’, and all brands of AGM are not necessarily the same. To condemn the whole technology on these old and limited tests is not realistic.
Also, I would say that deliberately discharging to 10.5 volts (100% discharge) constitutes misuse; it may be (or not) that some or all AGM batteries are more sensitive to this sort of misuse than a regular flooded battery, and the use must decide if this is relevant.
What is interesting is to see how the Prius makes its batteries last for so long. As I understand it, they always run the batteries between a range of something like 60% to 80%…or never fully charged and never less than 60%. I have gel batteries, two 4D’s which I ran them at basically the above levels most of the time and they lasted 13 years before they had only about 50% capacity left so I bought new ones. I have a Rival 32 and sailed from Seattle to La Paz 9 years ago. Perhaps the Prius batteries are very different but my experience bares some of this approach out. I did leave the boat in storage at about 90% charge without a charger and came back 6 to 7 months later and could still start my diesel engine as the charge was above 12 volts. Amazing but true.
Perhaps Gels are different than than the absorbed matt batteries you are talking about. I had a best friend who ran a charter service out of La Paz and had gels on his boat that lasted 10 years under charter service and living aboard full time.
I had another friend who had the absorbed matt batteries and he had the same problem you had…they did not last and he was going back to gels.
I had another smart friend who went from Gels to Lifeline Abs. Matt and he was very unhappy with their short life and was going back to gels.
I am not in the marine business except I worked at a boatyard in Seattle for 10 years and saw all kind of things that should have worked, not work. I have nothing to sell to anyone but these are just my personal experiences and those of my good friends who are good sailors.
I love your site…it is one of the best ones on the web. The way you think is what I like especially for heavy weather. I wish you well with the batteries you choose. It will be interesting to see if they can last 8 to 10 years.
Best Regards,
Denny
Hi Dennis,
Thanks very much for the kind comments
Also, thanks for the interesting comment. A few thoughts:
Hi,
No, there is no way to equalize a gel but my friends who lived aboard and chartered full time, with high energy demands (the used five 4 D’s) had them last 10 years so maybe they don’t sulfate the same way as AGM’s. He also had 4 large solar panels working all the time and he like I set the solar regulator it at about 13.9 to 14.1….not the 14.3 it came at.
My alternator on my Volvo 2030 came from the factory set at 14.1 which is the other reason I use Gels and so far happy as a clam.
But for sure, your demands on your batteries is much, much greater than mine so I do hope they finally work for you as I think AGM’s can be charged at a faster rate than Gels which is appealing even to me.
I really appreciate your site. The gear that works is such a great part of your site and I appreciate it a lot. You give such well reasoned advice/reviews which is easy to understand. Thanks for all your research as well!!
Regards,
Denny
While searching for a viable way to store more energy on a cruising vessel with relatively limited space for batteries (currently 210 Ah/24v), I have come across LiFePo4 (lithium, iron, polymer) batteries. They seem to hold significant benefits in addition to having less temperament than other types of Li batteries. At the same time I have the impression that it is not a straight switch from a lead battery based system; in terms of the various sources of charging (engine, alternator, sun, wind, shorepower) and maintain Li batteries.
Any views or knowledge you would care to share with the AAC community would be appreciated.
Hi Petter,
I’m no expert on lithium battery technology but I did read up on LiFePo4 and the thing that jumped out at me is that this is comparatively new technology and my general recommendation is that such technology has no place on an offshore voyaging boat until it is more mature and has been proven in general use.
A conservative approach I know, but one that has stood me in good stead for years. Bottom line, every time I have tried things that are on the leading (bleeding) edge the problems have cut into my voyaging time.
Thanks for the view, John.
BTW – while researching lithium house battery bank installs, I came across an in-depth technical writeup by Bob Ebaugh about his project to install a 1200Ah 12V lithium battery bank into his beautiful 44′ cruising trawler Mar Azul. It may be found here:
http://marazuladventures.files.wordpress.com/2013/01/diy-lithium-iron-phosphate-batteries8.pdf
A few bits of additional research for the benefit of readers:
http://www.tahinaexpedition.com/2011/08/lithium-ion-batteries-for-boating.html
http://www.tahinaexpedition.com/2011/09/batteries-on-board.html
About LiFePO4
Here is a copy of a post I wrote in the PetersonCutter Yahoo group in July of this year. The interesting point is that the Chinese company does not recommend sophisticated devices like BMS, they just recommend serialed 3.5V batteries (no paralleled ones) with an initial procedure of discharging and charging.
jcglt – FK8IH
Message 25 of 33 , Jul 4
I’m considering to replace my paralleled 12V LA batteries by 4 serialed LiFePO3 400Ah each cells.
1. that no sophisticated electronics like BMS are used ;
2. the cells are discharged according to their procedure before first use in order to fully balance them.
I agree with Jeff : paralleled batteries in a bank are a source of unbalance and serialed balanced cells should not become unbalanced during their life.
I see an other interest in LiFePO3 cells : the various sellers recommend that they are not fully charged, which will improve their length of life. It is difficult to fully charge to 100% a bank when it is unplugged from the shore supply and this requirement is interesting.
Jean-Claude – S/V Bauhinia
many years ago soon after assuming ownership of my first voyage-capable boat from its orig owner who had it for about ten years, i quickly encountered battery problems only because i knew so little about taking care of them…only then did i begin to see the importance of always monitoring these seemingly fragile pieces of equipment when i had no idea of the extent of their fragility thinking well they look like the totally trouble-free battery in my car so these must be similarly trouble free…so now twenty years and several successive boats later i have found that the more i learn about these systems the more i realize i have so much more to learn and even so-called experts (marine mechanics) often know less than i do about them…the best i have been able to assimilate about them is to continue to take the best care of them that i can while still staying focused on the real priority for me which is enjoying my water-borne experiences and plans for future voyaging…it is almost as if these systems have intelligence enough to decide on their own whether or not they like you such that if they do then they will perform adequately…if not then their resulting inadequacies will always be apparent regardless of their care…so maybe it’s really an art vs a science…just one non-engineer’s view of it all
It’s been a while since I read the whole battery book but this seems to be the best place. Does anybody have any thought as to the idea that charging the batteries while using them gives inaccurate signals to the charging system. If there was a switch that flipped when the charging source came on that shifted all house electronics to a small battery and power supply from that source (separate regulator output) and isolated the batteries so they were charging only would that give any appreciable gain in life of the batteries? I just wonder since as the other loads cycle (water pump, ice box, etc…) they draw amps which makes the input to the batteries fluctuate.
Andy
HI Andy,
I discuss exactly that issue in depth in this chapter. I guess that what you suggest would work, but the better and simpler solution is for the battery charger manufactures to stop BSing us and add shunts to their offerings that can be installed at the battery input to actually measure the amount of charge going into the battery, net of loads.
Having said all that, we are managing fine (and our AGM batteries are doing well) using the simple tips in the above linked chapter to get around the problem.
John,
I don’t know how I forgot about that other chapter and the solution that you came up with. I was thinking of basically switching it around so that the batteries were isolated at the begining of charging instead of managing the overcharging issue once charged. It doesn’t seem to me that it would be in any way complicated to have a relay that clicks over when on shore power or generator (wire in an AC relay right next to the battery switch) that switches the house load to a seperate power supply.
Until, as you point out, someone makes a better charger I’m not sure that it matters much.
Hi Andy,
You could certainly do that. I guess, for me, I would not like to add that level of complication. For example, you would, if I understand you correctly, be mixing AC and DC on one relay, something I really don’t like. Also each relay will give you three sets of contacts in your main battery feed (two terminals and the relay contacts). Each of those contacts is just another place for corrosion and voltage drops to set in. So, at least to me, the solution is worse than the problem.
Hi John.
Although I have just bought a new battery management system, I am considering installing shunts on all the battery inputs, and then using a switch (or bank of switches?) to allow measurement of each individual input. This would only provide a snapshot, but nonetheless would be a useful way to monitor performance of the various charging devices. At the very least I would want to monitor the alternator and battery charger inputs. Buying the shunts and a separate ammeter from an electrical wholesaler is a lot cheaper than buying one of the all-singing, all-dancing battery monitors, and although not marinized, replacement or carrying a spare ammeter should be easy.
What do you think?
Yours aye,
Bill
Hi Bill,
You could certainly do that. When you say you bought a battery management system, what did you get? I ask because I’m surprised that it does not include shunts and battery input current measuring capability. Our 20 year old Link 2000 includes those features.
Hi John.
Thanks for reply. I am completely renewing the electrical system. All cabling has been run, and these are the management systems I have bought to install:
1. BM2 system from NASA: uses shunt to measures amps in and out of house bank and SOC, and measures voltage in the starter battery. The battery SOC as you know rapidly becomes so inaccurate as to be useless.
2. SmartBank system from Merlin Instruments which uses voltage as a way to monitor SOC of the house bank and also provides voltage of the starter battery. It also provides automatic charge sharing when certain values eg, house bank voltage, are reached. I don´t claim to understand how this system works, but it claims to be extremely accurate, and has been, and is being, installed by the British and US armed forces in their military vehicles. It has also been tested in the lab of a major battery manufacturer (I forget which, but they do quote the name, so I assume it is genuine) who reported that it was provided SOC accurate to within a few percent. Merlin is a long established company with a good name, so I hope that the system does what they say it will.
I have installed a 160A Aquamaax alternator with Balmar smart controller, and the output from this is really what I want to monitor. The only way I can see to verify the claims made this charging systems, is to be able to see what the alternator produces, and for how long. And then to use the “smarts” in the regulator to adjust charging regimes if necessary. Each of the following has its own direct connections to the house bank: alternator; mains charger; fridge; VHF; SSB; wind generator; house supply (nav, instruments, lights etc). This does mean that my house bank compartment has a lot of cables, and fusing them all has not been without problems. The alternator´s direct connection (+ve and -ve) to the house bank, with a shunt inserted into the negative should give me this value, unaffected by any amps flowing out over other cables. I have a spare shunt from the old system, and a standard digital ammeter from my electrical supply house should give a cheap and effective way monitor alternator output.
Reading your battery management on-line book provided the impetus to completely renew Kinsa´s electrical systems as part of the refit, and the “dirty little secrets” the necessary suspicion of marketing claims. Additional knowledge provided by a raft of other books, including Nigel Calder´s, provided the rules for installation. Not always without problems, as some of the experts seem to differ on fundamental points, and finding and buying some of the necessary components has also been a challenge.
This reply seems to have become longer than necessary, but I´m sorry, I didn´t have time to write it shorter. Quote from someone, I forget who.
Yours aye,
Bill
Hi Bill,
Yikes, my head hurts.
No seriously, sounds like a good system. If it were me, I would not worry about adding a shunt to measure alternator output. I think you will find that you can guess that pretty accurately by looking at what’s going into the battery and then mentally subtracting the loads that you know are coming out, that you will have learned about quite quickly while sailing and at anchor from the NASA.
Not perfect I know, but that’s what we do and it works well.
Oh, and I think the quote is from Mark Twain.
What is the best way to look after batteries when winterising a boat for a six month layup? I have AGM batteries for engine and house banks, and a stand alone sealed lead acid battery for the genset. I do not want to leave shore power on unattended but can leave solar panels on. Advice please.
Hi David,
AGM batteries do not self-discharge, so just charge them up, equalize if they will allow that (depends on the manufacturer) and then disconnect them to make sure they have no loads, even tiny ones. They will be fine that way for several years.
The liquid filled battery will need recharging once a month or so, or it will self-discharge and then freeze. Probably best to remove it from the boat and take it to somewhere it can receive that maintenance. Or better still, replace it with an AGM so you no longer have the problem.
Batteries are like delinquent teenagers; if you think they are doing well it’s because you don’t know what they are actually up to. My gel batteries self discharge to 50% at 68 degrees F over 24 months so that prompted me to look up the Lifeline AGM technical manual. According to that document their AGMs self discharge to 50% at 68 degrees over 16 months. This self discharge gets worse at higher temperatures. It’s not ideal but it’s still better than leaving them hooked up to an unattended charger I think.
Hi Phil,
Hum, that’s interesting, but at odds with our realworld experience: We have left our Lifeline AGM’s for as much as a year (including over a summer) without any measurable self-discharge. Not sure what’s going on here, but since we have done this several times over the years and so have others who have reported in comments to this online book with the same experience, I’m pretty confident in saying that Lifeline have this one wrong.
I think I would say I have the same experience with my gel batteries. Certainly after one year the voltage on the batteries does not indicate as much discharge as the graph would predict. Next time I am going to monitor how much of a charge it takes to get back up to full charge.
Hi Phil,
Yes, monitoring the number of amps/hours that it took to return to 100% charge was exactly what we did and it was less than 5 amp/hour per 8D battery.
Thank You for a very good website.I have been sailing all my life, but not very much offshore. But now, in april ,I will retire and I have bought a new(seconhand) boat that I will make ready for living onboard and sailing also offshore. Therefore, all the information and viewpoints on this web is very valuable for me.I have many comments and questions, but to start with the electrical, I wonder if it should be possible to avoid the equalising if I install a big enough battery bank, lets say 800Ah, then try to minimise usage and have like 400w of solar power. Then after having charged the bank by running the engine(preferable underway) to 80 to 85% charge, then split the bank in two, and let one half be topcharged by the solar, while using the other half, and afterwards change over and do the same with the other half. Afterwards the two banks are connected together again. Do You think this is possible and doable at each cycle? And can I by this avoid the equalizing?
Hi Leif,
Yes, I think that fully charging the battery is possible with that strategy, as long as you only have very low usage (probably no freezer) and plan your charging carefully as well as monitoring things with an eagle eye.
Having said that, I doubt that this system would totally eliminate the need to equalize, but it would certainly reduce it. If it were me, even with this system, and assuming AGM batteries, which are both expensive and more prone to sulphating, I would still try to equalize at least once every three months.
Thank You. I want to try something in that direction. I want to think more about it and go more into the details, before I decide. Principle beeing bulk charging with the engine, then top charge with Solar, on half the bank at the time so that the part of the bank that is beeing top charged does not have any usage going out. Also it could be a possibility to first charge with solar at 14,4V until the regulator drop the voltage to 13,6. Then start charging further at 14.4 from a dedicated, fairly small charger, fed from an inverter, until the current delivered goes below 4 ampere (if half the bank is 400Ah)(this could be done by a current relay), the solar charge beeing diverted to the other half before this starts. Afterwards repeat on the other half bank.
Hi Leif,
I don’t think there is any need for the charger/inverter loop—very inefficient. A bit like trying to pull yourself up by your boot straps. The solar regulator should be programmable to complete the charge, just increase the time it stays at 14.4. Also, I think there are solar regulators that can be programmed to equalize the batteries as well, so you could do that with solar every three months or so.
The bottom line is that no matter what you do, it’s still a good idea to equalize your batteries occasionally, rather than try to avoid it altogether and, into the bargain add quite a lot of complexity.
Hi, read all electrical articles on the site. Excellent stuff.
As for monitoring – # 9: Will the NASA monitor do, please?
I have no prior experience of battery monitors. Will the NASA tell the battery condition perhaps?
We bought a pre-owned boat with 4 x Gel batteries, connected in parallel. There is a 25 A three-stage charger and 300 W inverter. Additionally, a fifth battery is always fully charged, to be used if the others fail. Courtesy of previous owner.
I could possibly rebuild everything according to Your guidelines. For now, I am pondering about whether I can get knowledge about how many Ah are left in the battery bank when fully charged, I.e. what is the status of the batteries? They are a few years old, so would be good to know if I am to expect replacing them any time soon, please?
I know I can disconnect all loads, charge them fully, and wait three hours, then measure the voltage, perhaps for each battery independently even. But that won’t give me any info on how many Ah they can hold, or does it, please? By the way, the voltage I get by doing so, does it tell me when they must be replaced, please? E.g. 12,5 V max possible = replace battery!
Regarding equalisation, I won’t be doing so as these are gels, but I might replace them with 6 x cheap liquid filled before ARC 2018. The way we do it here in Sweden, is that we take our boats out of the water and dismast them during the long winters. Usually, we take extra care of the batteries then. A good opportunity to equalise.when fully charged and not used (winter), do we need to equalise monthly anyway? I thought, just leave the Ctek connected and you’ll be fine
What do you think about Ctek, please? They are quite popular here. They claim they do recondition your batteries using some kind of smart technology, I wonder if they do in fact equalise them?
CTEK:
http://smartercharger.com
Aiming to have a massive solar array on custom made heavy duty arch in the stern, we are hoping to be able to keep the original alternator etc. Bring a spare one. Perhaps add a Ctek Smartpass to the current configuration:
http://smartercharger.com/?s=Smartpass&x=0&y=0
We’re not so very power hungry, a little less than the average cruiser I would say. Perhaps four batteries (assuming 75 Ah each) will do for ARC, please? 2 x 75 Ah leisure capacity was enough with previous boat for a few weeks vacation in our beautiful archipelago. At the longest we stayed 2-3 nights before heaving up anchor and starting the engine,
However, we have decided that if we find a nice lagoon, e,g, in Tobago, we might stay anchored for as long as three weeks. Wouldn’t want to start the engine… 🙂
Cheers
Tobias
Hi Tobias,
To take your questions in order:
Thanks. With The Gels, I can do step 5.7 but not not 5.5 so I will get to know but I cannot equalise the batteries.
Step 5.6 however, can I try it, please? Depending on the result in step 5.5.
The check in 5.7, must I do it four times, for each battery, or can they be parallel connected during the procedure, please?
It seems I need a charger with which I can choose the output current, as well as a device that draws 25 A exactly. Interesting,
Cheers
Tobias
Hi Tobias,
On no account should you use any procedure with gells that involves voltages higher than 14.4 volts (at 20c). To do so with gells will certainly damage the battery and might result in explosion and/or fire.
And, yes, while it would be better to capacity test each battery individually, you can capacity test the whole bank at once.
Hello John,
congrats on the great site, discovered it just recently and became a member immediately, to no regret!
I do have a question on batteries and solar charging I have not been able to find a convincing answer so far elsewhere:
I have recently installed a 1100 Ah AGM bank (6 x 185 Ah in parallel), and 560 Wp solar panels (Solbian on the bimini and Solara on the stern arch) with one MPPT charge regulator per panel.
The solar panels are connected directly to the battery bank and stay connected all the time, even if I switch off the main power switch, cutting the whole boat from the batteries.
This means the batteries are charged/kept charged (at float) permanently, even if I am not at the boat for month.
I understand this should be ok and maintains the batteries well.
Do you agree?
Or should I cut the panels from the bank when not at the boat for an extended time? For security reasons only, as you wrote?
One more topic comes to mind:
I have been told by a representative of the battery manufacturer of my installed brand (a well know reputable European brand) that I would need a charge current of around 30% of nominal capacity of the bank, that would be 330 amps in my case, to be able to charge the 1110 Ah bank fully. With less amps I would never be able to fully charge the bank, however long I would charge the banks, e.g. 20 amps from solar for many days while having no load on the batteries.
As another technical expert of another manufacturer argued I would need to have at least 100 amp current to make my bank “react” and get charged.
This sounds weird to me. Any ideas why this could be the case?
Best regards,
Klaus @S/V Starship
Hi Klaus,
What you were told about charging is just one more example of the truly stunning level of ignorance about electricity among marine “professionals”.
Anyway, your questions raise some interesting points that come up often, so I think I will handle them as a post, rather than a comment. I have added it to the list.