

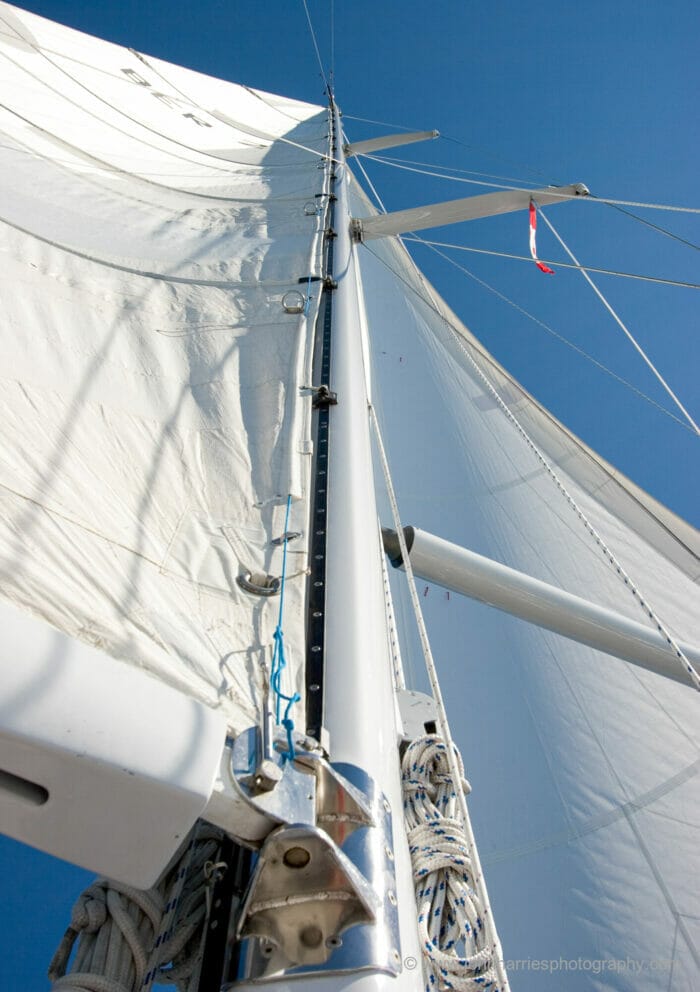
Cruising Sailboat Running Rigging Inspection
18 CommentsReading Time: 10 minutes
More Articles From Online Book: Sail Handling and Rigging Made Easy:
- Be A Master Of The Deck
- Don’t Forget About The Sails
- Sail Buying Tips
- Our Mainsail Is Our Friend
- Hoisting the Mainsail Made Easy—Simplicity in Action
- How Many Reefs and How Deep?
- Reefing Made Easy
- Reefing From The Cockpit 2.0—Thinking Things Through
- Reefing Questions and Answers
- Reefing Tips
- A Dangerous Myth about Reefing
- In-Mast, In-Boom, or Slab Reefing—Convenience and Reliability
- In-Mast, In-Boom, or Slab Reefing —Performance, Cost and Safety
- Mainsail Handling Made Easy with Lazyjacks
- Safe and Easy Offshore Sailing—When to Reef, Part 1
- Safe and Easy Offshore Sailing—When to Reef, Part 2
- Topping Lift Tips and a Hack
- 12 Reasons The Cutter Is A Great Offshore Voyaging Rig
- Cutter Rig—Should You Buy or Convert?
- Cutter Rig—Optimizing and/or Converting
- Cruising Rigs—Sloop, Cutter, or Solent?
- Sailboat Deck Layouts
- The Case For Roller-Furling Headsails
- The Case For Hank On Headsails
- UV Protection For Roller Furling Sails
- Making Life Easier—Roller Reefing/Furling
- Making Life Easier—Storm Jib
- Swept-Back Spreaders—We Just Don’t Get It!
- Q&A: Staysail Stay: Roller Furling And Fixed Vs Hanks And Removable
- Rigid Vangs
- Building A Safer Boom Preventer, Part 1—Forces and Angles
- Building A Safer Boom Preventer, Part 2—Line and Gear Strength Calculator
- Building A Safer Boom Preventer, Part 3—The Details
- Why We Don’t Recommend Boom Brakes
- Downwind Sailing, Tips and Tricks
- Downwind Sailing—Poling Out The Jib
- Setting and Striking a Spinnaker Made Easy and Safe
- Ten Tips To Fix Weather Helm
- Running Rigging Recommendations—Part 1
- Running Rigging Recommendations—Part 2
- Two Dangerous Rigging Mistakes
- Rig Tuning, Part 1—Preparation
- Rig Tuning, Part 2—Understanding Rake and Bend
- Rig Tuning, Part 3—6 Steps to a Great Tune
- Rig Tuning, Part 4—Mast Blocking, Stay Tension, and Spreaders
- Rig Tuning, Part 5—Sailing Tune
- Cruising Sailboat Spar Inspection
- Cruising Sailboat Standing Rigging Inspection
- Cruising Sailboat Running Rigging Inspection
- Cruising Sailboat Rig Wiring and Lighting Inspection
- Cruising Sailboat Roller Furler and Track Inspection
- Download Cruising Sailboat Rig Checklist
- 9 Tips To Make Unstepping a Sailboat Mast Easier
- Rigging Tips Part 1
- Rigging Tips Part 2
Your yes, to Tylska… is going back to this article on the new page.
Hi Edward,
Thanks, fixed now.
Hi John,
Ginger gave me, years ago, an endoscope with a wireless display capability to a computer, Ipad or phone. It consisted of a small camera head (pencil diameter size), long cable (20-30 feet?) and a control box on the end for battery, transmitting and to adjust the light that surrounds the camera lens. The light can go quite bright and is a very important part of the package when pushed into dark corners.
About once a year this device makes a job much easier, even possible and a few times a year, it is just handy to look at things and plan work before performing boat yoga to get to the job.
It is water proof so I have used it, attached to a boat hook, to look at the prop and zincs when in really cold water which has allowed me to put off the chore of donning a wet suit etc. for a dive.
It is on the boat, so I have no idea of the manufacturer and I would say that things have changed, probably for the better, in the last decade or so. My sense was that it was surprisingly inexpensive, but as a present, can’t speak to that as well.
It is a very appreciated tool in my arsenal, and might be quite useful in looking into or up a mast at the lines.
My best, Dick Stevenson, s/v Alchemy
Hi Dick,
That sounds very like mine, and yes I have found it useful for other things, but not so much for looking inside the mast, I think because the lens is such a wide angle. As you say, I’m hoping this tech has got better in the last couple of years and that someone will have a report on looking up the mast tube with one.
Hi John, such a valuable series but a real task. May I suggest mast/collar/deck seal checks for seal/movement, and then check any block attachment points? Background – popular in production boat rigs, we had a small leak (into the cabin headliner) offshore around the mast collar for our keel stepped Z-Spar mast that we couldn’t seal from above or below. Only when we removed the mast to re-rig did we realise the cause.
Our alloy mast collar not only covers and protects the mast/deck seal but also provides the attachment for the halyard, vang and mainsheet turning blocks. The aft end of the collar is held securely down with an independent tie rod that screws into the mast shoe, to counter the loads from the mainsheet and vang. But at the forward end of the collar it was secured only with bolts through the deck, allowing it some flex. The turning block for our Code-0 halyard (grey&white in photo) is attached to the starboard side of the collar forwards and takes a lot of load, but there was no forward tie rod (due to the proximity of a main bulkhead). This halyard load had been lifting the front edge of the collar along with the sealant between the collar and the deck, allowing water ingress to the mast/deck seal.
We also found hair-line cracks in the old collar (casting) so swapped it out (great stock service and value from US Spars).
We changed the two forward/corner fastening under the deck to eye-bolt nuts, then tied each down to a newly tapped mast shoe using wire ties, eye-bolts and bottle screws (just enough access). We then added an L shaped stainless bar for block attachment to either side, further stiffening the collar. No movement now and no leak!
Hi Rob,
Great suggestion, I will add that to part one since it will fit in nicely with checking the chain plates and step.
Hi Rob,
I would keep a weather eye on the alloy collar. Mine started to show bending and dents from the stainless steel turning block’s shackles exerting pressure (point loading usually). I needed to augment with stainless steel collars.
My best, Dick Stevenson, s/v Alchemy
Thanks Dick, agreed. The side halyard blocks all attach to the stainless angle bar. The vang and mainsheet attach with a shackle directly to the collar as the lead is serviceable, but not ideal. So I am going to change this design and use another piece of L-shaped angle bar bolted along the aft edge, to which these blocks will then shackle.
We have a tackle inside the boom for extra purchase on our outhaul. A mix of wire and rope.
This will require the rivets holding goose neck end of the boom to be drilled out to remove it for inspection.
I expect we are not alone in this arrangement and it’s probably a good time to take it out and have a look.
(Boats with single line reefing setup probably have a selection of bits going on inside the boom).
We also have a purchase system inside out vang which is easier to access but still needs an extra look.
In addition if you notice chaff on a halyard somewhere unexpected (like several meters from the end) check to see what it’s rubbing on.
We now have added extra protection on our spreaders where halyards clipped to the bottom of the shrouds for storage were gentle wearing a groove in the aluminium.
Hi Dan,
Great tips, I will add them to the check list and this article.
I recently acquired a 10 m. endoscope with wifi connection to IOS devices that renders the camera image on a smart phone or tablet. It was made by Depstech, a company which offers a wide range of reasonably priced endoscopic imaging devices. It features greater depth of field than previous “bore scopes”. I’ve had some good results “fishing” messengers inside the mast with this kind of endoscope, and I bought this long one to hunt for a lost messenger that got loose in the mast during the 17 month covid layover while the boat was berthed in Montenegro. I’m worried that this loose messenger in the mast will eventually snag a halyard at an inopportune moment. Wish me luck.
Hi Reed,
Thanks for the report. Sounds like things have got better since I tried one. Which one did you get? https://depstech.com/collections/wifi-endoscopes
And good luck finding the messenger.
Hi John and all,
I have secured certain threaded D shackles for decades with a dab of silicone on the threads, a practice I learned from the rigger at HR&R back in the day. This has worked well for me with a minimum of fuss or mess.
I also do this with galvanized anchor shackles: not so much for securing as they will be moused, but more to make the threaded portion more easily removed when needed. Too often after a season (or two if I am remiss), these are quite hard to unscrew.
My best, Dick Stevenson, s/v Alchemy
Hi John,
I also love the Wichard shackles and on racing boats I have sometimes used them in applications with many times higher loads than they are meant for. I’ve managed to damage them, as in bending the bolt and changing the shape of the U part, but none have ever been close to actually letting go.
The collar that keeps the bolt from falling out is invaluable and the self-locking function is great, but many tighten them too hard, as we’re used too from other shackles. Too much can mar the surface and bend parts so the shackle works less smoothly. It still works just fine, but it’s a pity with such nice pieces.
Also, if the shackle is overloaded and bent, the U will become narrower and loose its spring function. Then (if not too much bent) it just works as a normal shackle. Conclusion: Totally worth going for, and even more so because of the reasonable price.
One horror story that I heard is when the outer sheath fails at the masthead sheave and bunches up inside, preventing dropping, or even reefing the sail.
Inspection and prevention is the best solution.
When we had splices on our halyards we saw chafe. With knots, much less.
We have long tails on our halyards so can cut the top foot off and re-tie when I’m any doubt.
Perhaps we are wrong, but with 12mm T900 halyards on a 47 ft boat, we feel that we do not need its full strength.
Hi Neil,
I guess we will have to agree to disagree on this one.
I strongly recommend against tying halyards made of T900 (I used that line for 15 years), particularly, since the core includes kevlar cousin (Tehnora) so it’s particularly susceptible to the problem I detail above with fiber breaking due to tight turns. The point here is not that you are losing a bit of strength from the knot, but that in all probability you are relying on the Dacron sheath, not the core, to take most of the load in the knot, which is a small fraction of the intended strength of the line and are taking a big risk of exactly the problem you postulate.
I see no mention of winches in the the rig maintenance articles. I suppose they’d go with running rigging? What is a reasonable for a maintenance schedule? What should the maintenance be? Does anyone have a recommendation for grease?
Hi Courtney,
https://www.morganscloud.com/jhhtips/qa-winch-service-intervals-grease/