

Writing about camera gear or providing technical how-to tips is easy. But now I’m going to have a go at something much harder: tips on what to photograph and how to compose the shot.
It’s a Matter of Personal Style
Before we get into the specifics, please understand that I’m not suggesting that you slavishly try to copy what I do. Heck, you might not even like what I do—i.e. my style. Even if that is so, I hope this post will still inspire you in your search for your own photographic voice.
Talking of personal style, to my own eye at least, my photography has advanced most since I stopped shooting for the sailing magazines and stopped thinking about what they would like and buy—a very narrow and, to my mind, boring style—and started shooting purely to please myself. After all, how many more over-saturated sunset shots does this world need?
Photography as Part of Daily Life
Another important step in my journey as a photographer has been that I have now integrated my craft into our daily voyaging life. For me, this has proved to be much more realistic and enjoyable than trying to fit photography-only time to what is already a very full life. Sure, I still occasionally go out by myself with a tripod to try and make a killer landscape shot, but increasingly it’s the shots that capture the daily life or details of a place while out walking with Phyllis, or even running errands, that mean the most to me.
Share With Your Partner
The additional advantage of my developing style is that now my craft is a shared one. Although Phyllis has no interest in making photographs herself, because my photography is almost always part of our time out together, she has become part of the process: anticipating what I will shoot and discussing the composition afterward. In fact some of my favourite shots of the last couple of years are ones that Phyllis saw developing before I did—she pointed, I shot.

Not Snapshots, Made Photographs
Having said all that, I don’t want to leave you thinking that I now take snapshots. Far from it. Every photograph I make has been thought about and composed, even in a street shooting situation where the time from idea to shutter trip is just seconds. And that leads me to my single most important tip: think about what you want every photograph to say and the larger story they are part of. Make your photographs, don’t take them. For example, in the shot above I consciously decided to throw the foreground out of focus as well as include the grave stone.

Let’s Make This Hard
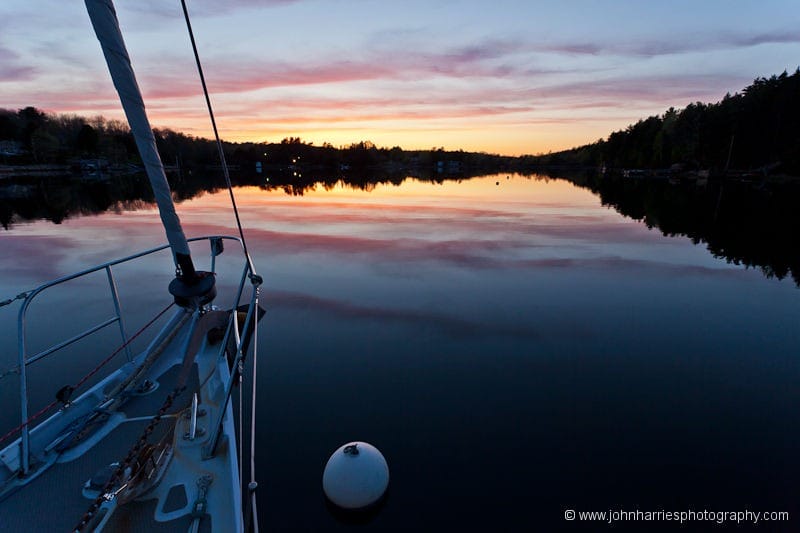
An anchored yacht lit by lovely long warm light, a scene that it is easy to make a pretty photograph from, like the one above. But I’m going to try something harder: I made the photos below around Charleston last winter as part of our daily life. Yes, it’s a picturesque city, but even so it’s all too easy to come away from any place with cluttered uninteresting photographs that fail to tell the story of the place and our time there. If you can make strong interesting photographs in a town, you can do it anywhere.
I hope the tips in the captions of the photos at the end of the post will inspire and help you to make photographs that please you and tell your story, wherever you happen to be. To really see the shots, click on the photos to enlarge them.
A Word About Gear
Many of the images below could have been made with a reasonably good point and shoot and all are within the capabilities of just about any mirrorless camera with the right lenses. In fact, the advent of the new small easy to carry mirrorless cameras has contributed hugely to my evolving and improving style. Good photography is not about big expensive gear.
Comments
I have tried to keep the captions as jargon free as possible. But explaining every photo term would make them overly long, so if you have any questions, please leave a comment below the photos. Likewise, if you have any photography tips that will help others.

But there is more to the making of this shot than great light: I carefully positioned myself and the frame to get the best of the foreground reflection on the water and then used the strong diagonal of the boats to lead your eye out into the harbour through the entrance that I positioned off center in the classic rule of thirds position.
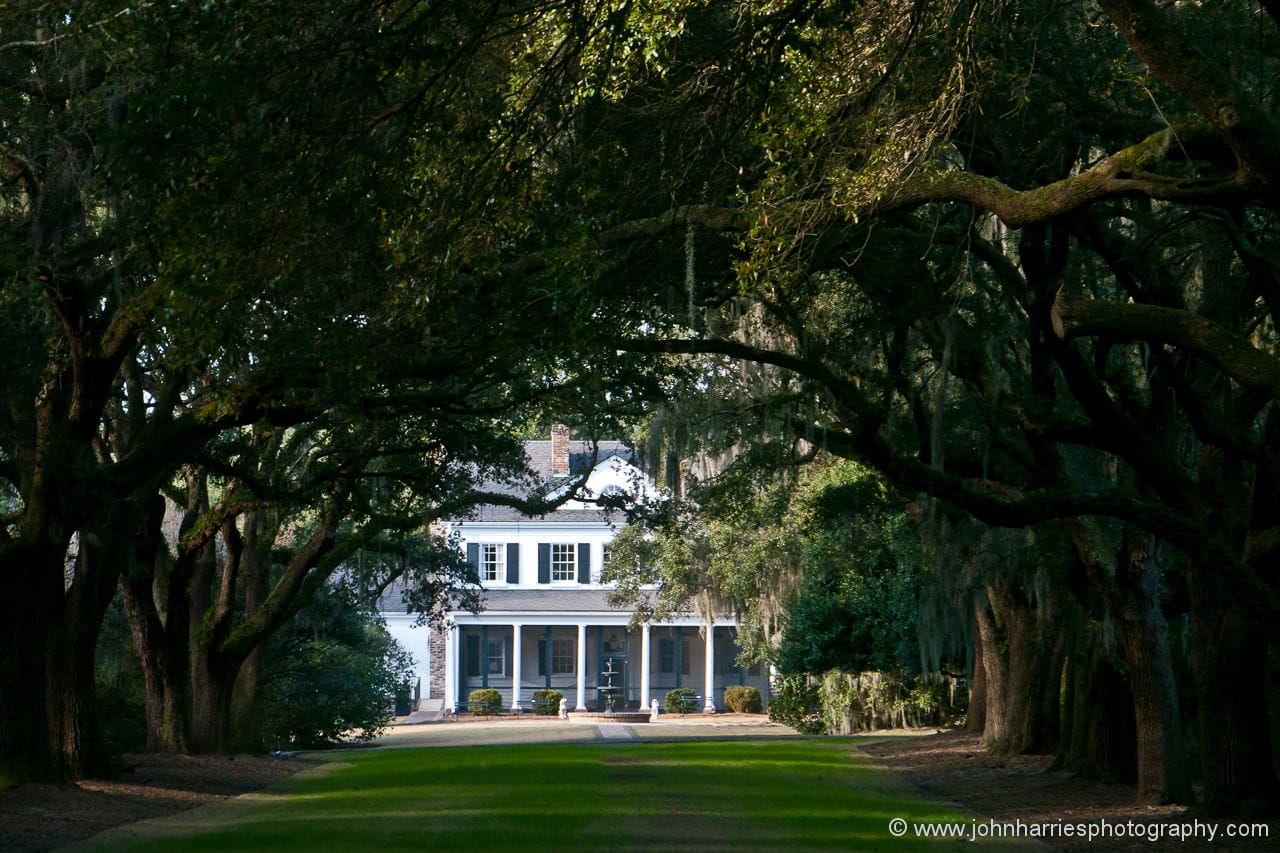
I think that maybe it’s the way the shot gives you a feeling for the Charleston architecture and how the houses are set in a riot of lush vegetation.
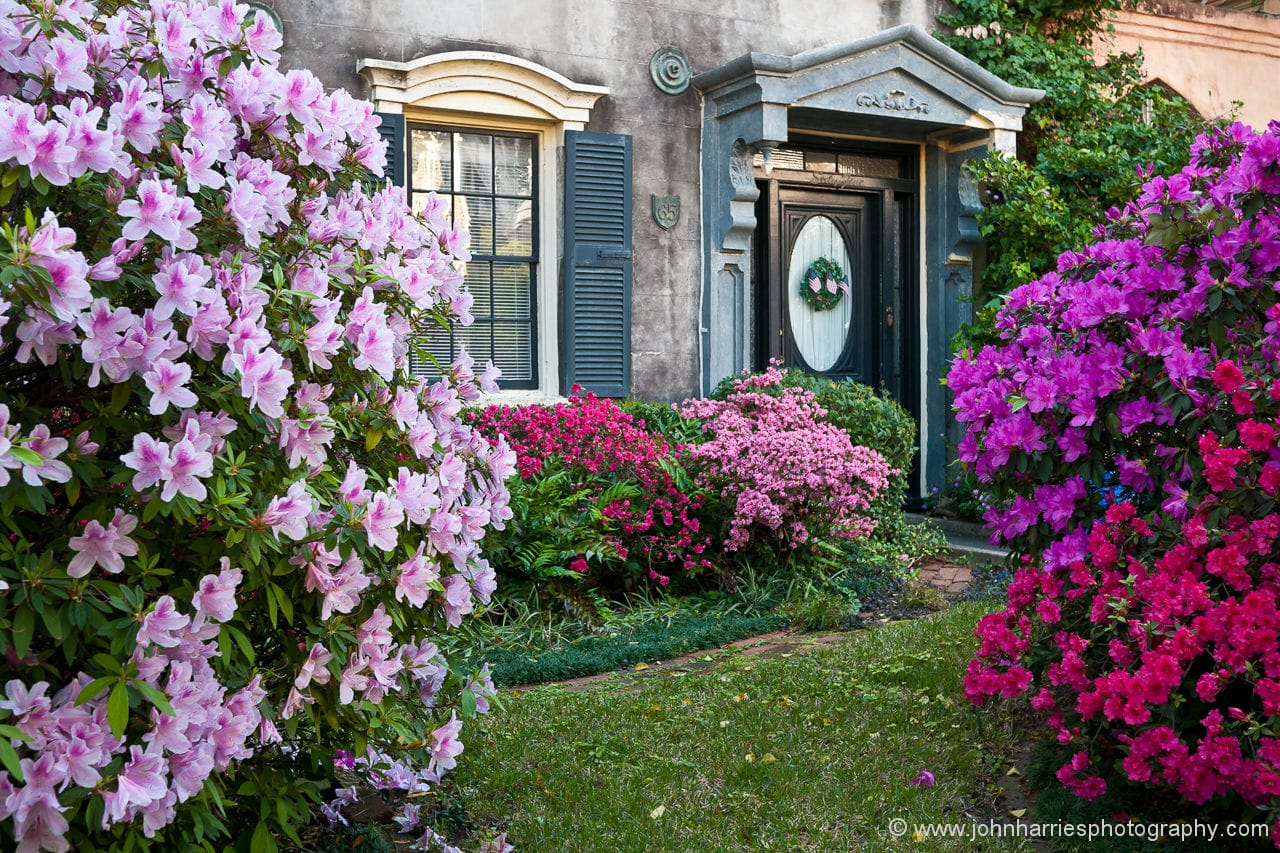
Here, by including just a part of the flowering bushes I have framed the door and window in a pleasing way.
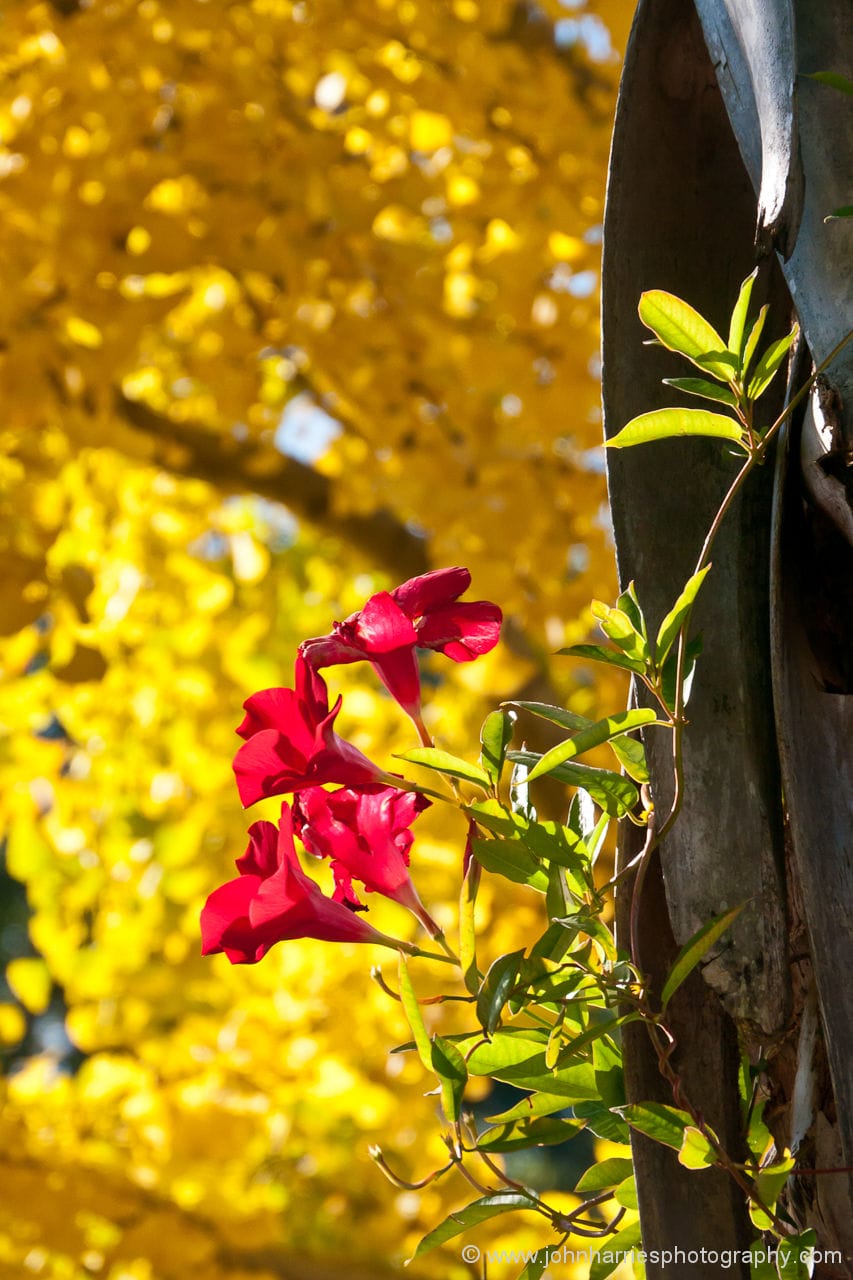
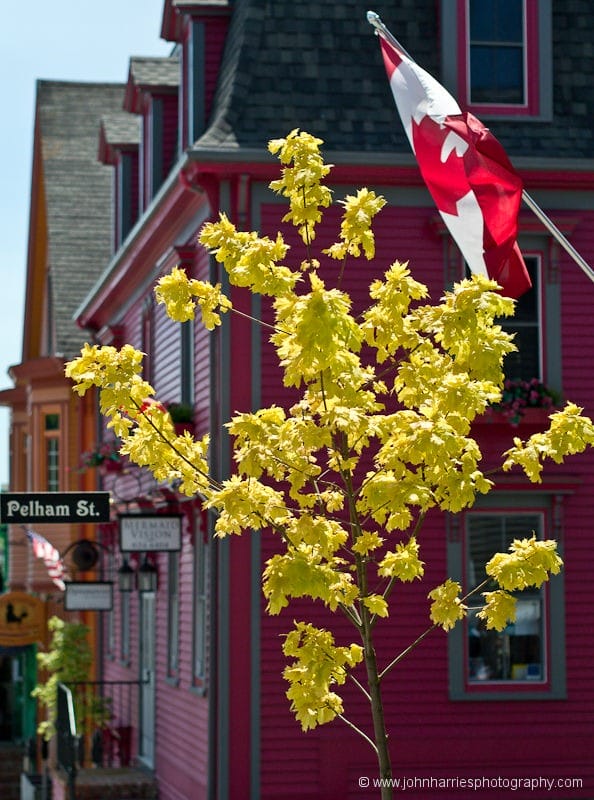
Here I used a long zoom at 250mm and a mid range F9 aperture to bring the flowers into sharp focus while blurring the bright leaves behind.
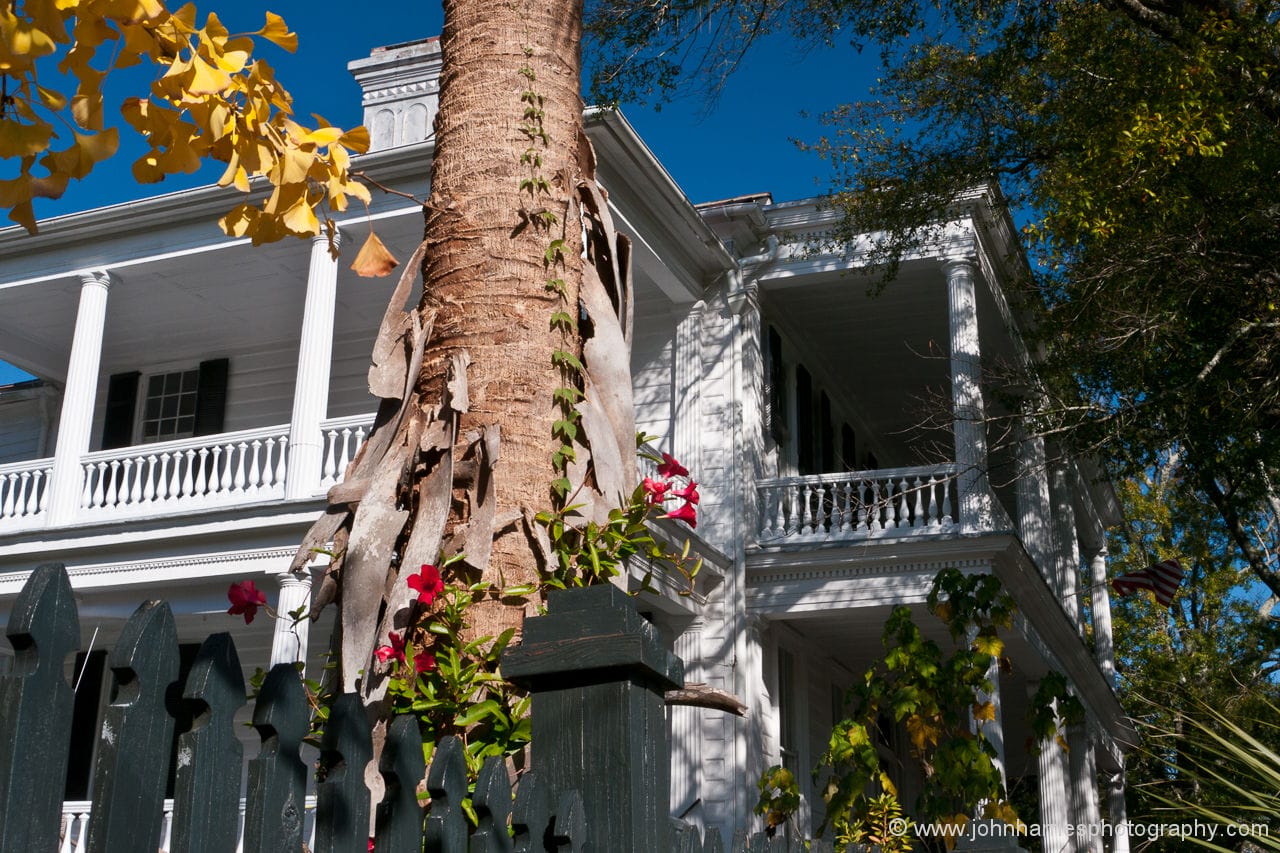
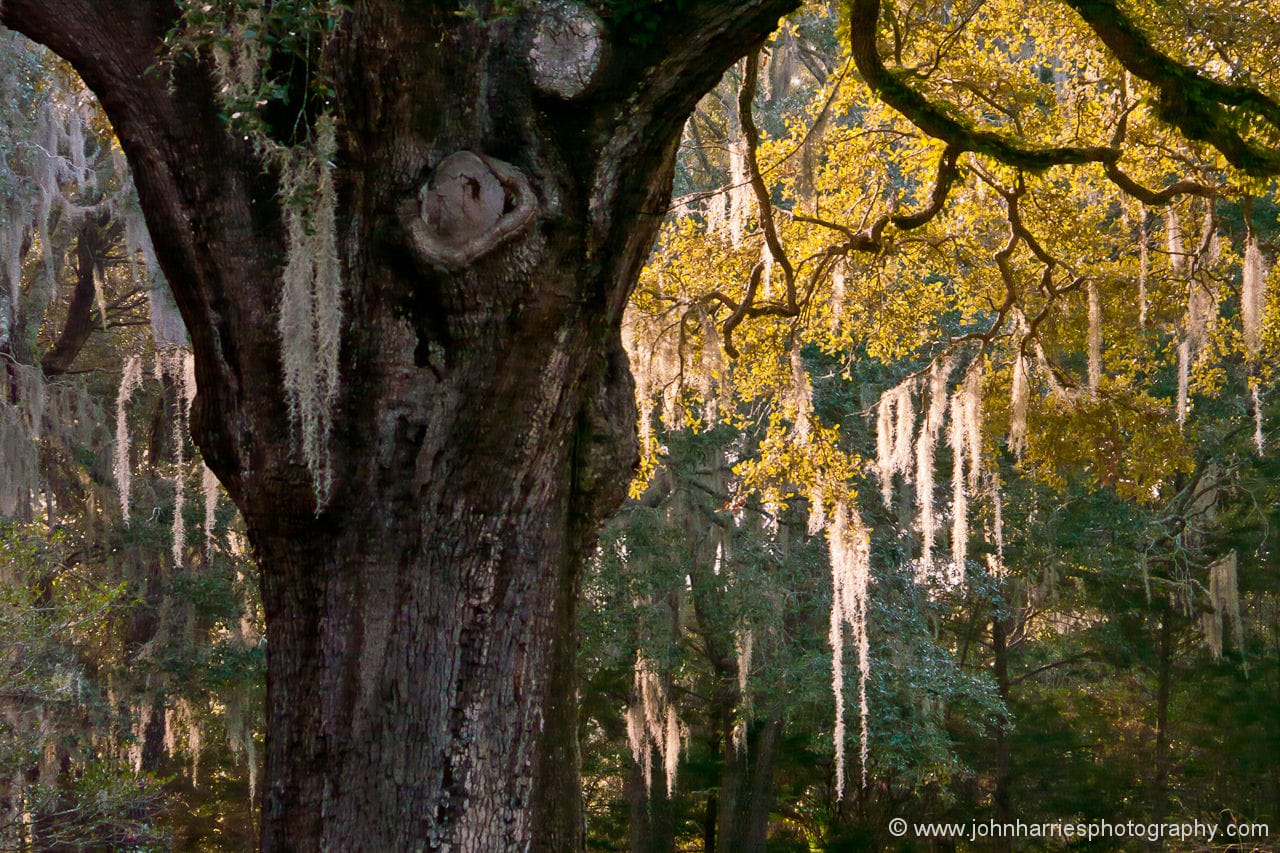
I carefully composed to anchor the shot with the tree trunk at the right. I then kept dialing down the exposure compensation and taking shots until none of the bright highlights were burned out (see my previous tips post).
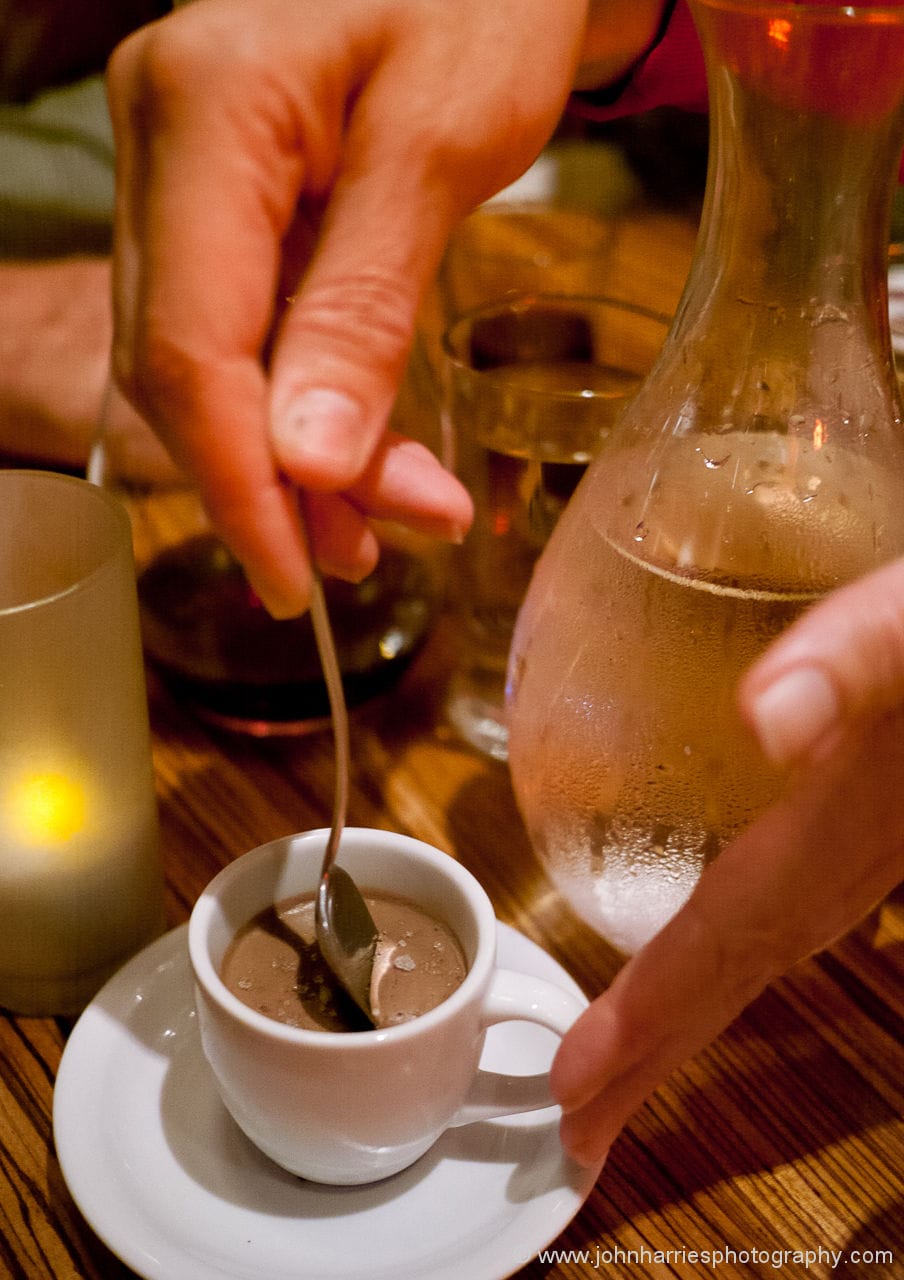
Once again I used my 40mm fast prime wide open at F1.7. I focused on the surface of the pudding and then recomposed.
I almost always have my camera set to use a single center focus point that I aim at what I want most in focus, press the shutter button half down to lock focus, and then recompose the shot before finally tripping the shutter.
If you practice this technique it will quickly become second nature and you will have taken one more step on the path to making photographs instead of taking snapshots.

To me, a lot of the reason the shot works is the strong diagonals, which are almost always more interesting than horizontal and vertical lines in a photograph.
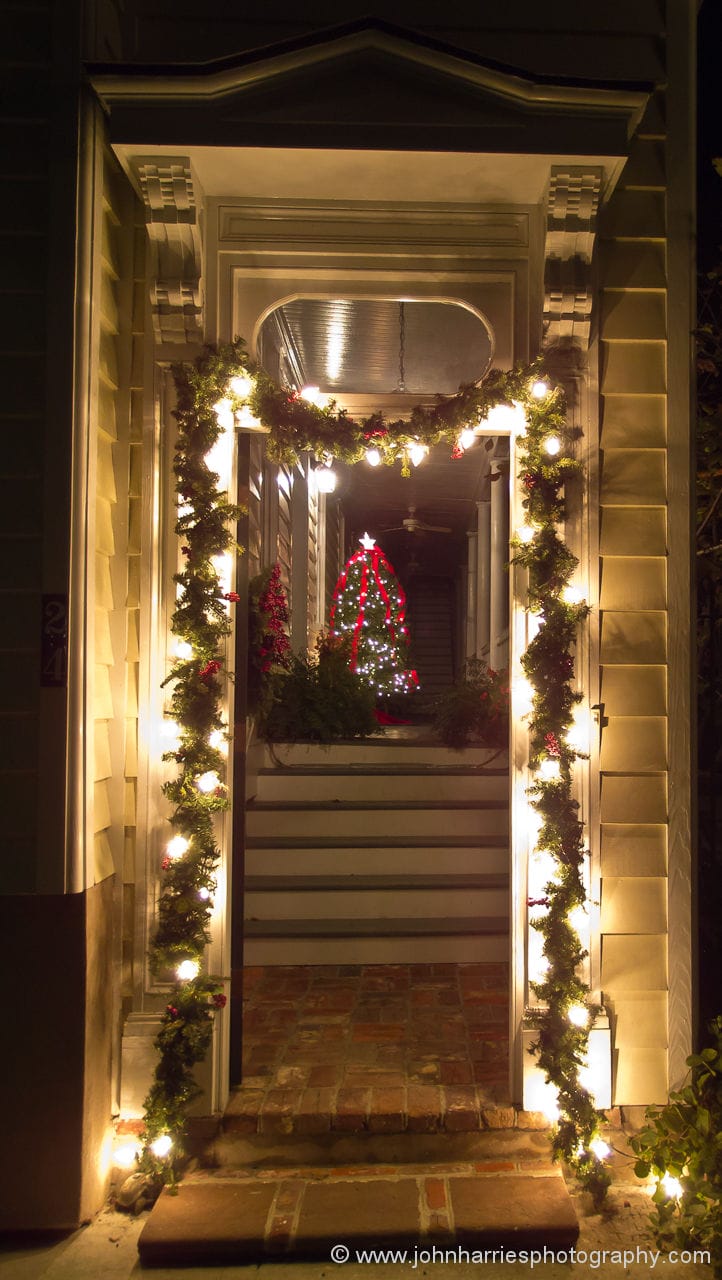
I moved back and forth until I got the balance of the window, door and piazza just as I wanted it.

A tight crop makes the image. If I had included the whole carriage and both horses the people would have been too small for their expressions to be obvious.
Here I used a 90mm prime lens nearly wide open at F2.2 to freeze the movement and focused on the guide’s face to emphasize the star of the show.
If I had used a slower zoom everything would have been in sharp focus, including the background, and the shot would be weaker.
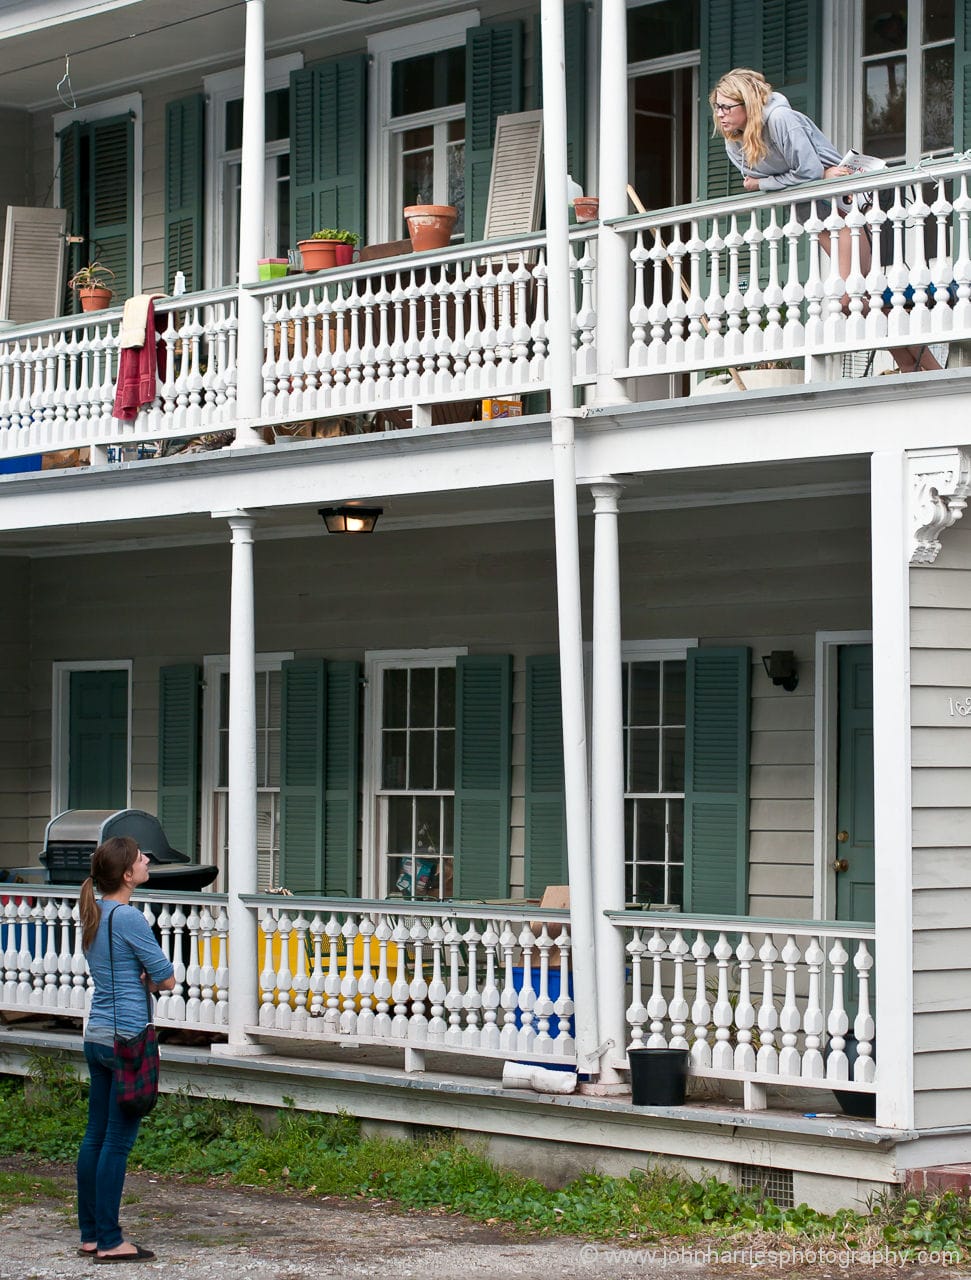
Once again the strong diagonal between the two women is what makes the shot.
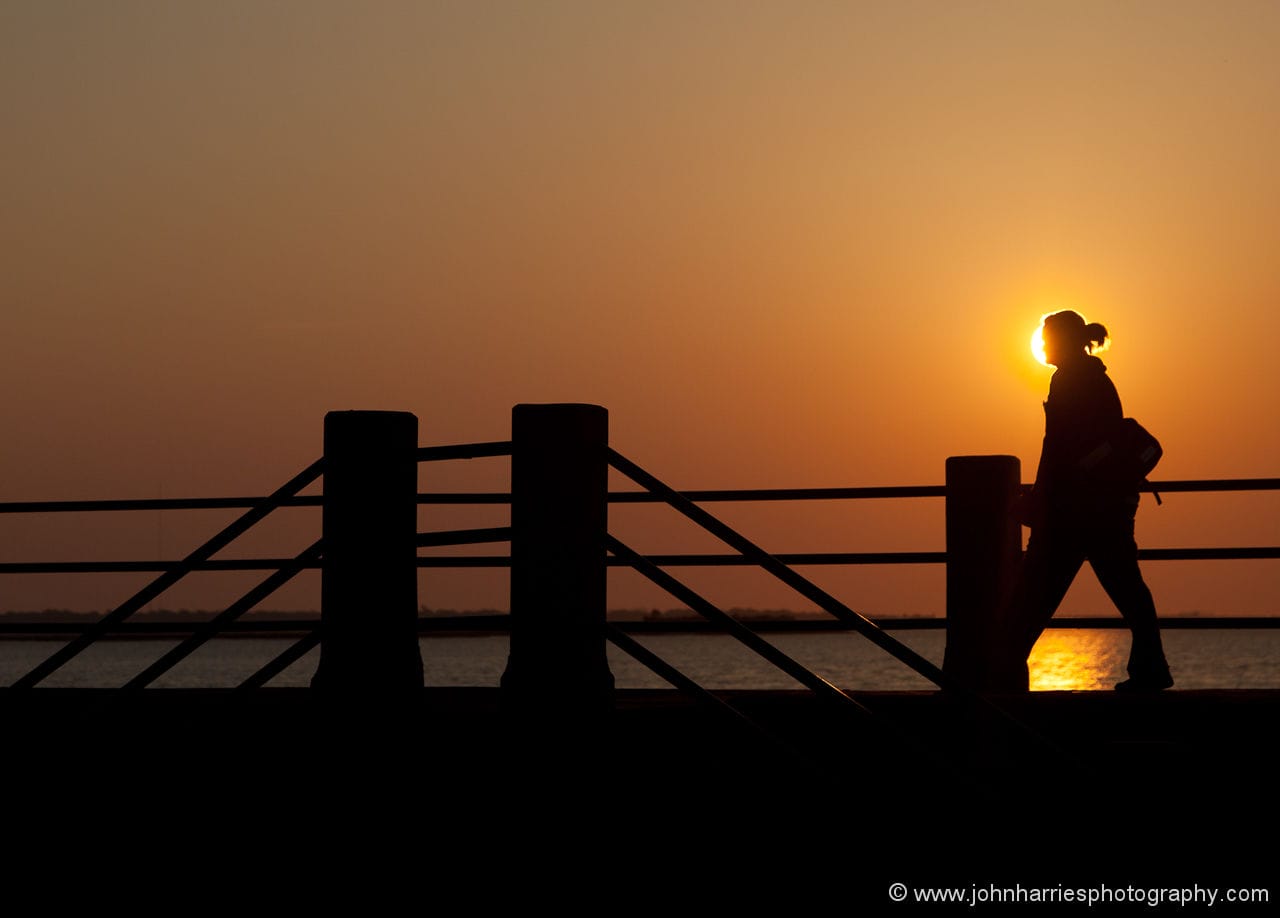
I then dialed in 2-1/2 of negative exposure compensation to make the walker a silhouette. I took a test shot to make sure I had it right and then waited.
As the person walked into the frame, I fired a burst of seven frames and got this one as number three.
You do need a camera that is quite responsive and has a high frame rate for this kind of thing. Also be careful not to stare into the sun or expose the camera sensor to it for too long.
This was taken with a mirrorless camera at ISO 1600 with a 90mm prime lens wide open at F1.8 in near darkness. Try this with a point and shoot and all you will have is a noisy pixilated mess.

First know the rules, then break them.
Here again I cropped tight. A wider shot would have shown cars, power lines and all kinds of other distracting stuff, whereas this shot focuses on just the parts that give the feel of Charleston.

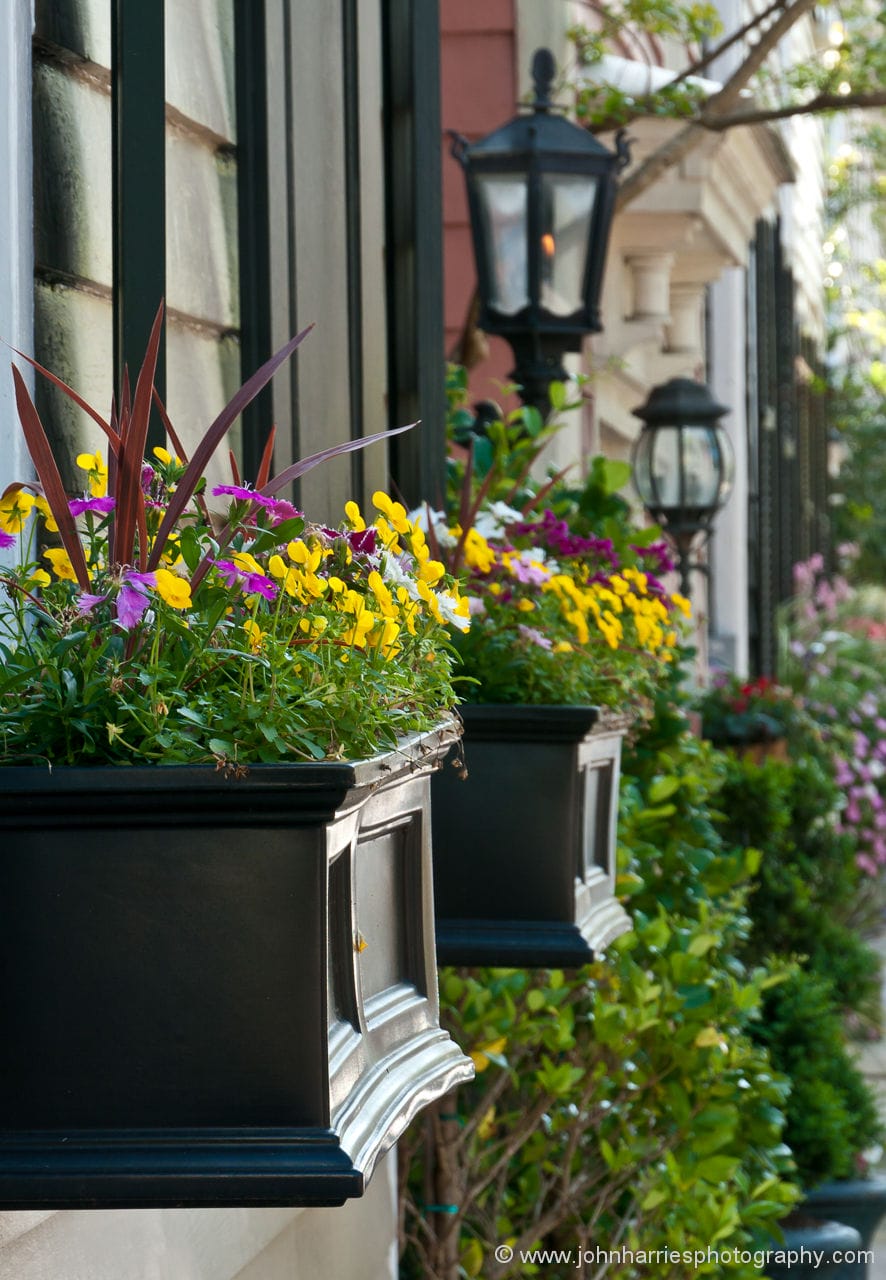
Here I used a 90mm fast prime and a fairly wide aperture at F3.2. This combination yields a very shallow plane of sharp focus isolating the important part of the shot.
I composed very carefully, anchoring the shot with the tree trunk at the top left and including the highlights at the top to draw your eye through the shot.
I then shot at several different aperture settings until I got just the right amount of blur in the background.
This technique of isolating with focus, that is so valuable in cluttered places, is something that you simply can’t do with a point and shoot since a small sensor and slow lens will always yield a lot of depth of field. If everything had been in sharp focus the shot would be just another munge of flowers.

This speaks to a big point about good travel photography: A lot of it’s access. But access is easier than you might think, even for the amateur.
The key is a winning smile and a slow and relaxed approach. Don’t ask to break the rules until you have established rapport with the rule maker.
Over the years, using this approach, I have been allowed past many a “no admittance sign”, from the Tate Modern Gallery in London to the light chamber of the Cape Hatteras Lighthouse.
In this case, only after chatting for ten minutes or so with the curator, did I ask if I could take a shot using a fast lens to blur the detail of the artworks.
I also invited her to supervise me as I did it and assured her that I would immediately delete any shot she was uncomfortable with.
In fact I think I like it better like this anyway. Photos of other people’s art that are too literal are, I think, just a rip off. Witness all the images people take of good graffiti (yes, there is such a thing). Really, what did the photographer contribute?
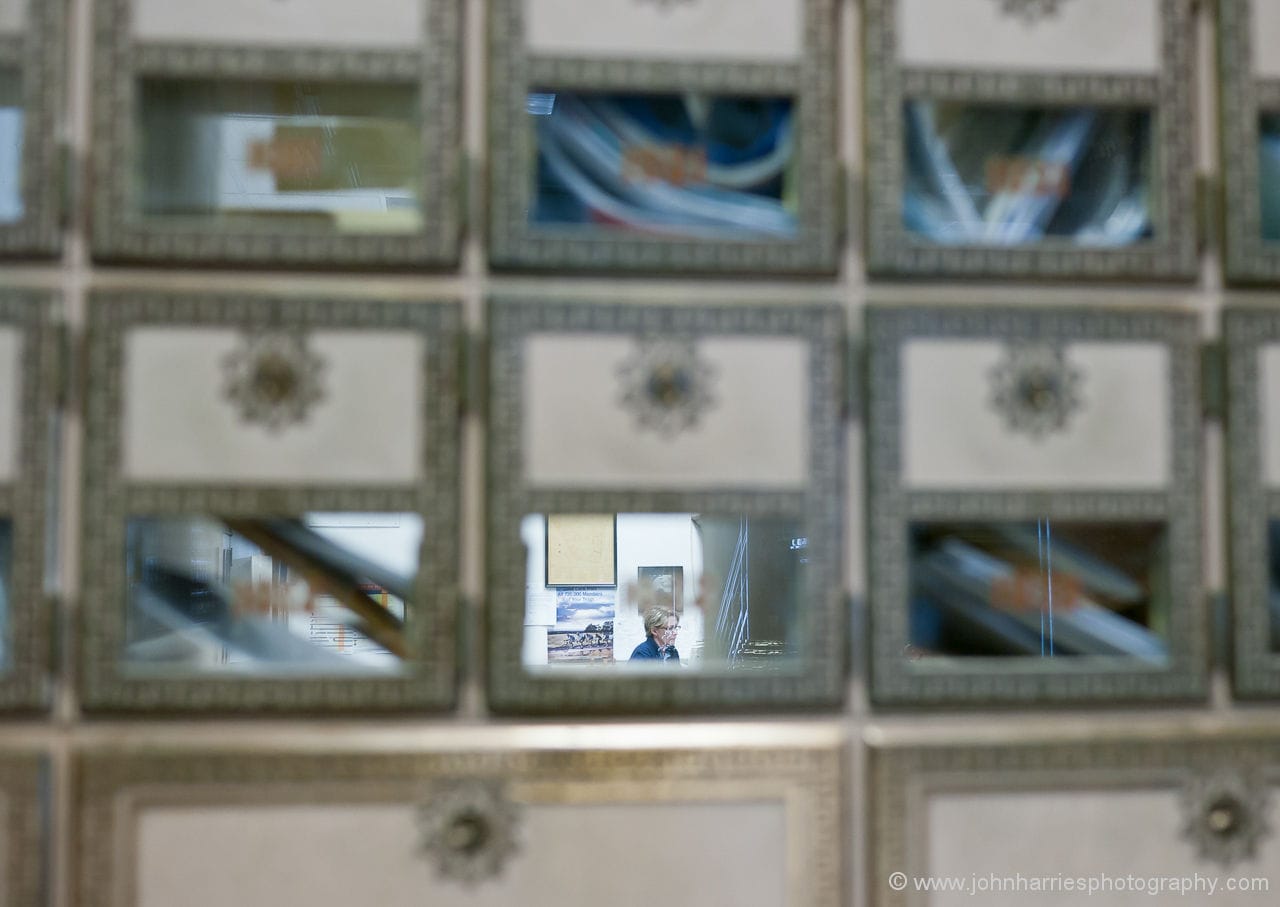
Again I broke a “rule” here and focused on the worker in the background, not the closer P.O. box doors.
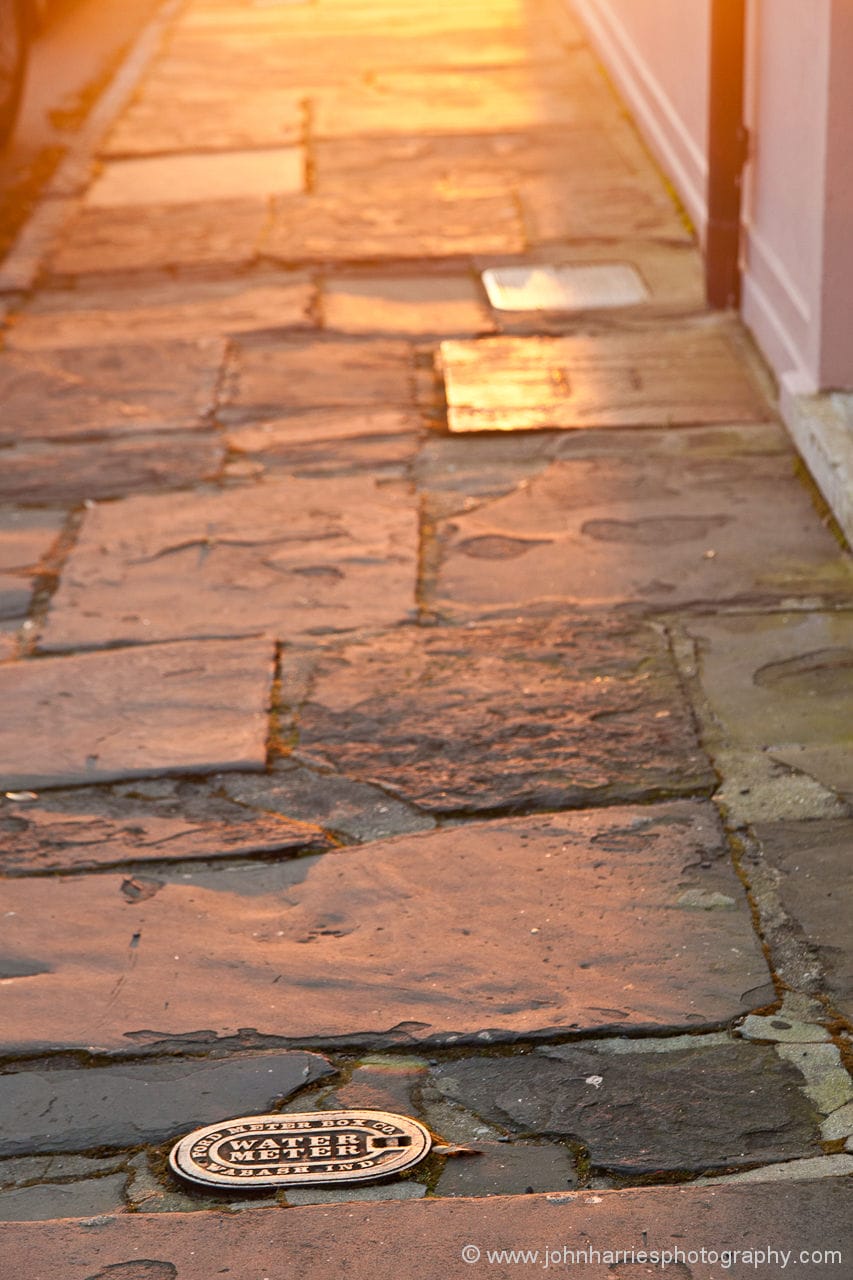
This may look like a snapshot but it’s anything but. Long morning light gives dramatic colour, but even more importantly, the low angle side lighting shows the texture of the flag stones.
I placed the inspection cover to anchor the shot and the drain pipe to pull your eye through it.
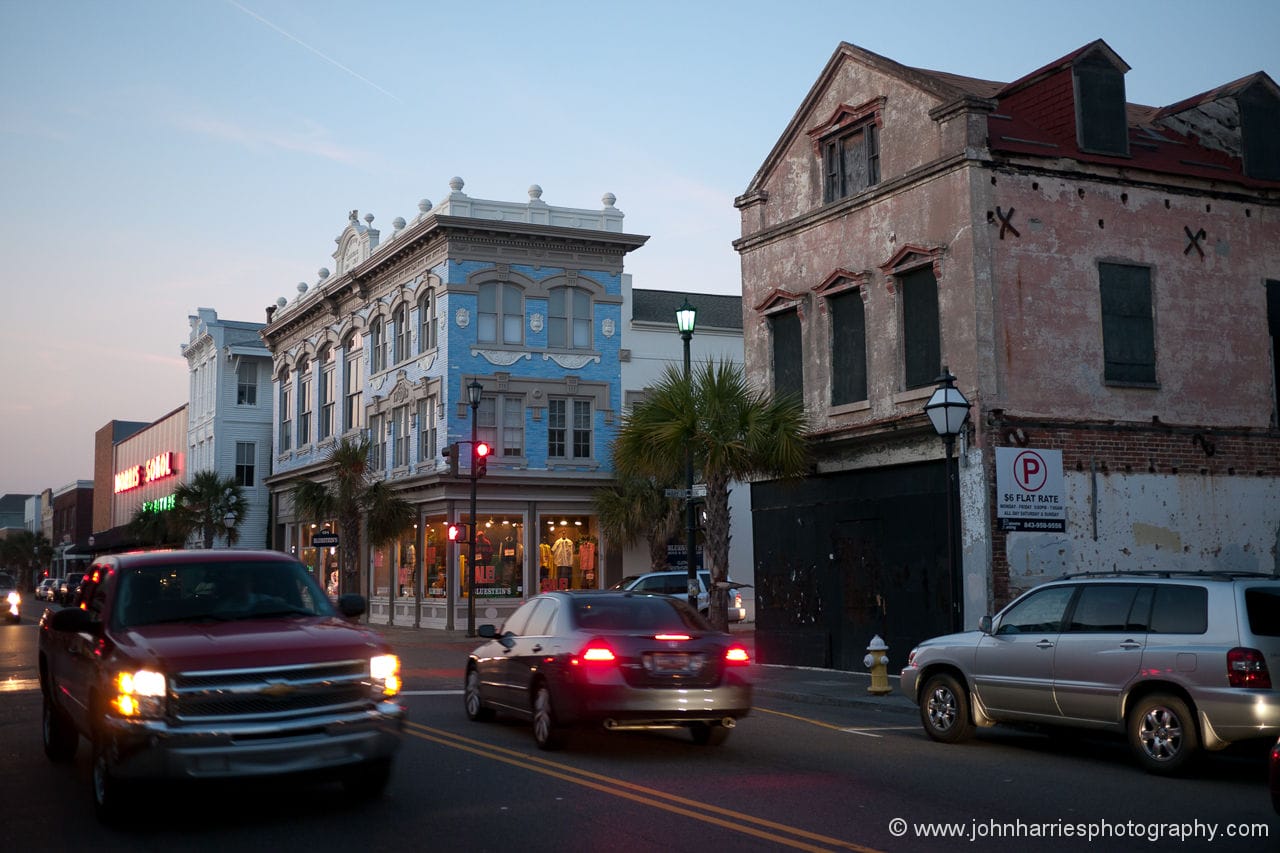
But early evening, with the lights and ambient light balanced, makes it more interesting, as does the contrast between the boarded up building and the well kept ornately decorated building with the brightly lit store.
Once again, strong diagonals add to the image.
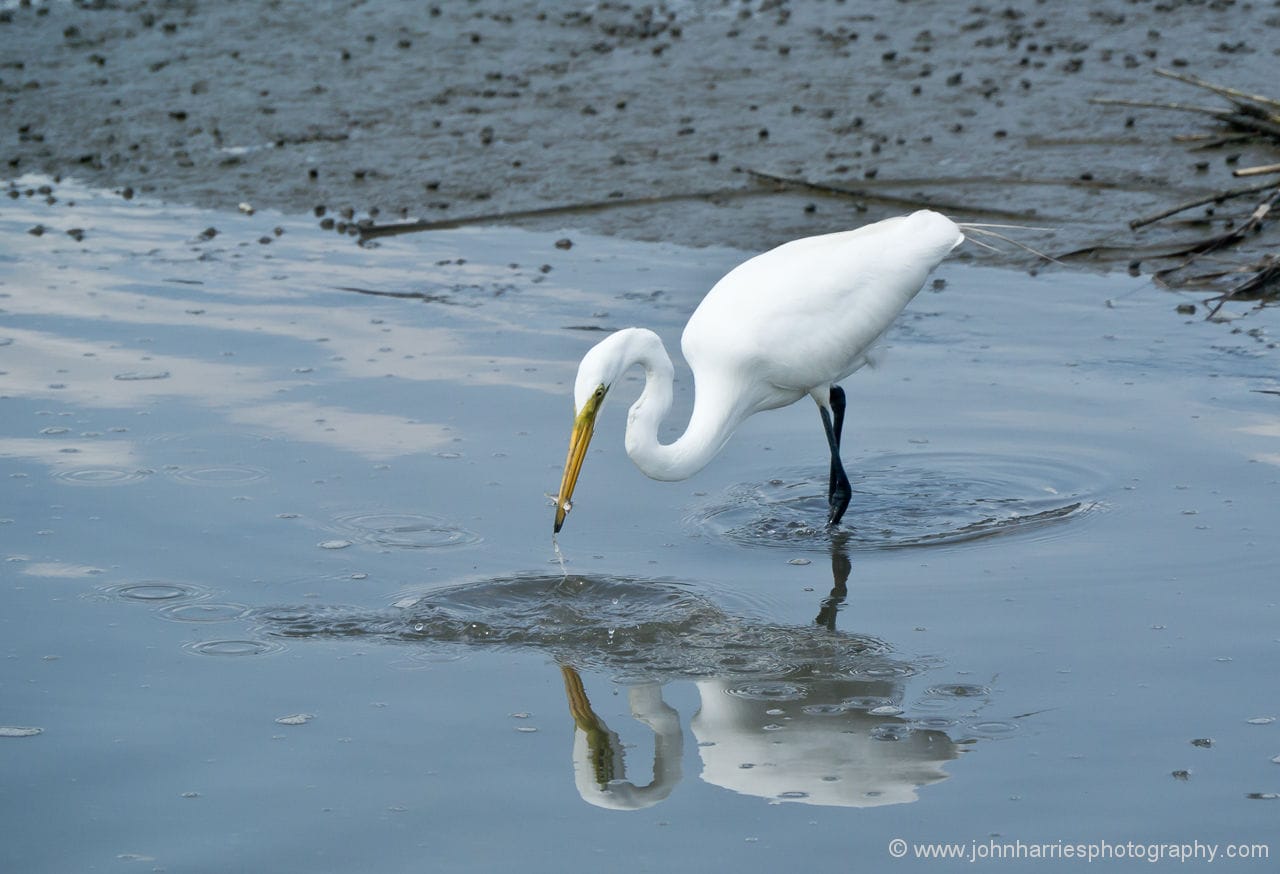
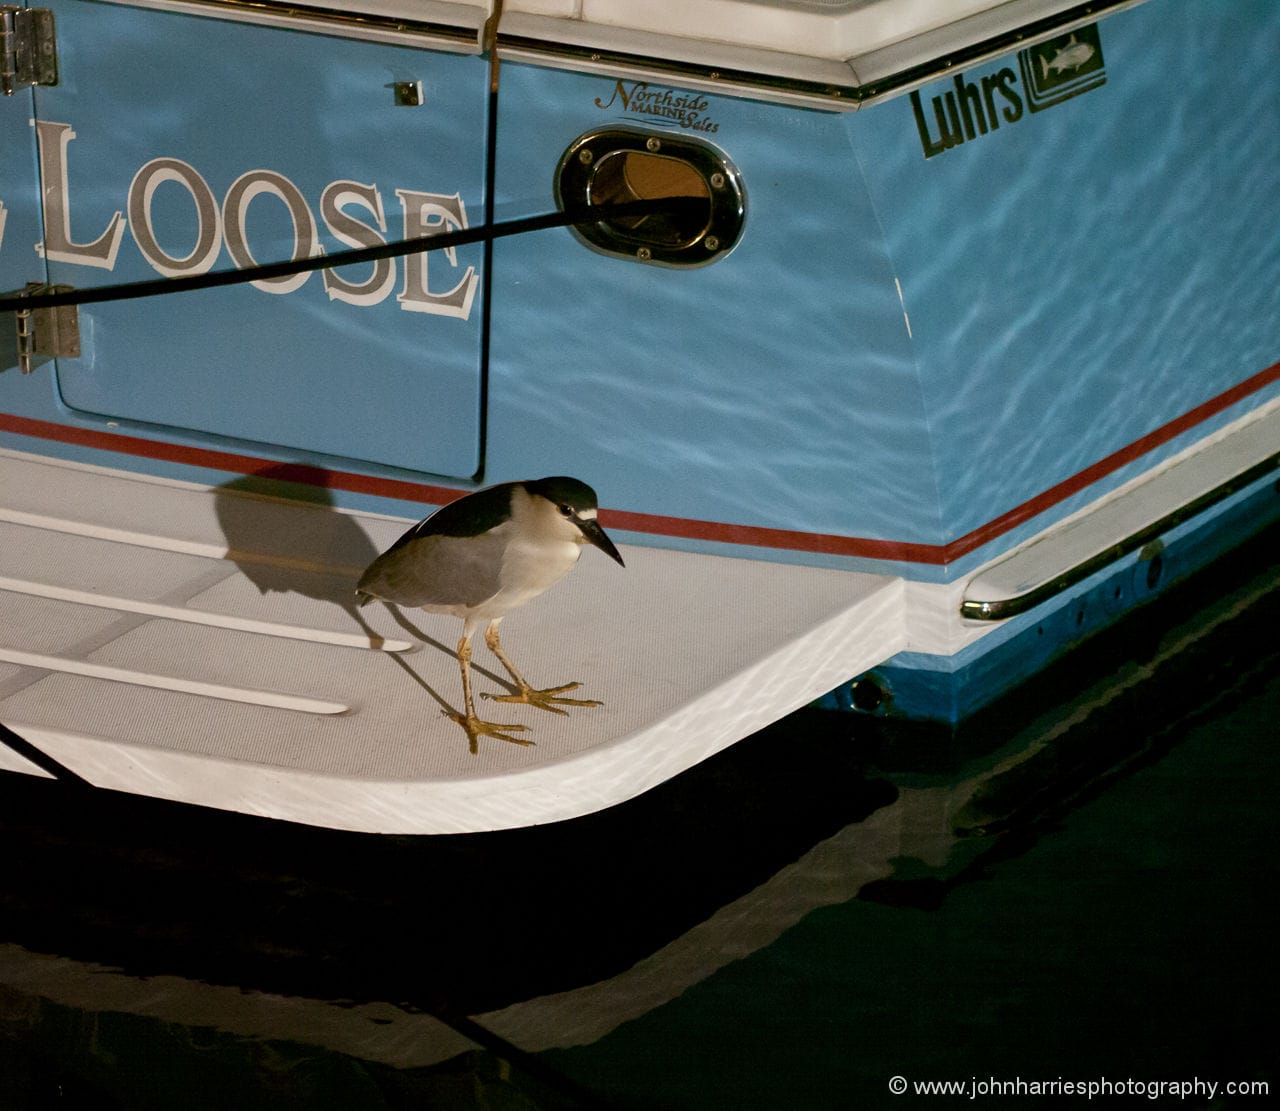
What I look for is a composition like this that puts the animal in the place, rather than a killer close up shot.
This was taken in the marina at low tide, when we were on our way out for a walk. Another time when the key to success was having a camera with me most of the time.
The lens was a zoom all the way out at 280mm. Another time when my mirrorless camera came into its own, because there is no way I would have been lugging my big kit with a lens this long.
I waited for the bird to look interested and then fired a burst of 3-5 frames as it darted for the fish. I took about 20 frames to get this decisive moment with the fish in its beak. You don’t need a camera with blindingly fast frame rate for this, but about 4 frames a second is the minimum.
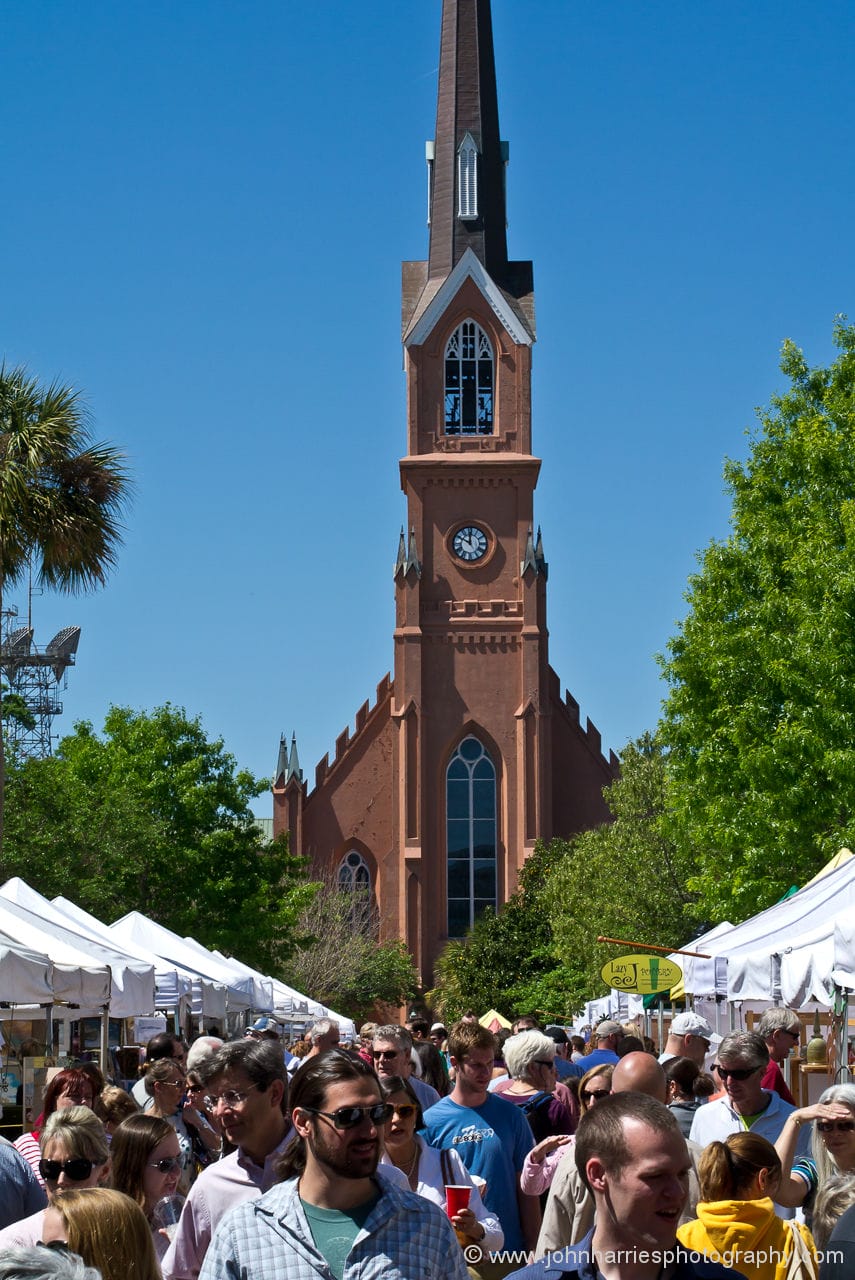
I used a 90mm telephoto prime (a zoom would have done just as well since I did not need a fast lens) to compress the scene and add to the feeling of crowding. I set the aperture at F13 to keep the whole scene in focus, front to back.
This scene has a very wide dynamic range, so I carefully exposed to just slightly blow the highlights. I was then able to recover those highlights and bring out detail in the shadows using Adobe Lightroom. That would have been impossible shooting JPEG although some of the newer cameras do come close.
Learning to process RAW images well is neither trivial nor for everyone, but it does let you make good photographs in difficult situations.
I also got rid of some orange traffic cones in front of the building that would have been a shot ruiner, using Photoshop; another skill that is worth having if you aspire to be a travel photographer.
Like the last shot, this is really pushing the capabilities of my rather old mirrorless camera. And since I was not using a tripod, I had to push the ISO to get a fast enough shutter speed in the late evening light, even with the image stabilized zoom I was using.
So the shot is both noisy and a bit soft from camera shake. A few years ago I would have discarded it. But lately I have learned that the strength of an image and its importance to the story being told trump a few small technical issues that most people will never notice. That is not to say that I ignore the importance of craft, but if the choice is no shot, or pushing the technical envelope, I will make more compromises than I used to.
another among many excellent posts john…first of all i had to chuckle to myself that here is this wiley, salt-caked and dedicated voyager who has faced innumerable situations at sea that would have most of us wimpering and immobilized on the cabin sole who is pontificating about artistry with as delicate an instrument as a digital slr camera as if he knew nothing about the realities of open-ocean passaging including that even with the full complement of electronics if you are exhausted from dealing with the elements you will still find yourself disoriented and unsure of where you are, which way to head, and feel the panic of these uncertainties amplified by knowing you are for real in the middle of nowhere with many more hours of the same still ahead of you even if you can sort out your position and attend to the basics such as keeping the mast up, the water out and the crew plus yourself on board…well, i think i have made my point about the irony i found with this post
secondly, can we sum up your view of photography by saying that there is the difference between night and day between snapping off a photo for the sake of snapping for an image vs the capability of becoming an artist with that camera even if is only a point-and-shoot and how gratifying is that discovery even to the point-and-shooter ?
lastly for now let’s not overlook the qualities of black and white photography…color is so ubiquitous we tend to forget about black and white, but it can easily rival color for effect and artistry…so if you do both then the end product suddenly at least doubles in scope
richard in tampa bay (m/v cavu’s skipper, formerly s/v sidra’s skipper)
Hi Richard,
Yikes, you have me pegged as a lot tougher than I really am. In fact I’m a closet wimp!
Good point on black and white. I look at and enjoy a lot of B&W as a photography consumer, although I don’t do much myself.
STUNNING … ABSOLUTELY STUNNING!
John: Great tips and great photography!
In my case your blog came just in time. I had taken a break from my amateur photography for a year, (mainly due to having a camera stolen). But recently I spent a long time looking at point ‘n shoots and range finders, something relatively small and fixed lens that I could take on the motorcycle easily.
What I found were hundreds of cameras that could fit the bill, very confusing. But one element came to light and that was the question of a ‘view finder’.
I cannot seem to live without a viewfinder, ergonomically I find it easier to frame a picture with the camera resting on my face! rather than arms length using a screen. Having figured that out, it narrowed the field considerably.
Not being in the position to buy a Leica M series, I stumbled upon a Leica Digilux II 5mp and its identical twin the Panasonic DMC-LC1. I settled on a used LC1 because anything with the “Red Dot” has a silly price attached. But both have the Leica F2.0 – 2.4 Leica DC VARIO-SUMMICRON lens with 3.2x zoom capability (equivalent to 28 – 90mm on a 35mm camera). The lens makes the camera in my opinion, yes restricted in its limited zoom capability but beautiful results all the same.
It is a camera that brings back manual f stop settings on the lens, shutter speed on a dial and of course all the tech found on the average point ‘n shoot. It shoots RAW so good to be able to jiggle the shots post-edit.
I digress, now I have the camera I feel very comfortable with, I can now explore the Scottish countryside armed with your excellent shooting tips and get back to an enjoyable hobby. Thanks!
Hi John
A well-heeled friend once took a photography class at a local college, and turned up on the first day with his usual assortment of high end kit, only to have the instructor take away all but the basic body and prime 50mm lens from his extensive repertoire of lenses.
And for the next few months that was all he was allowed to use. The message? Move your feet and find the image, frame it and work the light. At the end of it he was a different photographer, and thrilled with the results.
Which is, to me at least, much of what you are imparting here. Great stuff, and highly inspirational – looking forward to part II>
Best wishes
Colin
Hi Colin,
Perfectly said. I had much the same experience as your friend, although for different reasons: When we took care of “Polaris” in Greenland over Christmas a couple of years ago, even though I had a full kit with me, I found that the only practical camera to carry with me most of the time when we went ashore was my mirrorless with a single 20 mm (40 mm equivalent) fast prime, which was the only lens that made any sense in the low light. I felt that this forced exercise improved my photography immensely. The results are here.
I have seen too many slide shows of world cruises that mostly contain pictures of beautiful landscapes and/or sunsets and anchorages with the boat in the background. The real story is when you have slides of everyday life on board and of interacting with the locals. In fact the whole reason Kitty and I have made two circumnavigations was to meet the local people and to experience their cultures. A beautiful picture of local flowers is one thing; but, the real story is being part of a Kava ceremony with the local men and their chief in a remote village somewhere in Fiji, or our kids having dugout canoe races with the local children of Marovo Lagoon in the Salomon Islands, catching a fish at sea, kitty cutting my hair while at sea, trying to reduce sail in a storm. Those pictures can’t be set up and it is those pictures that tell the real story of your sailing adventures.
To see what I am talking about you can view our slideshows of our two circumnavigations by going to:
http://www.pbase.com/akuhner/bebinka 1st circumnavigation 1971-1974
http://www.pbase.com/akuhner/greatescape 2nd 1987-1991
when you get there, click on the first thiumbnail and then scroll down to read the text. Then click next at the bottom of the page ..and so on.