 I was walking along the dock the other day and got stopped by a couple who are about to head for the Bahamas and on down-island. First they said nice things about my photographs. After I was putty in their hands, they wanted to know if I could give them a few quick tips on how to take better photographs during their cruise. Things they could do quickly and easily with their pocket camera without spending a lot of money or reading thick tomes on photography. Here is what I came up with:
#1 Use a Lens Hood

Do you wonder why your pictures often look washed out, low contrast and boring? If you are not using a lens hood, that is probably why. Light striking the front lens element at a shallow angle will do more to wreck an otherwise good photograph than practically any other problem. And that goes double around the water.
Larger cameras have a bayonet fitting for the hood on the front of the lens. But even pocket point and shoot cameras usually have a threaded flange on the front of the lens that will take an aftermarket lens hood, although some will require some kind of adapter.
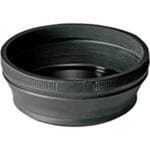 For my smaller cameras, I like the rubber collapsible lens hoods that can be had for as little as US$10.00. Although my favourites are a bit more expensive and are made by B+W.
Not only will a lens hood make your shots look better, but it will also protect the front lens element from bumps and scratches. Oh, and that reminds me of tip number four (of three):
Use a lens hood and a lens cap to protect your lens and don’t fall for that old saw about keeping a clear filter on the lens all the time. If the lens designer wanted another piece of glass there, he or she would have designed it that way! A clear filter just makes the lens more susceptible to flare, a lot more.
#2 Use a Polarizing Filter
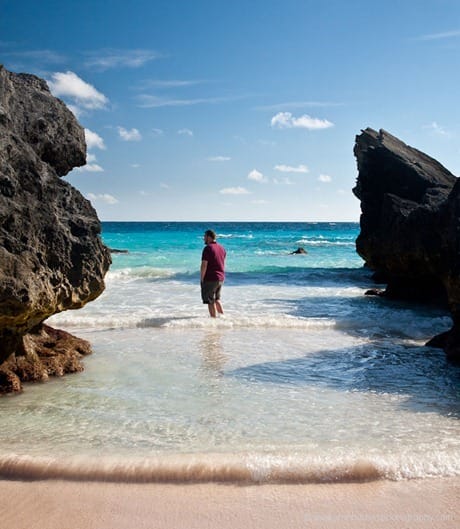
You know those wonderful tropical shots with clear green water and deep blue skies? Ever wondered why yours don’t look that way? Simple, the photographer was using a polarizing filter…and a lens hood. You should too, particularly on sunny days and around the water.
To use a polarizer, simply rotate it as you look through the viewfinder or at the screen until you get the darkening effect you want. Note that the effect of a polarizer is greatest when the scene is side lit.
Once again, even if your camera is not fitted with a thread for a filter, there are adapters that will solve that problem for most models.
#3 Don’t Blow the Highlights
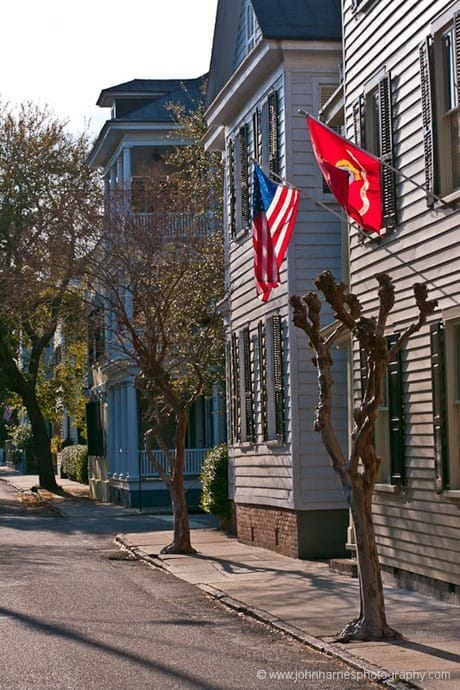
Camera sensors can see a much narrower dynamic range—the difference between bright white and black dark—than we can. In fact, less than half as much. And there are few things that ruin a nice travel photograph more than a sky that should be blue, but is blown out to white, or worse still some surreal magenta, as the sensor struggles with too much light for the exposure setting.
Unfortunately, even the most expensive cameras are prone to this when shooting on the automatic setting. Now don’t panic, I’m not suggesting you go over to full manual, just that you learn to use the exposure compensation setting on your camera to bias the exposure from the automatic setting when necessary. Look in the manual and it will tell you what knob to twiddle.
Back in the film days you used to have to understand exposure theory to use exposure compensation, a thorny subject that whole books have been devoted to, but today there is an easier way: trial and error.
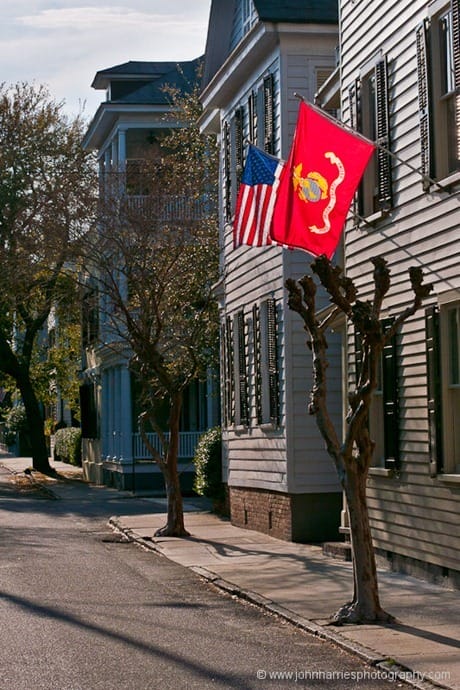
Look in your manual for a setting for something like “highlight warning” and turn it on. Then take a photo of a scene with a large range from darkest to brightest and look at it on the camera’s screen. Almost certainly you will see the brightest area on the screen flashing, the dreaded blinkies. The camera is warning you that this area is burned out to white with no data. Now turn the exposure compensation so that the shutter speed gets faster and/or the aperture gets smaller (bigger number). Don’t worry too much if you don’t understand that last sentence, just go trial and error.
Try another shot. It should be a bit darker overall. Still got the blinkies? Try again. You want to get to the point where you just have no blinkies, but no further.
If your camera does not have highlight warning, all is not lost. You can use the histogram, that funny graph thingy. You may have to turn it on in the menus, or maybe press an “info” button to see it. If the graph bars are bunched up at the right side and to the top, then the highlights are almost certainly blown. In this case, keep shooting and adjusting the exposure compensation until the hills and valleys are nicely distributed across the graph.
What happens if your camera has no blinkies and no histogram, or no way to set exposure compensation? Sorry, it really is time to think about a new camera that does. If you can’t get exposure right, you will never get good photographs. Even my top of the line Canon DSL only gets the exposure perfect without help from me and exposure compensation about 70% of the time. Point and shoots are usually worse in this regard.

is the ultra violet light filter i have always used ok versus the polarizing on my olympus slr ? what about both ? many thanks, richard in tampa bay (m/v cavu’s skipper, formerly s/v sidra’s skipper)
clarification: question should have been: what about both filters in use together ?
Hi Richard,
I really don’t like UV filters much and never use them. I have never found they did much that was useful and having them on the lens all the time increases the chances of flare (see point 4 above).
In conditions where a UV is useful, generally a polarizing filter is better.
And no, I would never stack them. The more glass you put in front of the lens, the more you degrade image quality and increase flare.
i gather from this that you use the polarization filter only when you feel you need it and that otherwise you are filter free ? thanks…richard in tampa bay (m/v cavu’s skipper, formerly s/v sidra’s skipper)
Hi Richard
I’d agree with John’s comments re UV filters, and especially not to double up with a polarizing filter – with many of the wider lenses (say 24mm and below) which are the most useful for deck shots and for seascapes there could be an issue of the second filter interfering with the edges of the field of vision.
Polarizers are fantastic, and are a must to carry for sea use, for all of the reasons John has so effectively described, but they’re not (at least in my experience) permanently mounted. They tend to be most useful for composed shots, where you’ve time to set the camera up, check the exposure and dial in the amount of polarizing effect you want. Leaving it on when it’s not required, you run the chance of it interfering with the cameras exposure metering when you lest want it.
Another reason not to leave them on the lens is they’re not cheap, and might be prone to damage!
Best wishes
Colin
Hi Colin,
Perfectly said, thank you.
That brings to mind filter cost. Polarizing filters run from about US$20 to over US$150. How much you should spend is dependent on how serious you are about your photography. But what I can say is that if you have invested heavily in good quality lenses, it is a waste of that money to stick a cheap filter on the front of them. I like the top end polarizing filters from B+W at US$150 each. Not cheap, but you can really see the difference.
Hi Richard,
Exactly. To me part of the secret of good photographs is to be thoughtful about what you want the shot to be. Part of that process is choosing the right filter, if any.
I’d add Alun John’s advice to amateurs who want to improve their pictures.
“Take three steps forward.”
Clearly not always possible, but useful to consider when setting up a shot. Besides, it’s free.
Hi Jamie,
Great advice. The single greatest mistake those that are new to photography make is trying to include too much in the frame.
Come to think of it, even after 15 years of “serious” photography, I still make the same mistake. But I’m working on it.
Hi John,
I really enjoy photography and people praise my photos – but what else are they going to do – tell me to my face that they’re crap?I read quite a lot about photography (not as much as I do about sailing!) but I’m thinking about joining a club in order to be able to enter photos in a competition – not because I want to win anything – but because I want an objective opinion and accompanying criticism in order to improve my capability…
Just wondered if this is a path you’ve gone down or if you’re completely self-taught…
Cheers!
Hi Bill,
No, I’m not big on clubs or competitions as a way of learning to become a better photographer. The problem for me is that both tend to force you into a specific way of seeing to satisfy the judge’s idea of what a good photo is. And in clubs that tends to be a sort of homogenized mediocrity that tends to turn into who can make the “best” yet another over-saturated sunset shot…yawn.
To me, that’s all wrong. We can never get any better by making our art for others, only by making it better for ourselves.
That’s not to say that we can’t learn from others, but rather than a group in a club, I would look for a few truly brilliant artists that see in a way you like, and try to learn from them—a group can never produce anything truly great, only individuals do that.
Right now I’m completely besotted with the work and writing of Jay Maisel and am trying to learn to simplify my photography in the way he does. Read his Light, Gesture and Colour, and you will learn more than you could ever learn in the typical club.
Of course all the above is about the vision thing. The technical stuff you can learn, as I did, from just about any of the many good books available.
Hum, maybe I should write a post on this…
Also, if you have not read it, I made a stab at some tips that may help in this post.