
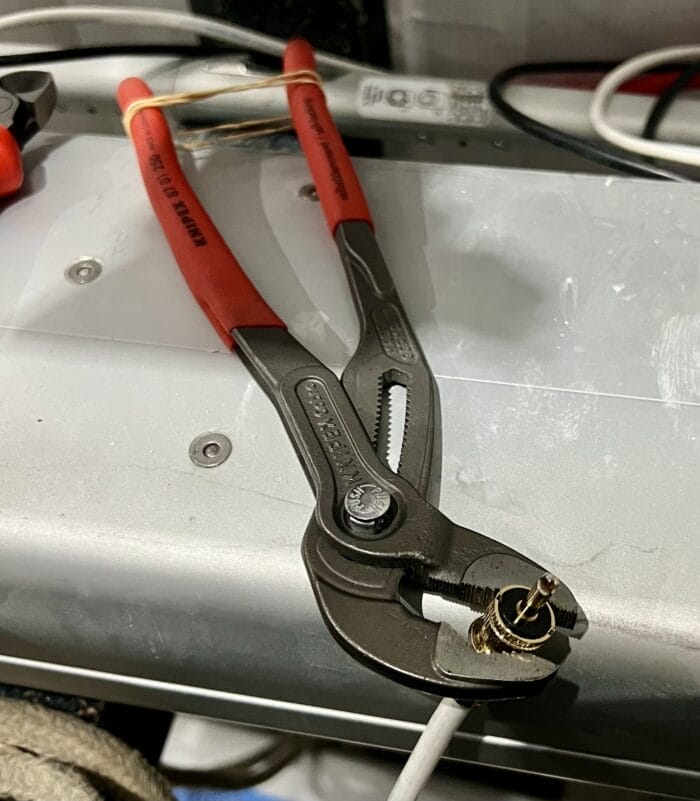
Not sure if this is a hack, or a kluge…or maybe just half-assed, but the rubber band worked a treat when I needed the VHF plug held still while I soldered the centre pin conductor.

Tips, Tricks & Thoughts:
Not sure if this is a hack, or a kluge…or maybe just half-assed, but the rubber band worked a treat when I needed the VHF plug held still while I soldered the centre pin conductor.

I have to cut an elliptical hole in the stern of our boat to accommodate the heater exhaust fitting above. And just to add to the fun and games, I need to also make two high-temperature gaskets out of silicon sheet.
So how the heck do I get a nice clean hole just the right shape in both the transom and the gasket material?
My first inclination was to use a hole saw to cut a hole in the transom the same as the minor axis of the ellipse and then start shaping with a Dremel and burr bit. I guess that might have worked, but I’m not either the neatest or the most patient guy around, so it also could have gone very wrong.
And what about the gaskets?
Time to work smarter:

While researching for a discussion we were having about epoxy shrinkage (or not), I came across a great site with a ton of information and tips on using epoxy resin to make repairs. I particularly liked their myth-busting post.
Despite having used epoxy for over 40 years, including for a refit that turned into a rebuild of a boat that I understand is still around four decades after I fixed her with West System epoxy, I learned several things from the above-linked site.
Highly recommended.
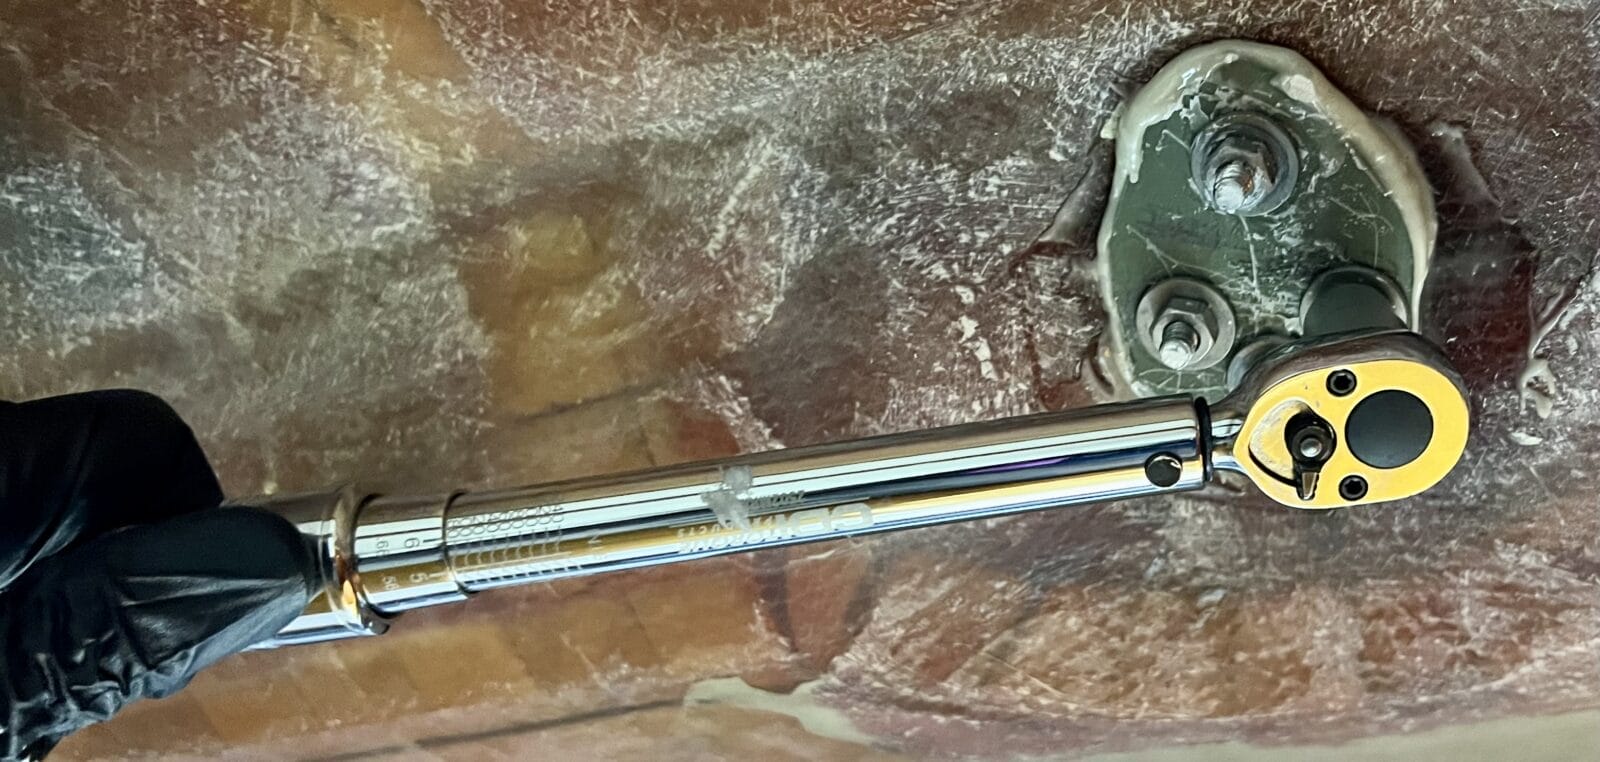
Seems like it’s torque week here at AAC; actually, it’s torque month since we have a fascinating two-part series coming from Eric on understanding torque as it relates to engines and transmissions.
Anyway, in the last tip I mentioned the dangers of over-torquing: wring off a fastening or weaken it so it fails later under load.
But here’s something that I only relatively recently really wrapped my aging brain around: the danger of under-torquing fastenings, other than the obvious one of them coming loose.
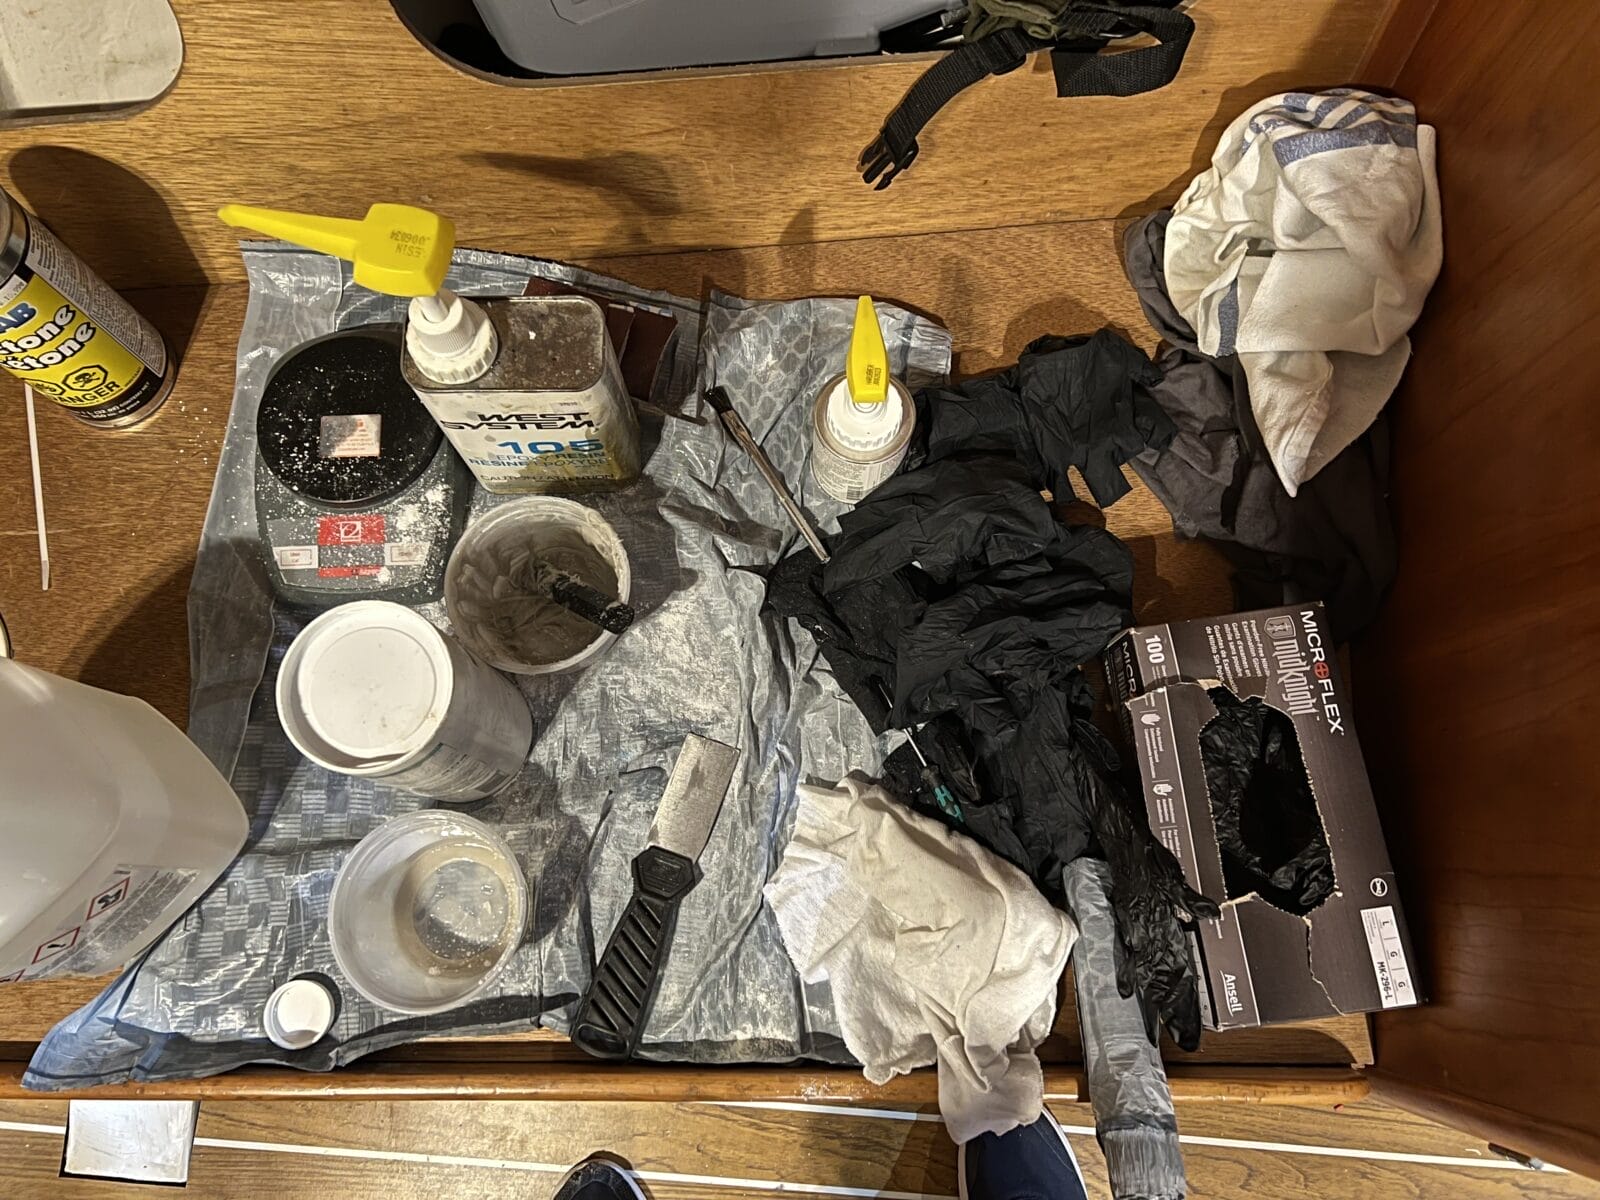
While we are on the subject of fun you can have with epoxy—see the last Tip—here’s another.
I have been doing a bunch of work on our J/109 with epoxy resin lately. Nothing structural, just mounting some hardware, and improving the mounting for a couple of turning blocks. Stuff that requires replacing core and bonding backer plates.
This kind of work involves handling things covered in epoxy and then handling tools…and then handling things covered in epoxy…repeat as necessary…
And then moving around the boat to the next place that needs to get sticky.
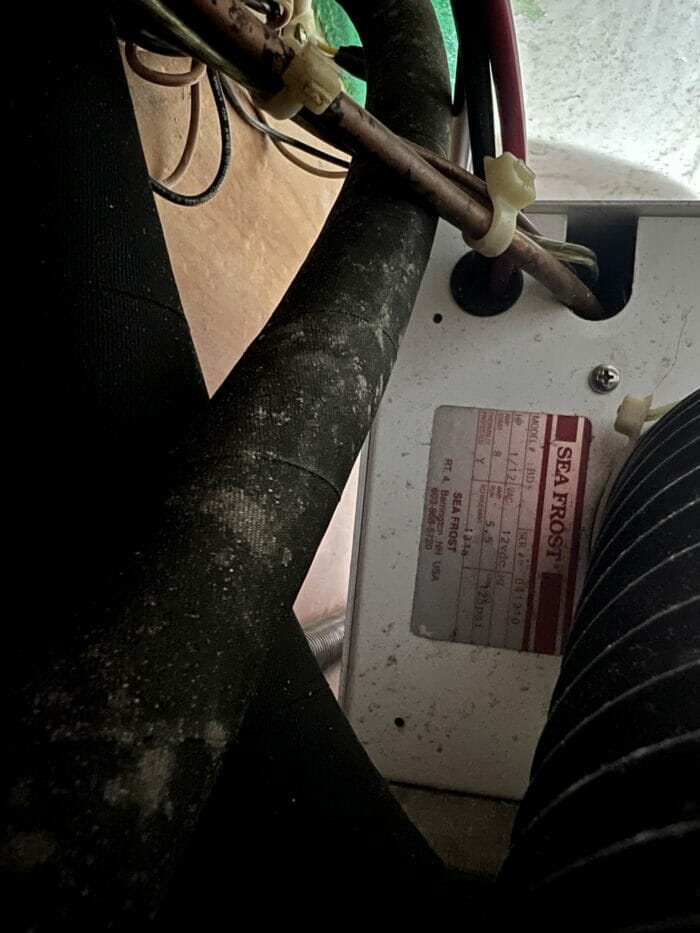
I needed to get the model and serial number off the fridge unit on our J/109, but the problem is that the plate is on the far side and inaccessible, at least to an arthritic old fart.
I was pondering using my borescope, but controlling it holding the wire would have been difficult.
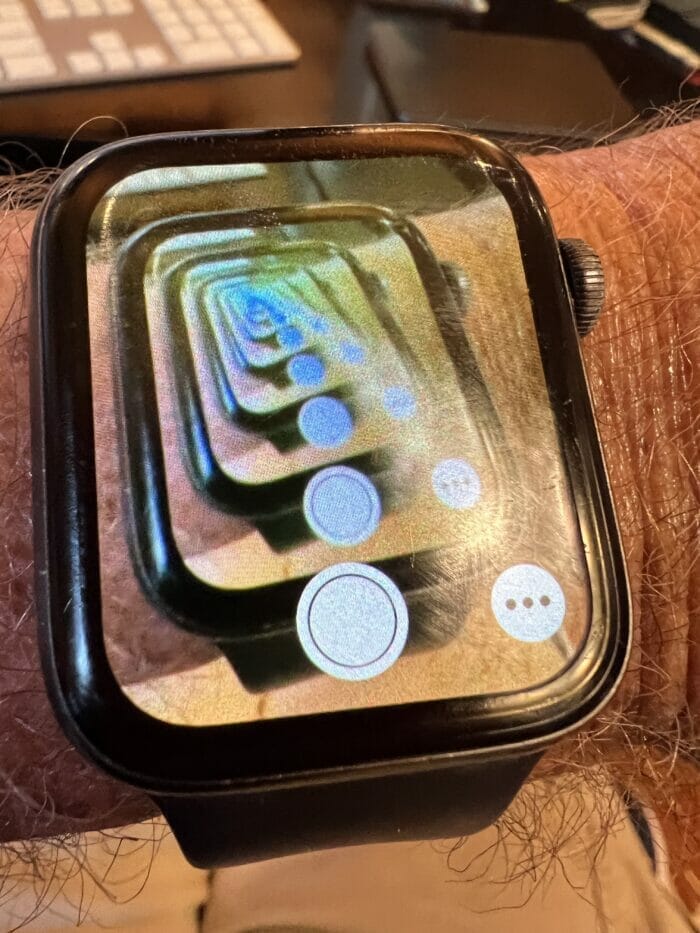
Then I remembered that I can control the iPhone camera, and even see what it sees, on my Apple watch.
So I attached my iPhone to a selfie stick—don’t ask why I have one, it’s not why you think, I see enough of my wrinkled mug when shaving—and five minutes later the job was done.
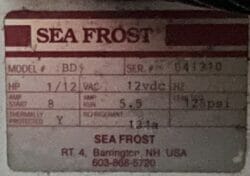
And the photo is way higher resolution than that produced by a borescope, so easy to zoom in on the details.
Taking a photo of my Apple watch while in this mode produced a fun graphic, too.
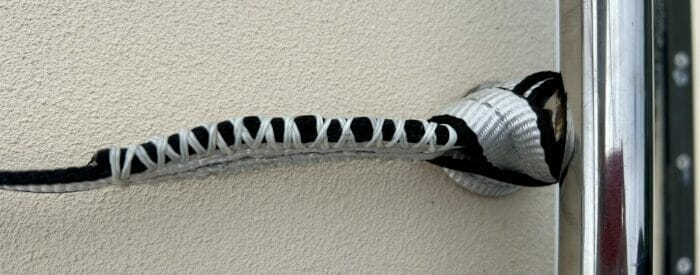
If we are sewing a loop into a piece of webbing to cow hitch it to something, as is often the case with jacklines, the end result will seat better and be way neater if we sew the loop with a half turn in it as shown below.
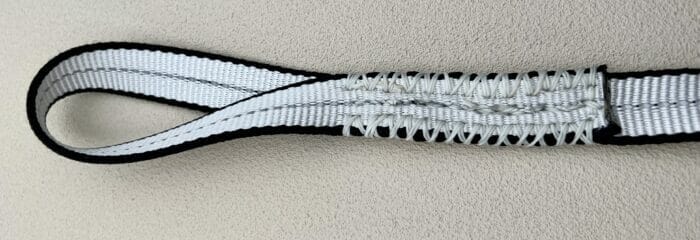
More on making your own jacklines and tethers in this Online Book.
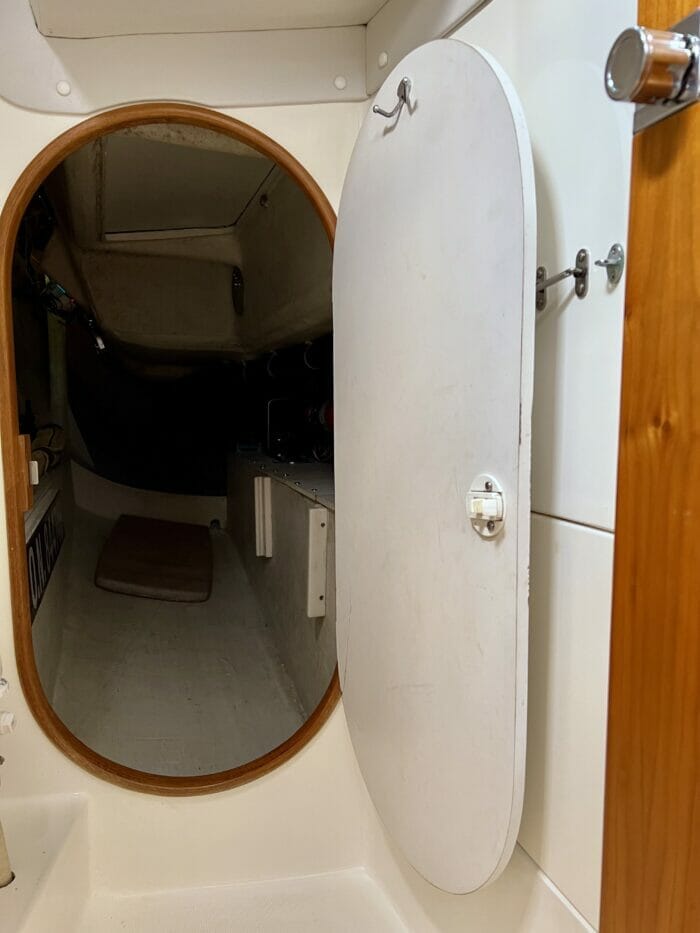
There are many little tricks that can make maintaining a cruising boat easier.
One of them is that all doors should have hooks or latches to retain them open so that air circulates, and should be left that way as much as possible.
This one change can cut mildew growth and general mustiness way back.
I just added a hook to what we call the “mouse door” connecting the head and cockpit locker.
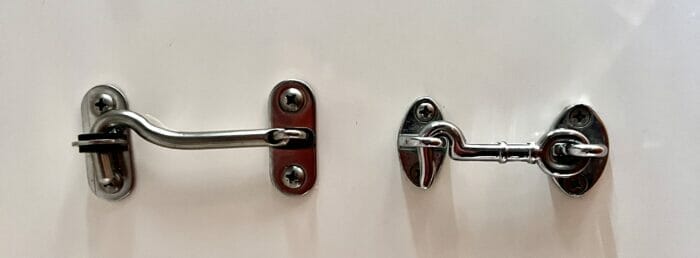
And, if we use a hook and eye, it’s a good idea to also add a second eye to retain the hook when the door is closed, otherwise it will make a very faint, but nonetheless hugely irritating, noise as the boat moves.
The one on the left, that I just added, is a better bet, because of the rubber insert that reduces clinking, than the one on the right, which the builder provided for the aft-head door.

This tip won’t work for active voyagers far from home, but for those of us who commission our boats at the same yard every year and have a place to store them it’s well worth owning our own sawhorses.
The things are always in short supply at a boatyard, and the ones we can hunt down are usually rickety and of mismatched heights.
We need four, three to hold the mast and one extra to tie a spreader to so the mast won’t roll when dressed.
Ours are a bit over-the-top strong and heavy because we originally bought them to support the mast on our McCurdy and Rhodes 56.
Something a bit lighter, maybe in plastic, would work well for smaller boats.
Do you have a brand that has worked well for you? Leave a comment.
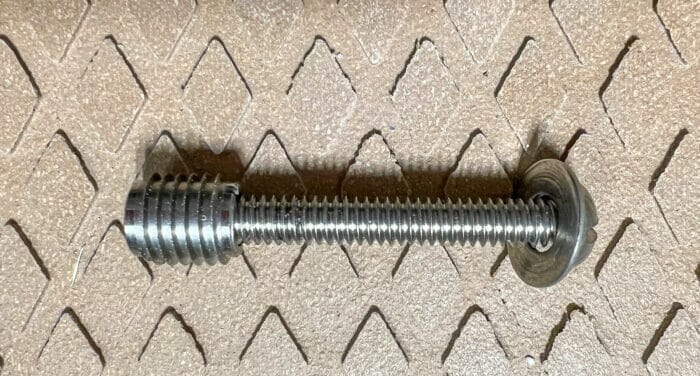
Engine access on the J/109 is way easier if we remove the top companionway step, so over the years that’s clearly been done a bunch of times.
And of course with each removal and reinstallation the screw holes in the retaining battens underneath have got bigger and more ragged. So people have replaced the screws with ever bigger and longer ones.
But we can only go so far with that, plus there’s a better way that solves this problem forever wherever a screw will be repeatedly removed and reinstalled into wood (or fibreglass):
Change to machine screws and threaded inserts as shown above.
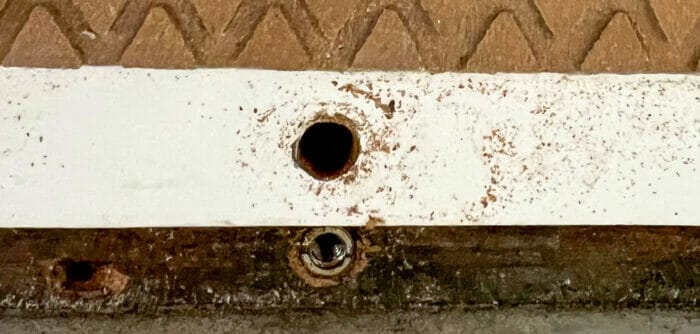
Here’s the hole (bottom) with the threaded insert screwed in.
And for extra points, change to a round-head screw with a washer, instead of the usual countersunk head that will slowly wear through the step or whatever is being attached.
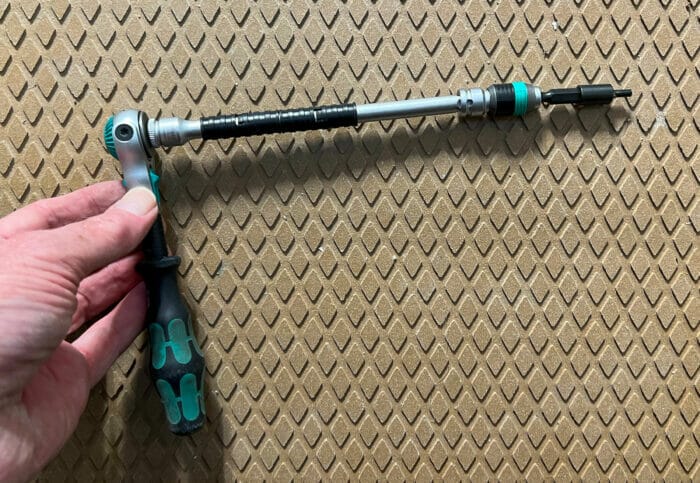
All that said, don’t try and install threaded inserts without the right tool—only way to get them in straight and true.

Here’s the finished step that can now be removed any time I want to without worrying about stripped screws. The electrical panel is next.
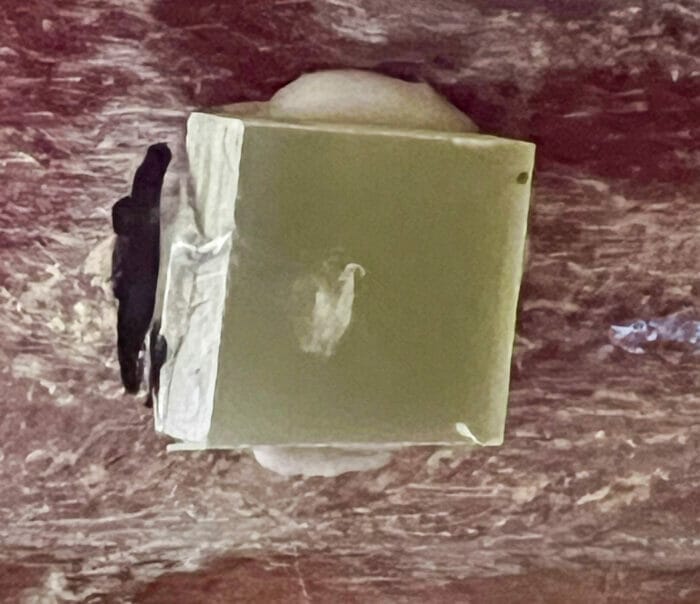
Pretty much any deck fitting should have a substantial backer plate. I like G10 for this function, although fibreglass sheet can work for less money when less stiffness is required. I keep some of each in different thicknesses on hand.
But how do we hold the backer plate in place while we drill the holes?The best way I have found is to epoxy it to the underside of the deck. So doing also stiffens everything up because the thickened epoxy fills any voids or curves.
Cool, but how do we hold the plate in place while the epoxy dries?
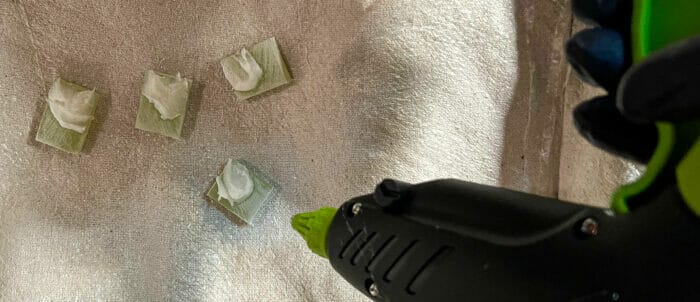
Simple, a dab from a hot glue gun. In the photo above I have applied the epoxy, but left a small area for the hot glue. Hold in place for 15 seconds and it stays put. Works a treat.
Once the epoxy hardens up, drill the hole(s).
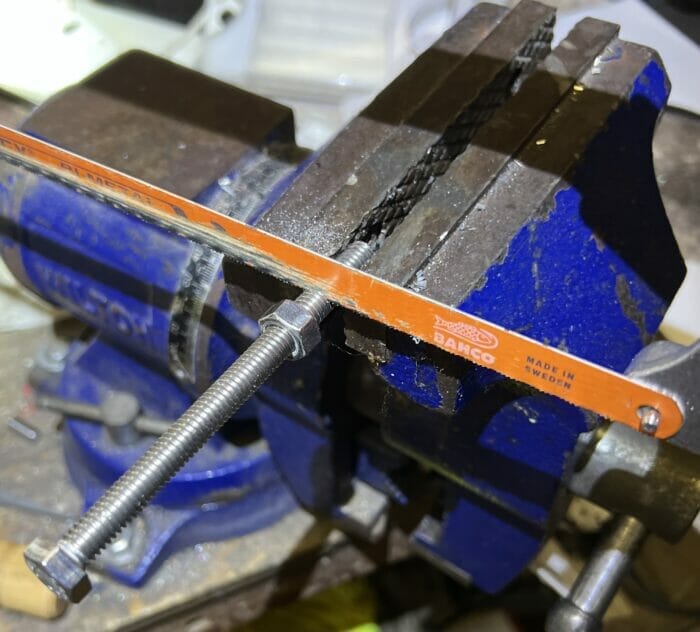
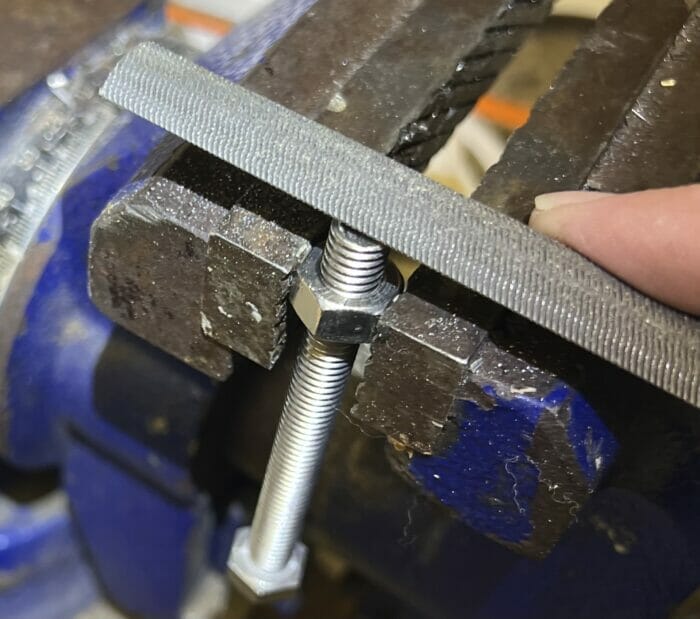
I’m guessing most of you know this one, but I didn’t when I first started working on boats, so it may be useful.
When cutting a bolt off that’s too long, first put a nut on it as shown in the above. Winding the nut off cleans up burs on the threads from cutting.
But even better, to avoid fragments that will make it difficult to get the nut on, particularly in confined spaces, before winding the nut off, grip it in the vice and use a fine file to clean up the cut end—only takes a moment and makes a world of difference.
¹Bad pun alert


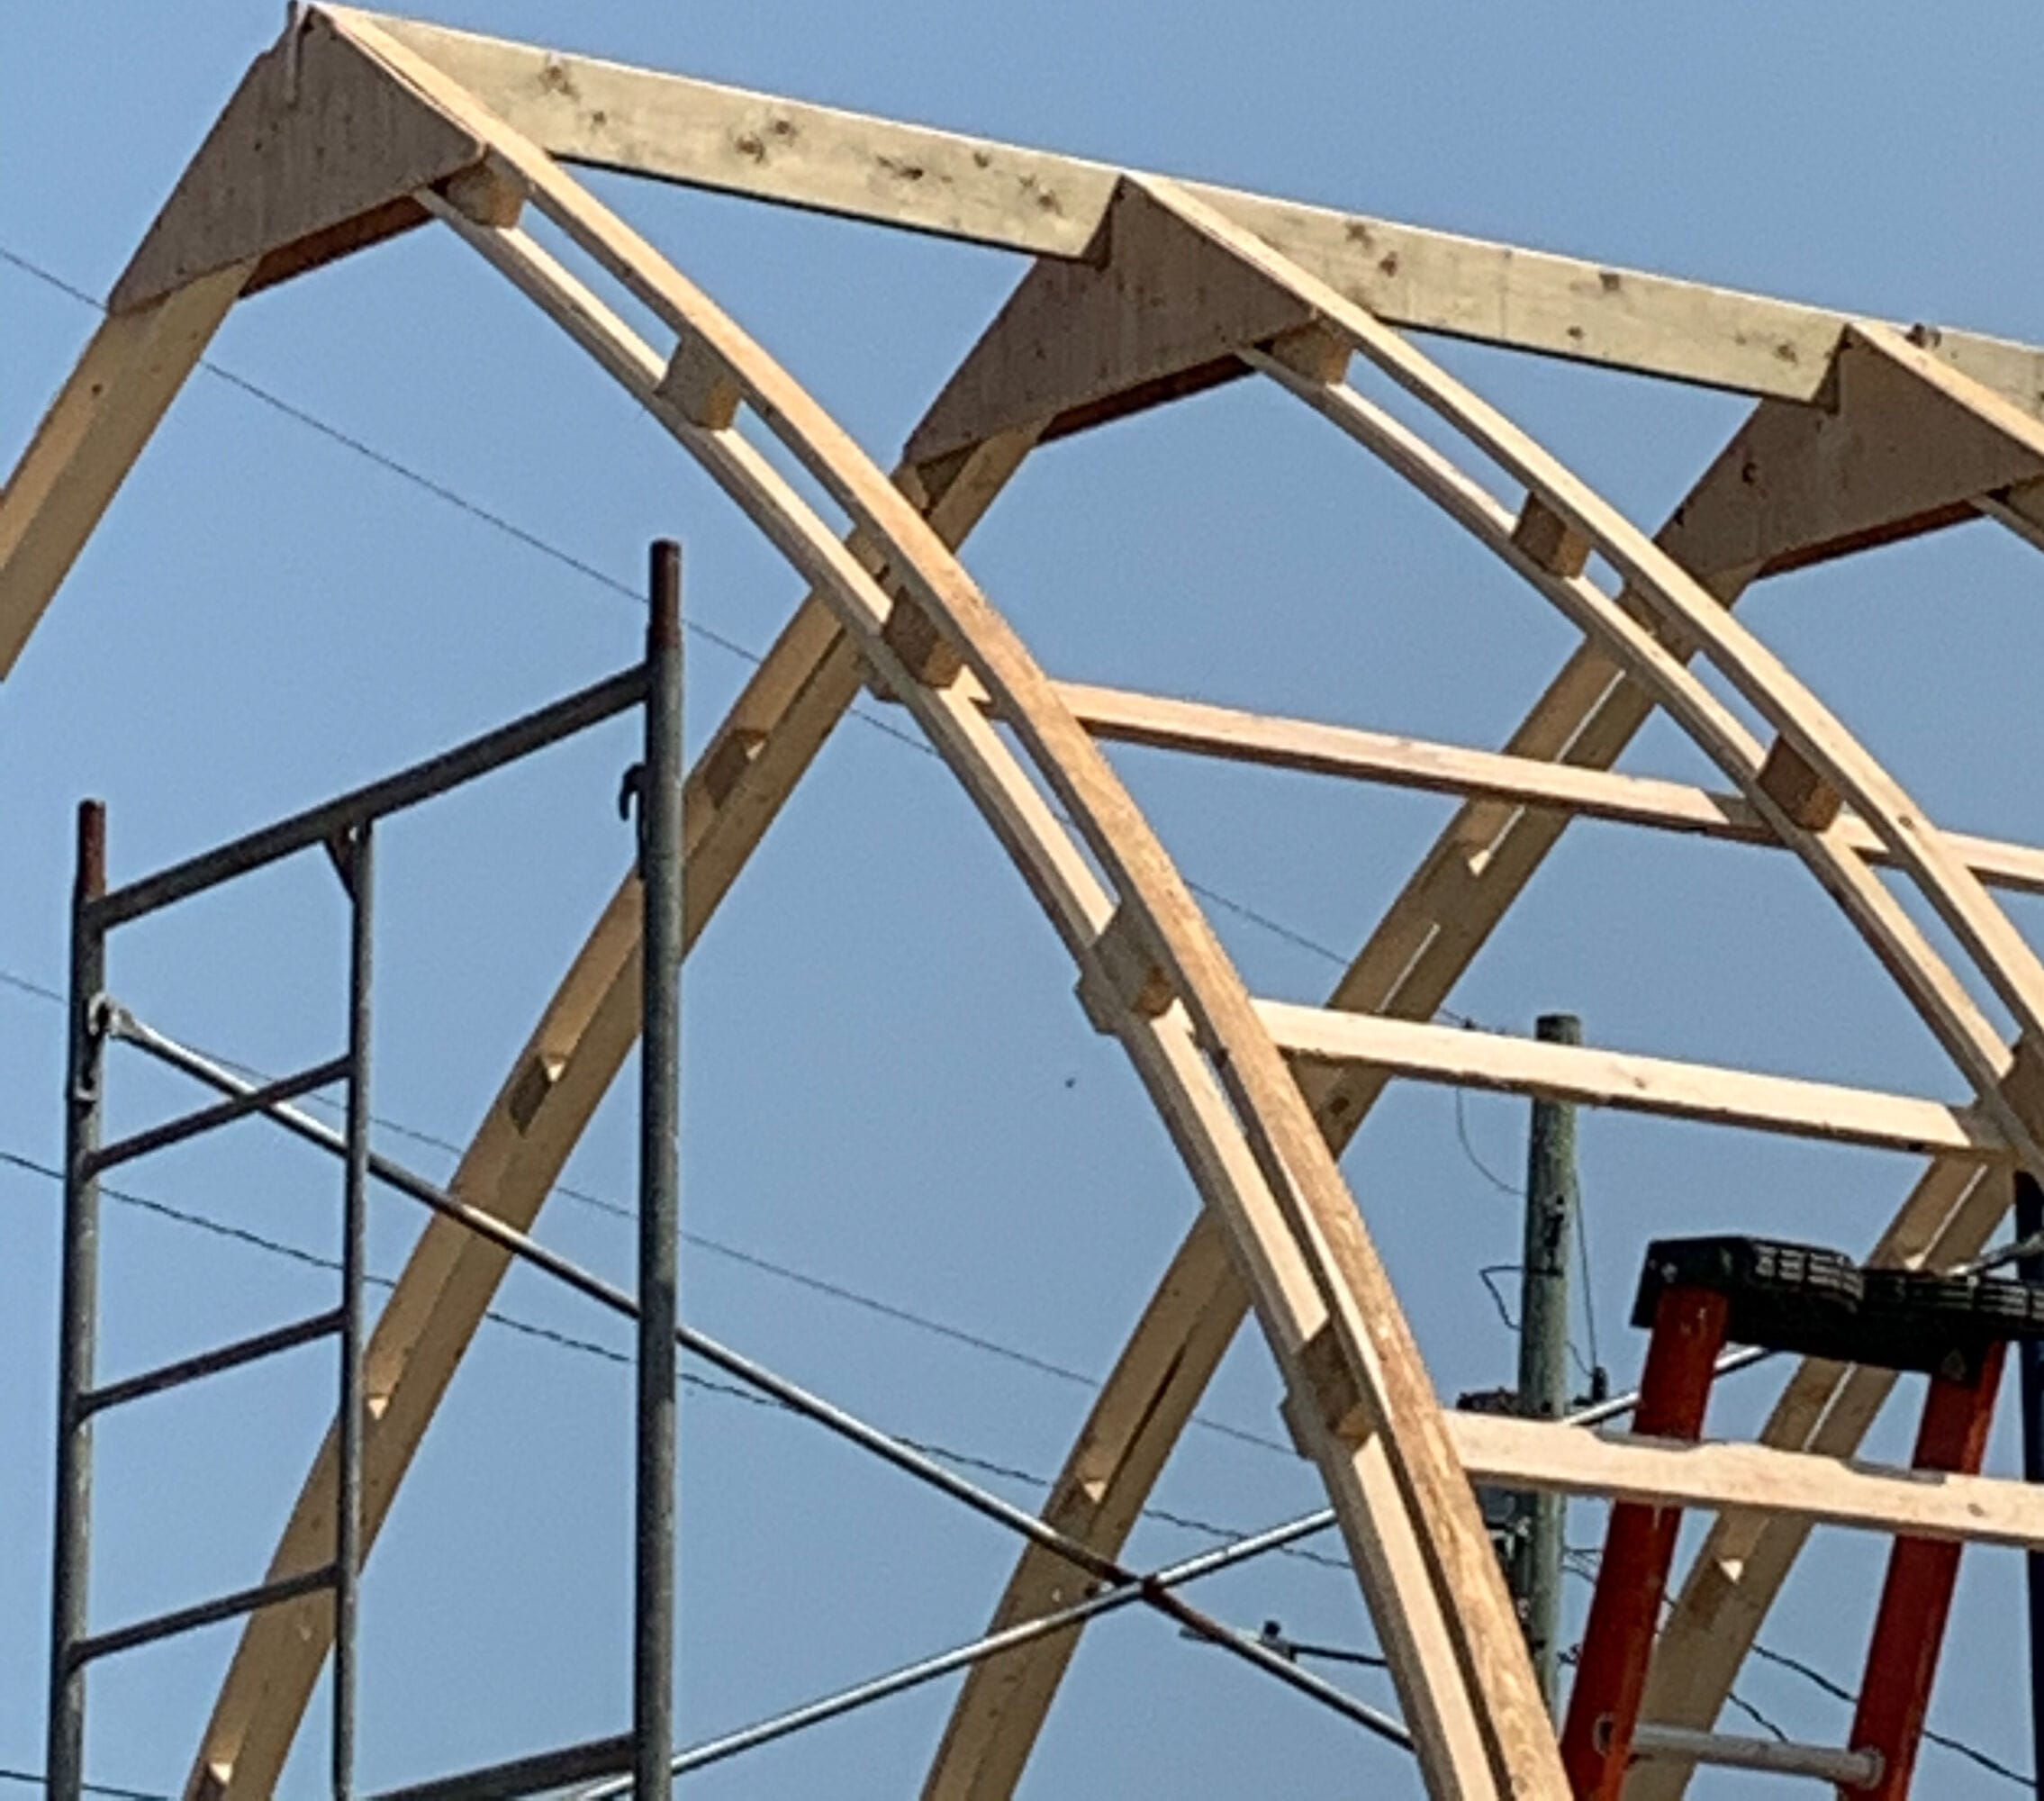


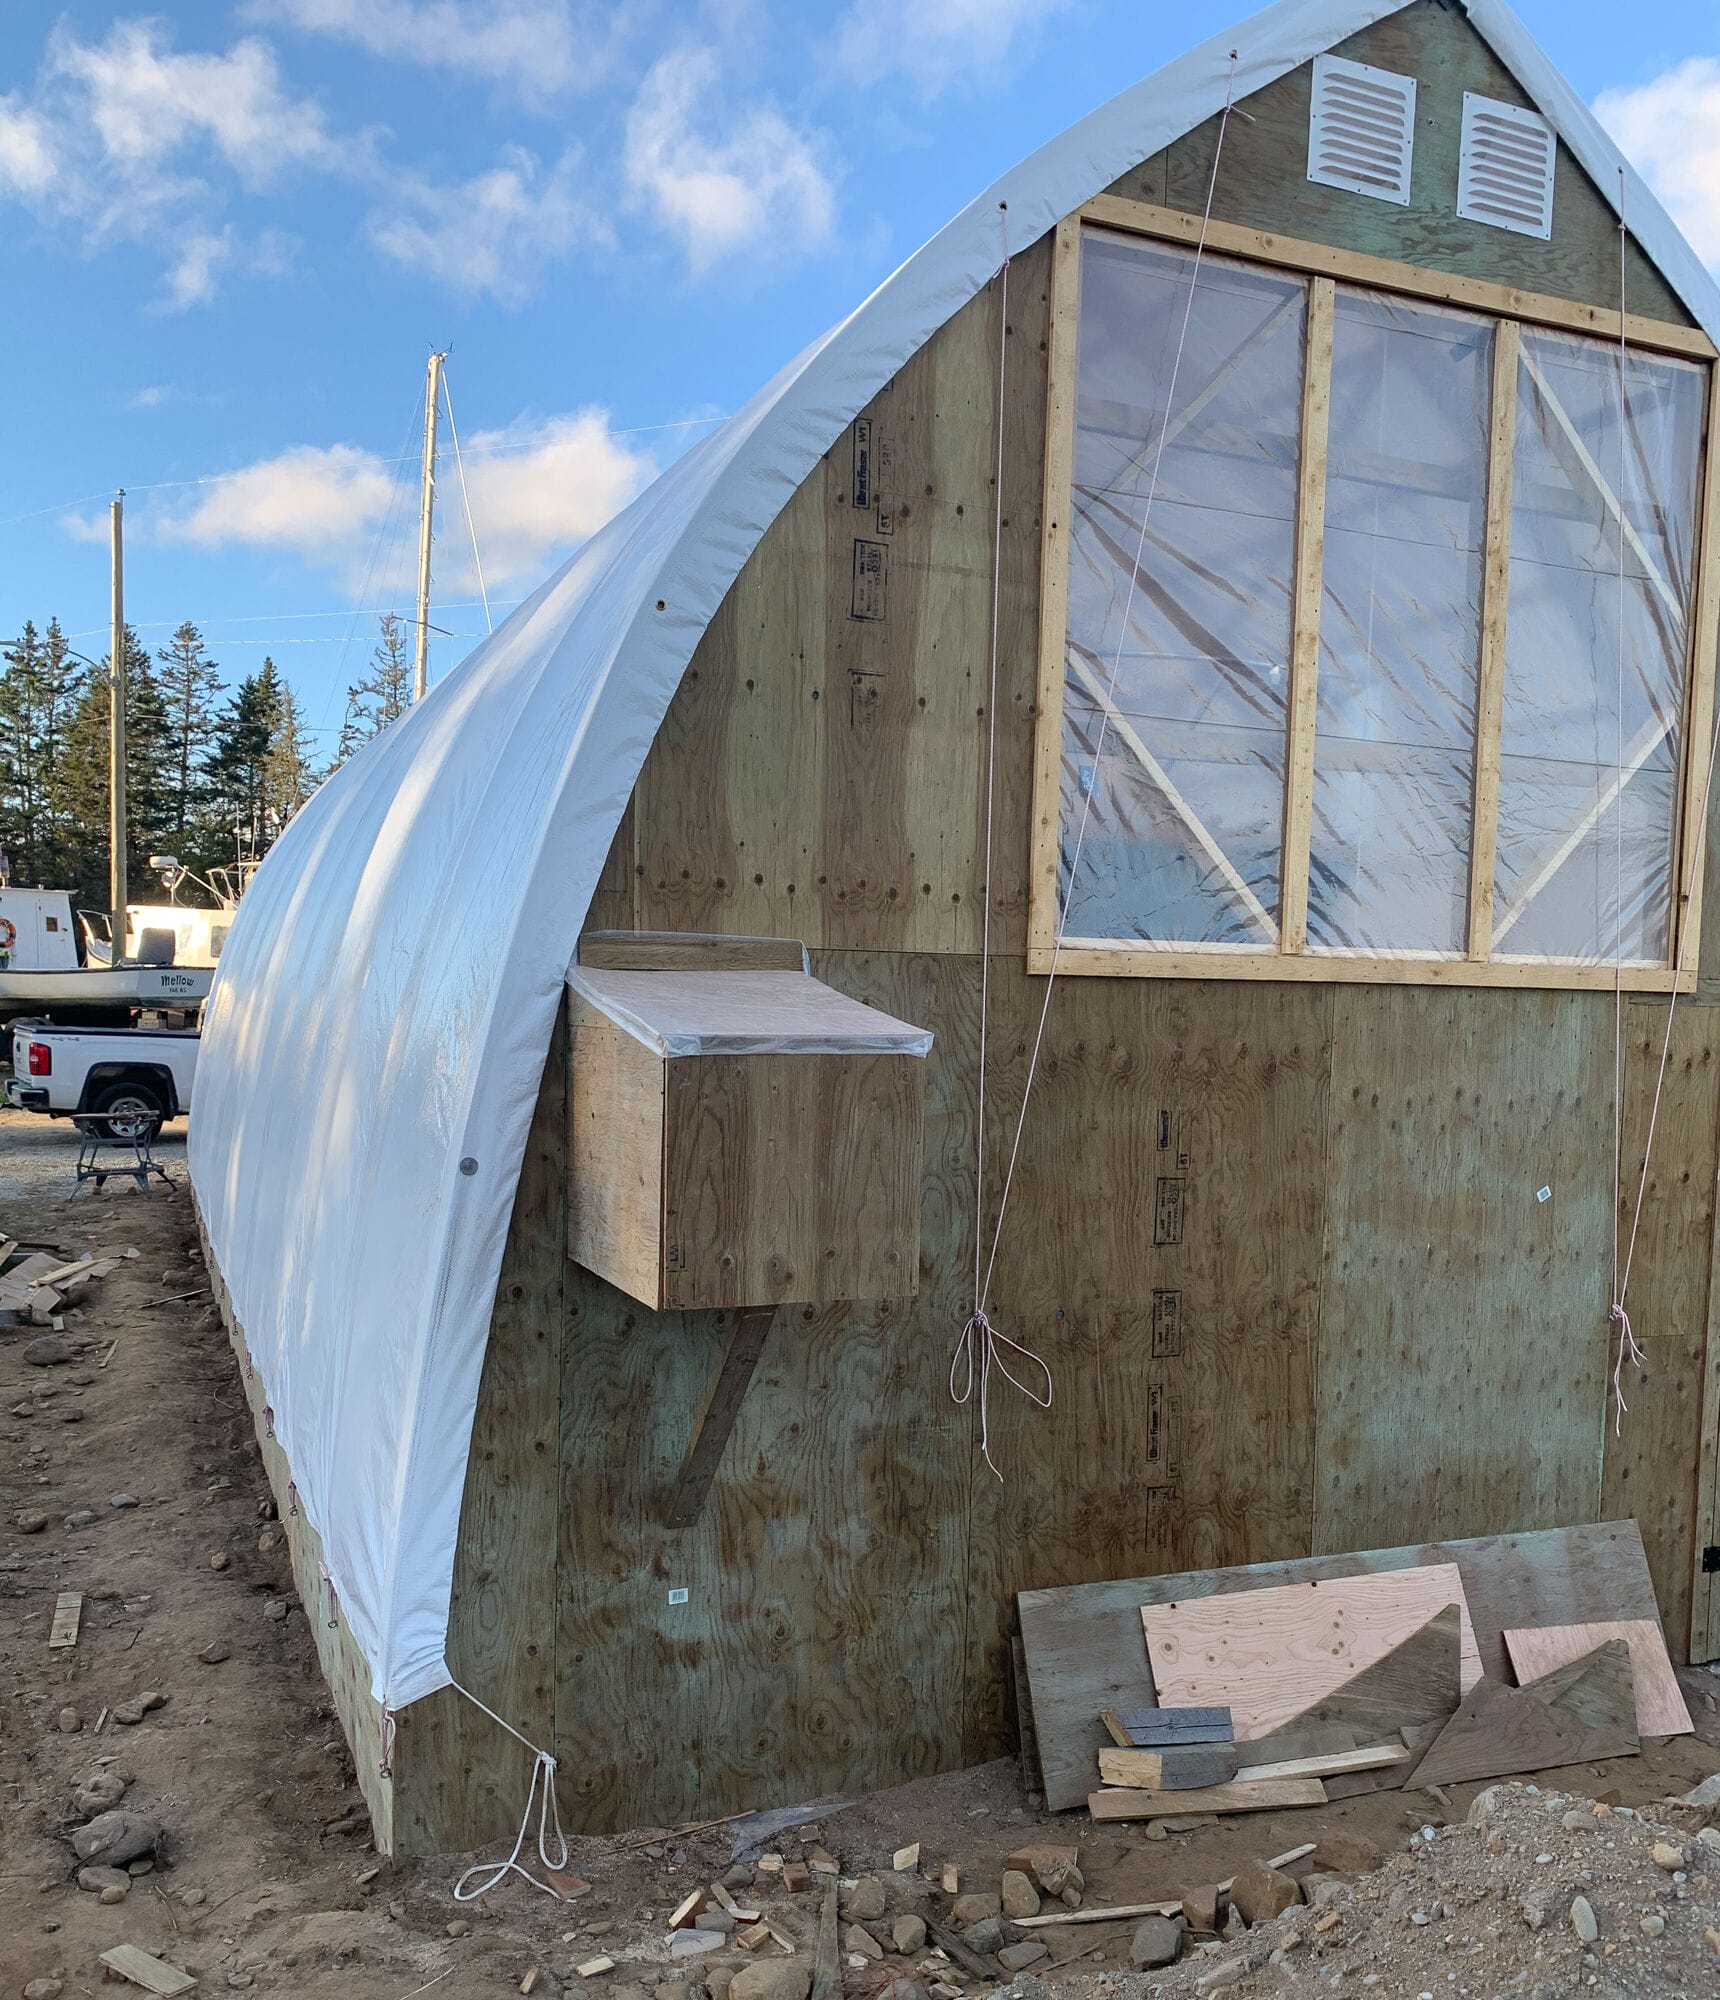
A couple of years ago my friend David sent me the above photos of a Stimson shed he built to winter store his lovely Hinkley 41, the same boat he so kindly lent me for a cruise.
I’m ashamed to admit that said photos have languished on my computer until I stumbled over them while searching for something else.
Anyway, he built the shed for less than ten grand (Canadian), so this seems a good alternative to winter inside storage at a yard for those who can find a piece of land reasonably near a haulout facility, and also a great option for a refit.
He broke the cost down as follows, all costs in Canadian dollars:
Could be done for much less depending on materials, access to machinery, labour, etc.
Here are some links David shared that might be useful:
https://www.reefindustries.com/griffolyn.php
https://www.by-the-sea.com/stimsonmarine/bowroof.html

I just got off the phone with a local guy who repairs inflatable boats.
Seems like he really knows of what he speaks. I learned a few things:
He is going to rehab our nearly four-decade old Avon. If it goes another 20 years I’m thinking I might be done with it.
Final tip from me: Hypalon may be a lot more expensive, but it’s worth every penny.
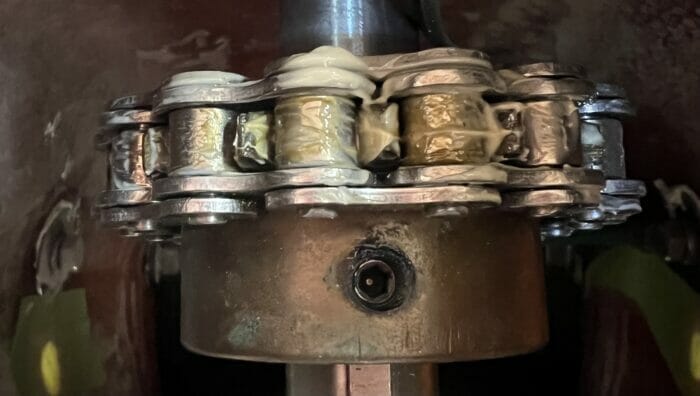
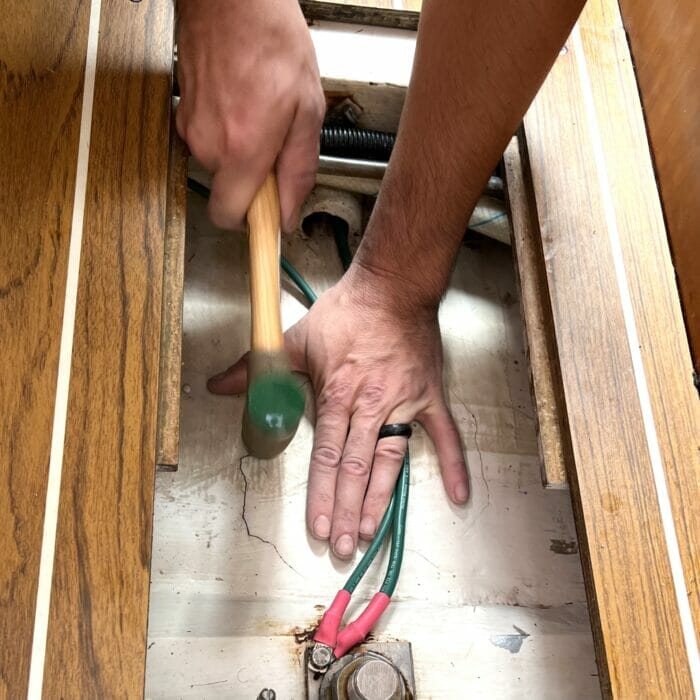
I mentioned in another tip that I have just finished a full maintenance on the steering gear on our new-to-us J/109 and that nothing was properly lubricated before I started and probably never had been.
On that subject, I have long noticed that the chain and steering cables on many boats are bereft of any grease, even if the rest of the gear is well maintained.
I think this is a mistake, particularly if we are putting on big-time miles, as Phyllis and I were for three decades on our McCurdy and Rhodes 56.
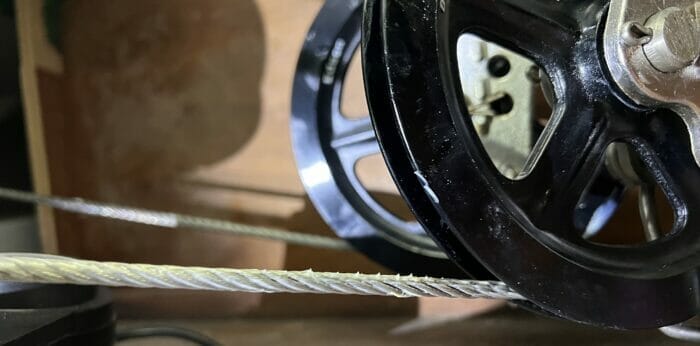
So I always lubricate the chain where it goes over the sprocket, and the cables where they go over sheaves, with my favourite Lubriplate 130-AA grease.
I just put a glove on and slather it on, although I guess a little brush would work too, but that way we don’t get it in our hair…a little dab’ll do ya—if you know what that was about, you are old, too.
Once a year or every 10,000 miles seems to keep everything well and truly slippery.
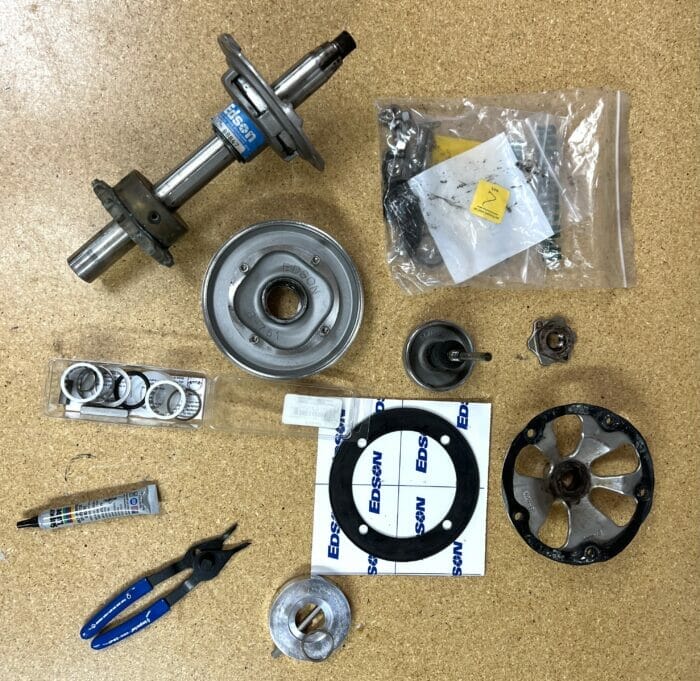
I’m just about finished rebuilding the steering gear, less the rudder since we did that last year, on our new to-us J/109.
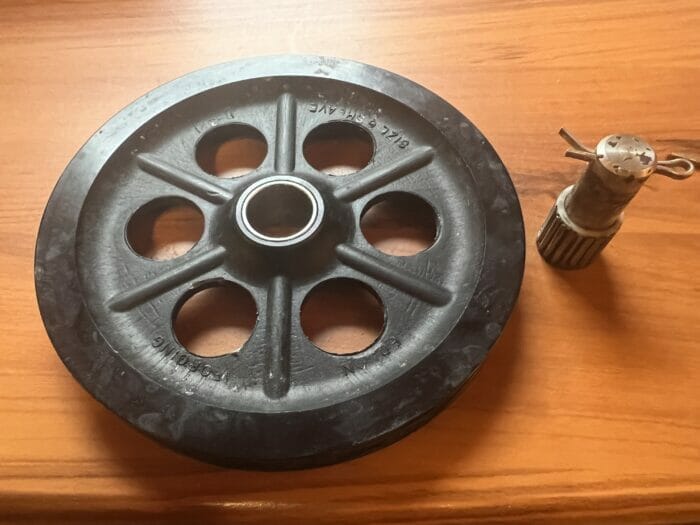
When I pulled it apart half the bearings fell out and there was not a drop of grease or oil on any of it…except the brake pad, where we don’t want it!
I’m guessing Tillotson Pearson assembled it dry 18 years ago when they built the boat and it has not been looked at since.
A steering failure looking for a place to happen.
It’s amazing how often I use the stack of dive weights I needed to get neutral when wearing my Arctic-level dry suit, (bought when we were cruising the high latitudes) to hold stuff down or together while glue is kicking off.
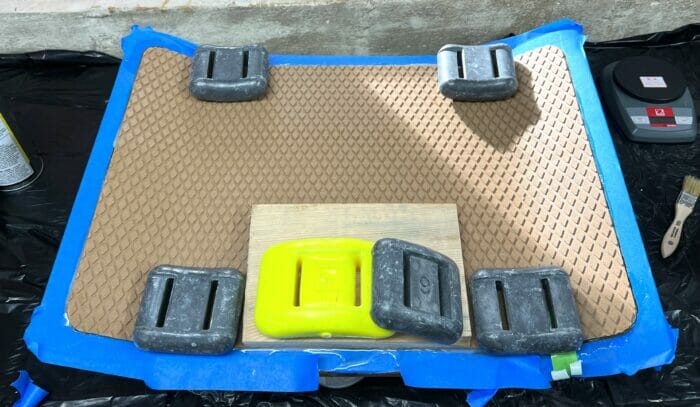
In the photo above the weights were invaluable while I was splatting¹ new TreadMaster on our companionway top step.
The heft and curved surface of dive weights works great for this function.
Worth having a few around in the workshop even if we aren’t divers.
¹A technical term Phyllis and I developed while spending three months covering the deck of our McCurdy and Rhodes 56 with TreadMaster.

I have always cleaned winches with kerosene, but I hate the smell and I’m guessing that breathing the vapours for hours is not good for us.
So last winter I tried this water-based degreaser from WD-40, even though I don’t like or use their spray lubricant.
The stuff really works. After a good soak the old grease came right off. No smell, and probably better for the environment, although we did take the used stuff to a hazardous waste drop-off.
Is it the best water-based degreaser? Who knows…or cares. It was available at the local hardware store and solved (ouch) my problem.
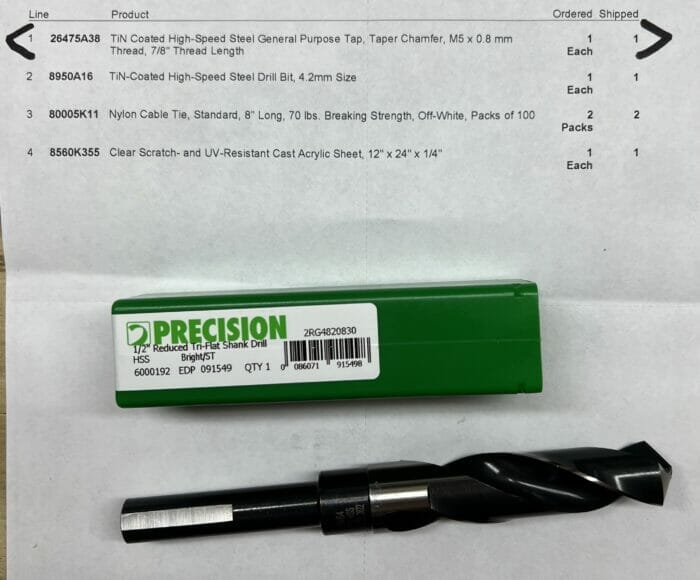
Phyllis and I have been buying tools, fastenings, and half a hundred other things from McMaster Carr for decades, and are such fans that I often say that if the company goes out of business I’m selling our boat and taking up golf…and I hate golf.
Over all those years, and hundreds of orders, I can only remember McMaster-Carr making a mistake twice.
The second time was two weeks ago when I ordered a 5mm tap and got a 1/2″ drill bit.
I emailed them with the photo above and in less than half an hour they replied:
I apologize we delivered the incorrect item. We will issue a replacement for the material you didn’t receive. We will deliver a replacement on Thursday between 2- 4pm.
There is no need to return the drill bit to us. Feel free to keep or discard as you see fit.
And two days after that, I had the tap in hand. No fuss, no excuses, no requirement to return, no RMA bureaucracy, no customs clearance hassles (they always deal with all that), and zero cost to us.
All companies make mistakes, what differentiates good companies from bad ones is how they handle their mistakes. It don’t get no better than McMaster-Carr.
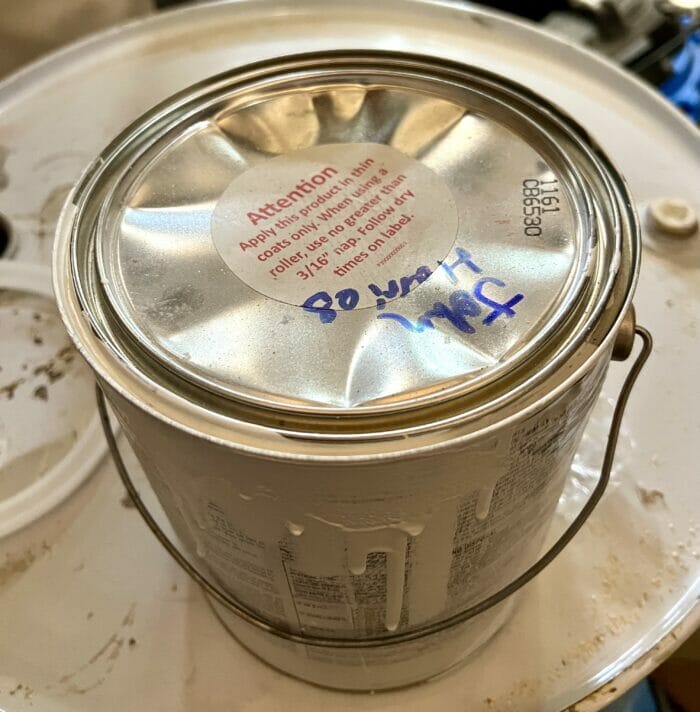
In this case there is $250 worth of my paint in this can that will likely be ruined by next season.
I have brought this to the attention of the yard in question. All yards make mistakes, but if we want things to get better we need to bring it up when they do, but in a non-confrontational way—more yard management tips here.
As I’m sure most of you know, the right way to seal a paint can is to first press the lid down firmly with our hands and then gently and progressively, while working around the can, tap the rim into place with a wood or rubber mallet.
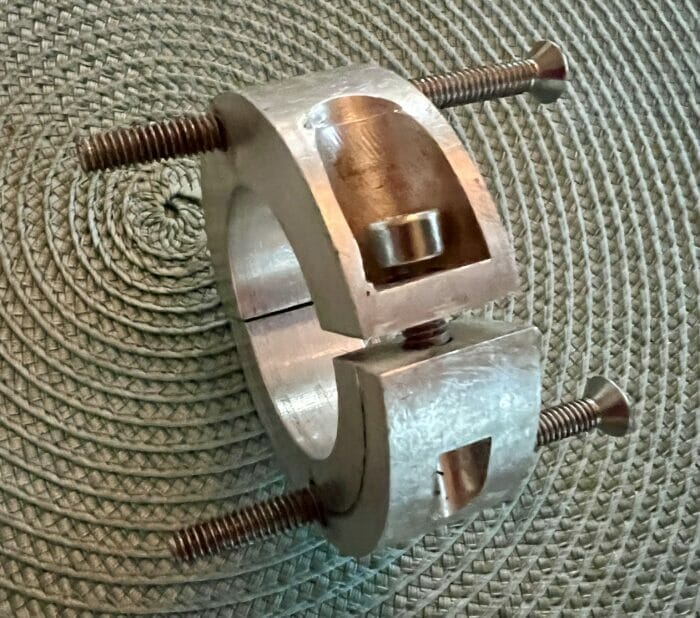
Ever tried to get the bellows perfectly compressed to specification on a dripless shaft seal, while at full-arm stretch in the bilge, and then get the little set-screws tight before the stainless steel rotor slips back?
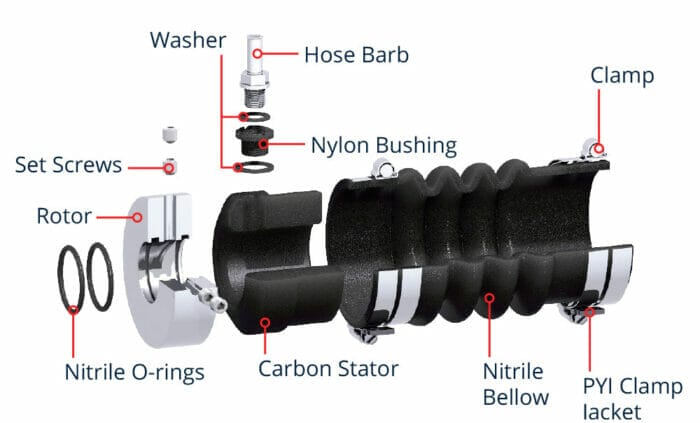
Sucks, right? But if we don’t get this adjustment right think sunk boat.
Our friend Phil, he of the amazing salvage, made this gadget up for our friend Hans, he of the great in-boom furling tutorial.
Very simple, very clever, and easy for a machine shop to make.
And, after getting the bellows adjusted right, we could even take the jacking screws out and leave the tool clamped down against the rotor for added security against slippage.
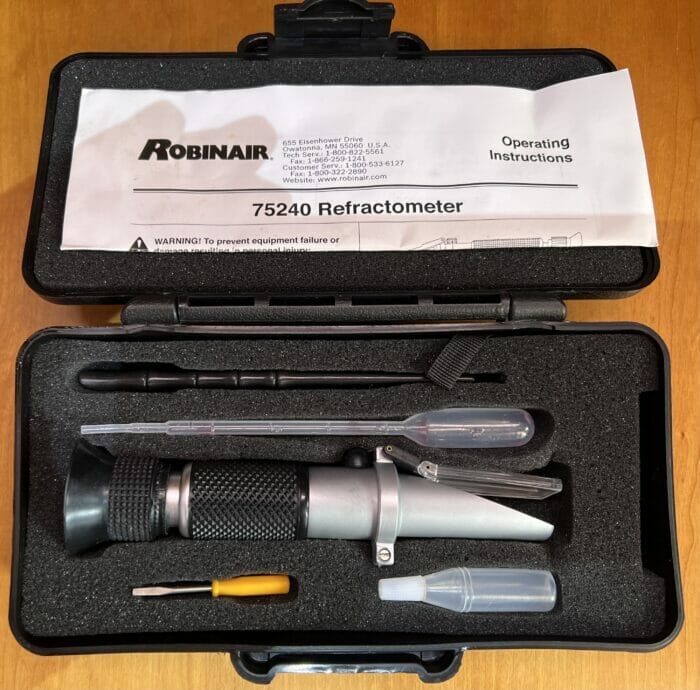
I confess I used to just flush out the systems on our boat until the antifreeze came out the end looking “pink enough”.
But that approach can either result in a lot of expensive damage if the antifreeze is overly diluted by the water in the system, or end up being wasteful and expensive when we “use one more jug just to be sure”.
A refractometer is a way better way and can be used to check liquid-filled batteries and engine antifreeze as well.
My kit cost a bit over US$100 when I bought it a few years ago, but I see there are refractometers on Amazon for $20. Anyone have any idea if the cheap ones are reliable?
I was working with a very experienced and smart composite technician today to check out a crack in the gel coat in the bilge of our J/109.
I was pretty sure it was not structural and just the result of sloppy gel coat application but wanted a pro to check.
He sounded it with a hammer, just like anyone would, but then put his hand down as shown and explained that if there is a void he will be able to feel “bounce back” when he taps. Never seen that before.
Good news: all is fine. He figures someone just poured resin in to level it. Seen it before. That said, he is going to grind it out and repair it right with cloth and then brush gel coat.
Says it should take about half a day. The good guys are fast, too. If I tried it, it would take half a day to get the resin out of my hair, never mind the repair.
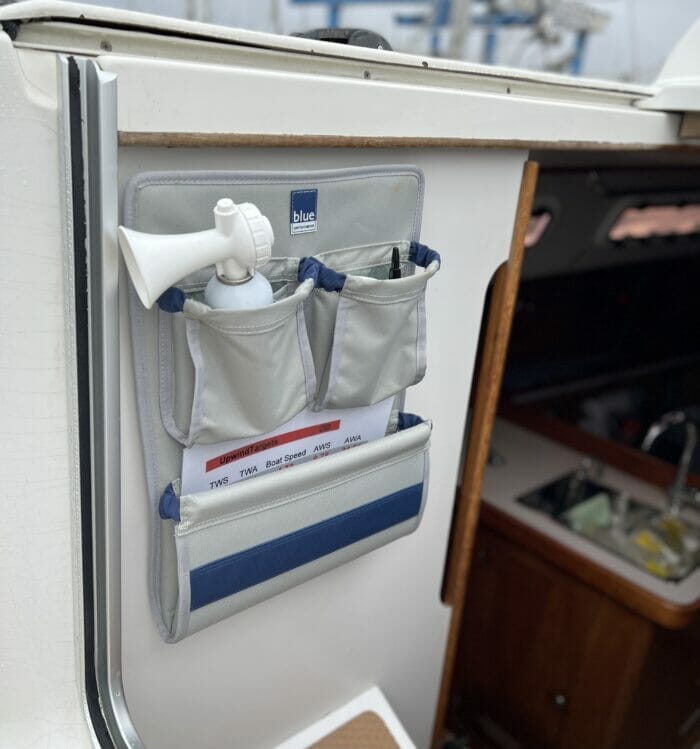
It’s so easy to get fixated on expensive updates to our boats, like cool electronics or new electrical systems, but sometimes things that cost relatively little deliver big benefits.
Phyllis and I were chatting during our last sail of the season about our favourite upgrades to our new-to-us J/109 and both agreed that the Blue Performance pockets at the companionway was a big contributor to our enjoyment.
Stuff that we use all the time is now close to hand:
Here’s how we installed the pockets without drilling holes.