
No one would ever accuse me of being a good carpenter. Wood-butchery is a better title for my efforts. There’s just something about the time-consuming finickiness of carpentry that does not work for me.
Give me a wiring, mechanical, or rigging task and I’m into it, but for me carpentry is just about getting it done.
That said, during my over six decades of boat ownership and four refits—I do stupid stuff so you don’t have to—I have been forced to learn a few carpentry skills while completing a bunch of projects, including a new chart table, redesigned forepeak and much better sea berth, to name just a few.
All of these, like most any carpentry project around a boat, have one thing in common: Cutting out expensive bits of wood to fit in irregularly shaped spaces.
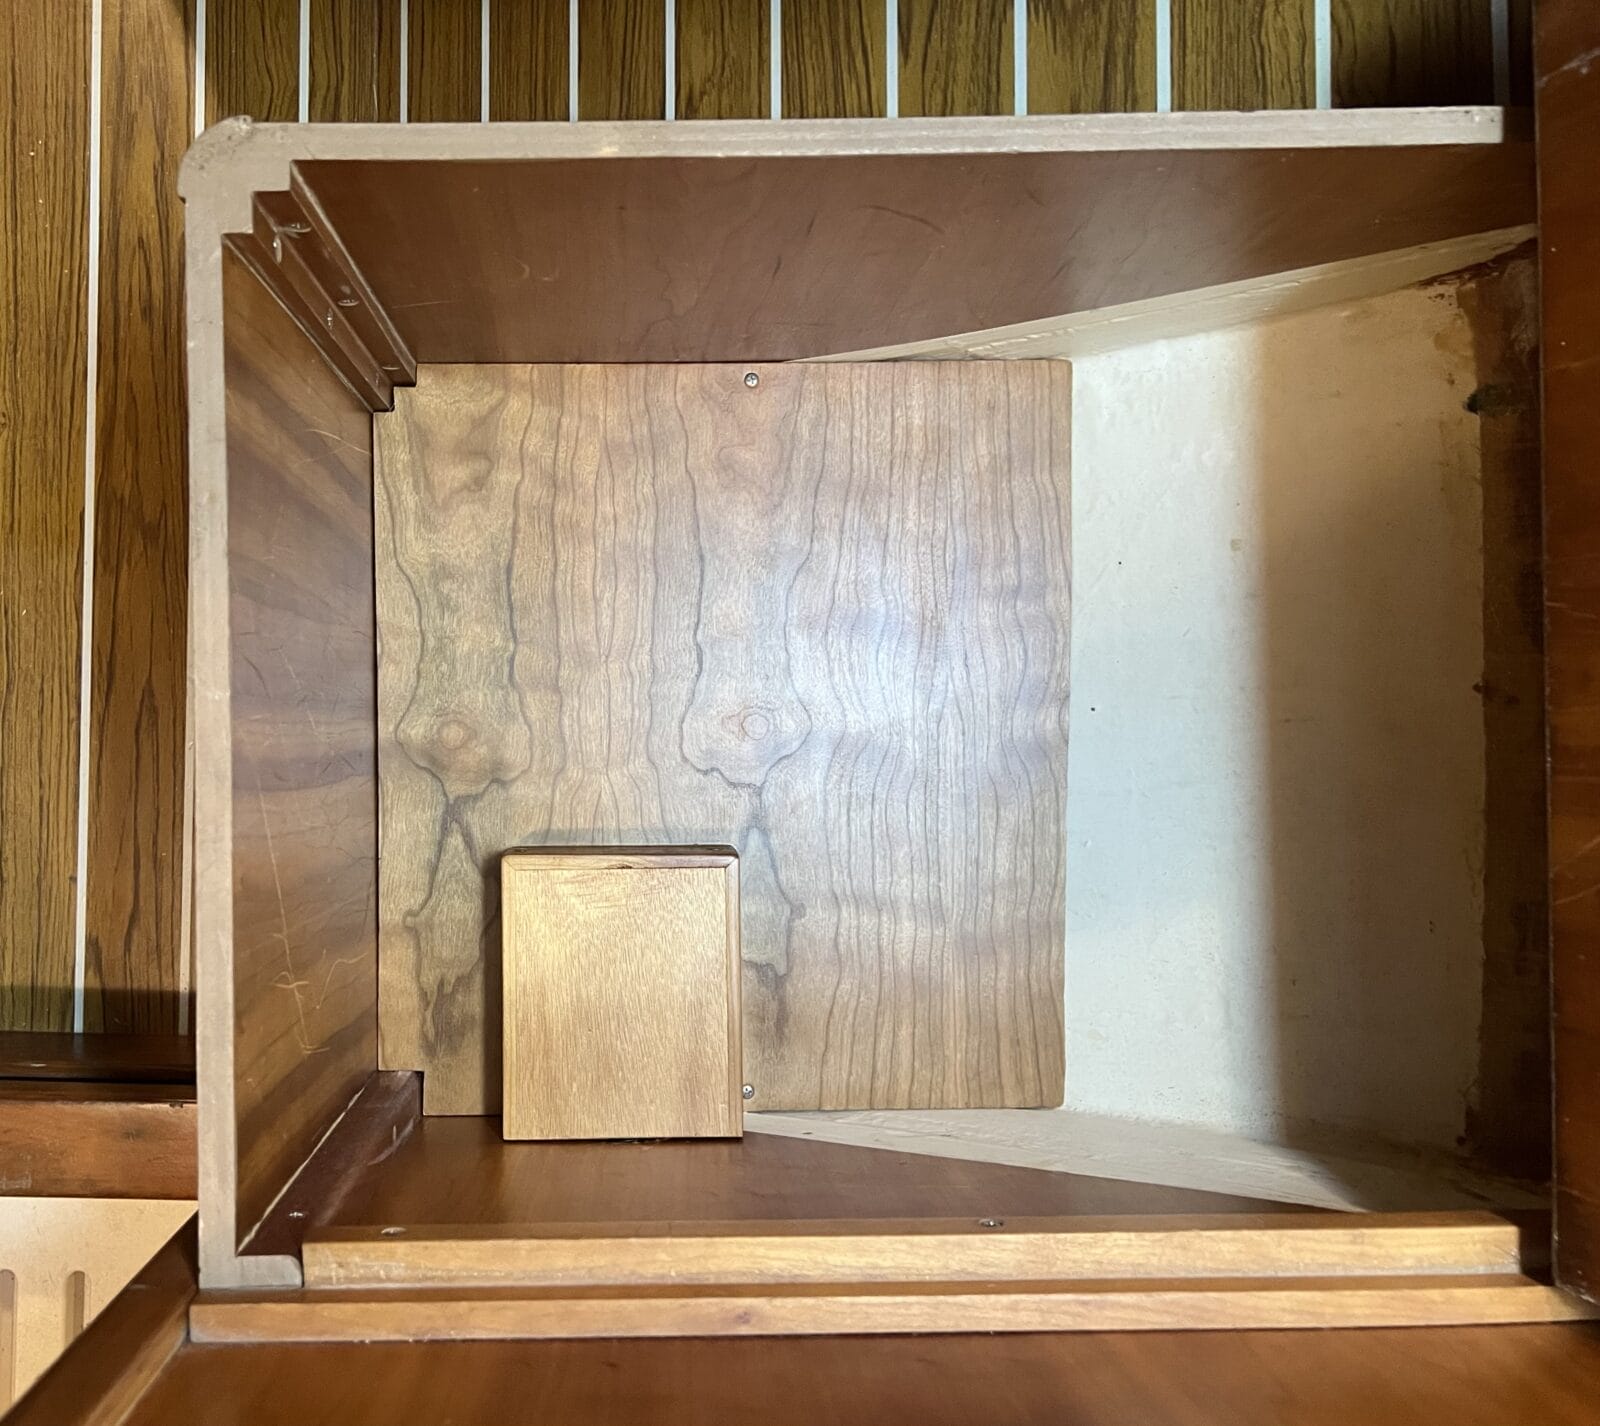
So here’s a photo Tip on how I built the bottom of the locker, shown in the shot at the top, in a surprisingly short time (surprised me anyway), without any screw-ups or wasted materials (even more surprising to me).
Another trick: For those fiddly corners, make small templates at the whole corner. Then tack these on to the long edge strips. Smaller corner templates are easy to handle and adjust. And easier to redo if not quite what you want without much waste. Back side of corner can be straight across, that is; start with a triangle or trapezoid.
Hi Randal,
That’s interesting, but I have a hard time seeing how it would add any precision or speed to the process. Waste is not really an issue when are using gash plywood strips. If you mean doing the corner in one piece of wood, in my experience that takes way longer because it must be shaped instead of just sticking on bits until the shape is fully covered. What am I missing?
For smaller templates use poster board, a scissors and two inch cheap masking tape. Tape the pieces together as you dial in the shape. Tape all of the overlaps on each side to stiffen it up. If your template is starting to sag, it’s too big, or needs a stiffening piece added. In your example, the poster board could have been used for the small detailed corner. The use of the cheap ply was perfect for the size of your project
Hi David,
Sure, easier to cut out, that said I always find that with take things move or I end up with it stuck to myself, so I prefer the glue gun. But that might just be me.
I sometimes use 2” tape too, but first fold about half an inch over onto itself so the outer edge is stiffer and not sticky. Then place it up against the detail and press the remaining sticky side down against the plywood/boxboard template body. Narrower tape can be used to follow sweeping curves, or be cut/folded sharp and used for arrow shaped thingies (my wife and I are fluent “thingie” speakers…). Or set your dividers and scribe an offset curve onto the template to capture an irregular shape. I’ve used a “story stick” for bigger stuff, but nothing beats hot glue and sticks of scrap 3mm ply or boxboard.
John, oh John, you’re going about this totally wrong. Don’t use plywood templates, that’s too old school and not nearly accurate enough, and you’re spending manual labour hours to do a machine’s job. Better idea: Bring your portable CMM ($10k-$150k) into the cabin and use it to trace the exact inner profile of the space in 3D. Import that data into SolidWorks ($3500/year). Draw the components in 3D and export them to DXF cutting path files. Load those onto your 48″x96″ CNC flatbed cutting table ($20k), secure your piece of fine mahogany BS 1088 marine ply ($240), and make the cuts.
Your way takes half the time, 30% of the materials budget, and 5% of the equipment budget of the proper modern way, and the difference in the boat’s resale value will be remarkable – your boat could have been worth $20 more had you done it accurately with CNC tooling.
Hi Matt,
Well that brightened my morning 🙂
Hahaha! But what about the 500-1000 hour software learning curve? I’m all for tools, but it’s hard to beat hot glue, door skins and a pair of tinsnips for making patterns for a ONE OFF. I built an entire 13.5m boat interior using John’s method. I could make a template in less than 5 minutes, cut it in 10 minutes and be gluing it in place in another 10. Now, If I had 10 or 50 to make, then the investment amortization for a digitized approach might work out. I saw some damn impressive things at the Hallberg Rassy facility last fall. But they still do a ton of handwerk, even on their CNC–cut parts. And you should see their bent-wood system!
Sadly, you are only too correct.
The sweet spots are either do as John described, or go one step up and work with better cabinetry tools.
I haven’t thought of the glue gun technique before, and I really like it! It does require a glue gun and power, so what I have always used is cardboard, and tape. I find it quite fine to put the corner of the cardboard towards one edge, and then towards the protrusion in the corner and “parallel trace” (in lack of a better term) the weird shape in the corner. I have always got pretty good results from just hand tracing it with a pencil and using my finger as a “parallel-displacer”. Then cut the cardboard with scissors, and measure for fit. I do one corner at a time usually and tape them together.
How do you transfer your glue gun construction over to the final piece? you just put it on top and trace it by hand/eye even if it will be a centimeter or two above the work-piece?
This feels weird to try to describe, as I hardly know what to call any of this in my native Norwegian, let alone in English! I think this has been one of the more amusing articles and tips sections I have read for a while! And also super useful! Kudos as the cool kids say!
Hi Arne,
Yes, the drawback of ply is that tracing is a little more challenging because of the separation from the ply being cut out, but then I was not too worried about perfect accuracy, and if one is it’s quite easy to transfer down using a set sqare and an awl to prick marks.
This is by far the best way to make patterns and any shape for a boat when doing joinery/ carpentry. I’ve used this method for years and was shown this holy grail technique by a chap called Morgan MacDonald a relation of Don Street about 25 years ago. The funny thing is though every time you let anyone into the secret they always suggest another “better method” just like all the comments above. This is the best method for sure. Happy you’ve found it John.
Hi David,
You know, I can’t even remember now where I learned this, but I’m guessing Bruce Bingham, although I came up with the glue gun only a little while ago, after years of using screws. See the last shot.
Wood butchery. I like that. My efforts resemble that. My goal is improvements and modifications that go unnoticed. Mostly I get there. Mostly.
This morning I fabricated some metal working tool/accessories through a combination of welding and metal lathe work. They function perfectly, but they will never be featured on a You Tube show-off video. Sort of ugly but strong and functional.
My projects are “workmanlike” rather than works of art.
Gorilla–strong, I like to call them. Not pretty, but will never fail.
Hi Drew,
Yes, and if I recall right, you also get out sailing a lot, winter and summer. In my experience there is an inverse correlation between perfection and time on the water. That said, I am a perfectionist, as are you I think, about vital stuff like the rig. It’s all about prioritizing, in my view.
Machinists like to show off their shiniest, most precise shop-made tools on You Tube. Other will admit to using what we call “donkey tools,” which are just as strong and precise in the dimension that matter, are constructed in 1/10th the time, and get the job done for years. Most machinists would rather spend hours on a milling machine rather than weld two parts together in 5 minutes.
Here’s a link to how I used the thin plywood template technique to create the interior of our Dix 43 Helacious. It’s the same basic approach that kitchen countertop pros use to cut the granite, marble or Corian for a kitchen remodel or build. Easy, foolproof and fast.
https://www.odysseyyachts.com/Odyssey_Yachts/BUILDING_BLOG/Entries/2012/8/22_Master_Cabin_-_Overhead.html
Hi Brian,
Much the same idea, only you are neater than I am, even with your templates! Nice job.
Shipbuilders used to use something called a Tick Stick to make irregular shapes templates.
https://smallboatsmonthly.com/article/a-quick-tick-stick/
https://www.popularwoodworking.com/editors-blog/fit-irregular-impossible-shapes-ticking-sticks/
Hi David,
That’s another good idea. That said when I tried tick sticks years ago it did not go that well for me, hence the above template technique. Probably more my screw up than anything intrinsically wrong with tick sticks.
I am a member of wood butchers anonymous myself. 6 feet away? Magnificent. Up close? Wood butchery.
I do like Matt’s way too. In fact, I know that guy.
(My grandfather used the term wood butcher for anyone using a crescent wrench or pliers.)
Great tip.
Templates are your friends for sure but use doorskin plywood (super thin and cheap, like $20 for a 4×8 sheet) to save time and effort. I’m doing a refit now so keep a stock of 2” strips on hand for just this purpose. The material is so thin that you can score and snap it cleanly with no need for a saw and because it is thin, it is easy(ish) to get an accurate transfer of your pattern to you plywood. If you want to graduate to next level carpentry without adding time and effort (yes, really) you keep your pattern strips on the same plane and use smaller pieces on top to tie them together.
On a side note, I have found a pro-level hot glue gun with appropriate glue sticks to be an incredibly versatile thing to have for temporary joints. I used mine to hold the routing fixtures in place on the side of the hull when I made the cuts for our bow thruster install.
Hi Torsten,
Door skin ply is a good idea, thanks.
Couple tricks I’d add with the door skin from when I installed granite countertops:
Sharp olfa knife and break the blade fairly often, as only the tip is doing the work, no sense fighting your tools. I like the black carbon steel blades better.
Always cut on the side where the grain runs perpendicular to your cut, bend away from the cut until you here a crack, then back the other way. Or just keep going until it breaks fully, but it’ll tend to be rougher. Back bevel the parallel grain side with the olfa knife after near areas you want accuracy. I always work with the light side up, for ease of marking. If feeling fancy, and I’ve got tricky, short curves I’ll do ‘pointers’ or even shape it a little with a surform. Otherwise, I just trace the line with an offset, usually by using whatever washer was floating around the toolbag and drawing along with a sharpie, or for really rough work, just shave slices off the edge with the knife until it’s close enough.
In the same vein, if feeling fancy, I’ll try to keep all my template pieces flat, and tag them together with scrap bits near the corners as a 45 ish brace, and several cross pieces in the middle If not feeling fancy, I just alternate, lower layer and upper layer as I go around the edge to avoid distortion of always adding on the top. Throw a few scrap bits on as bracing if needed.
Feeling fancy is directly proportional to how expensive the material will be for me to replace if I’m wrong, in both time and labour.
Every few years I break out a 4×8 of XPS foam, and rip a couple sheets into strips on it with a circular saw, the factory guide is good enough for me. Usually a mix of 2″ and 1″ 2 Is great for long runs, but small bits like the locker floor you made, 1″ is faster and easier to get around those corners. Door skin and a small table saw have never worked well for me, too wobbly and prone to binding.
Hi Star,
I can see that a knife would work better on door skin, than a saw.
A skilled kitchen fitter made me a Corian work top for the galley (he was neighbour). He showed me the template skills you explain. He also stated that you should write notes on the template, like this way up, hole here for 15mmm pipe, et cetera. I bought 3mm x 1000 mm x 1000 mm birch ply sheets (modelling ply) and rip down to 3″ widths for templates, thinner if required. Very easy to cut with sharp scissors or box cutter knife where more finesse is required. I don’t get fussed over glue, the lowest cost glue gun sticks are fine.
Nice job by the way, not wood butchery at all.
Hi Alastair,
Really good point on writing notes, I always do since I know from experience never to underestimate my capacity to screw up! Thanks.
And I love Corian for galleys: https://www.morganscloud.com/2018/04/13/8-things-i-learned-from-a-lazy-mans-galley-makeover/
Hi John,
I am also a proud member of the wood butchers club (great name). This can be a bit embarrassing given all the old wood boats I have worked on but there is usually no shortage of people wanting to do fine woodwork and I stick to things like replacing planks which I can do just fine and to plenty high precision.
I only learned the glue gun and doorskin ply trick relatively recently and it would have made my life so much easier if I had known it before. Instead, I used to spend way too much time with a compass splining things or with a jig stick both of which take much longer and have higher chance for confusion. So your technique gets my full endorsement.
Eric
Hi Eric,
Welcome to the club! And thanks for the fill on splining. I have watched the pros do that when fitting planks etc and they make it look easy and quick, but like the tick stick, it never worked out well for me.