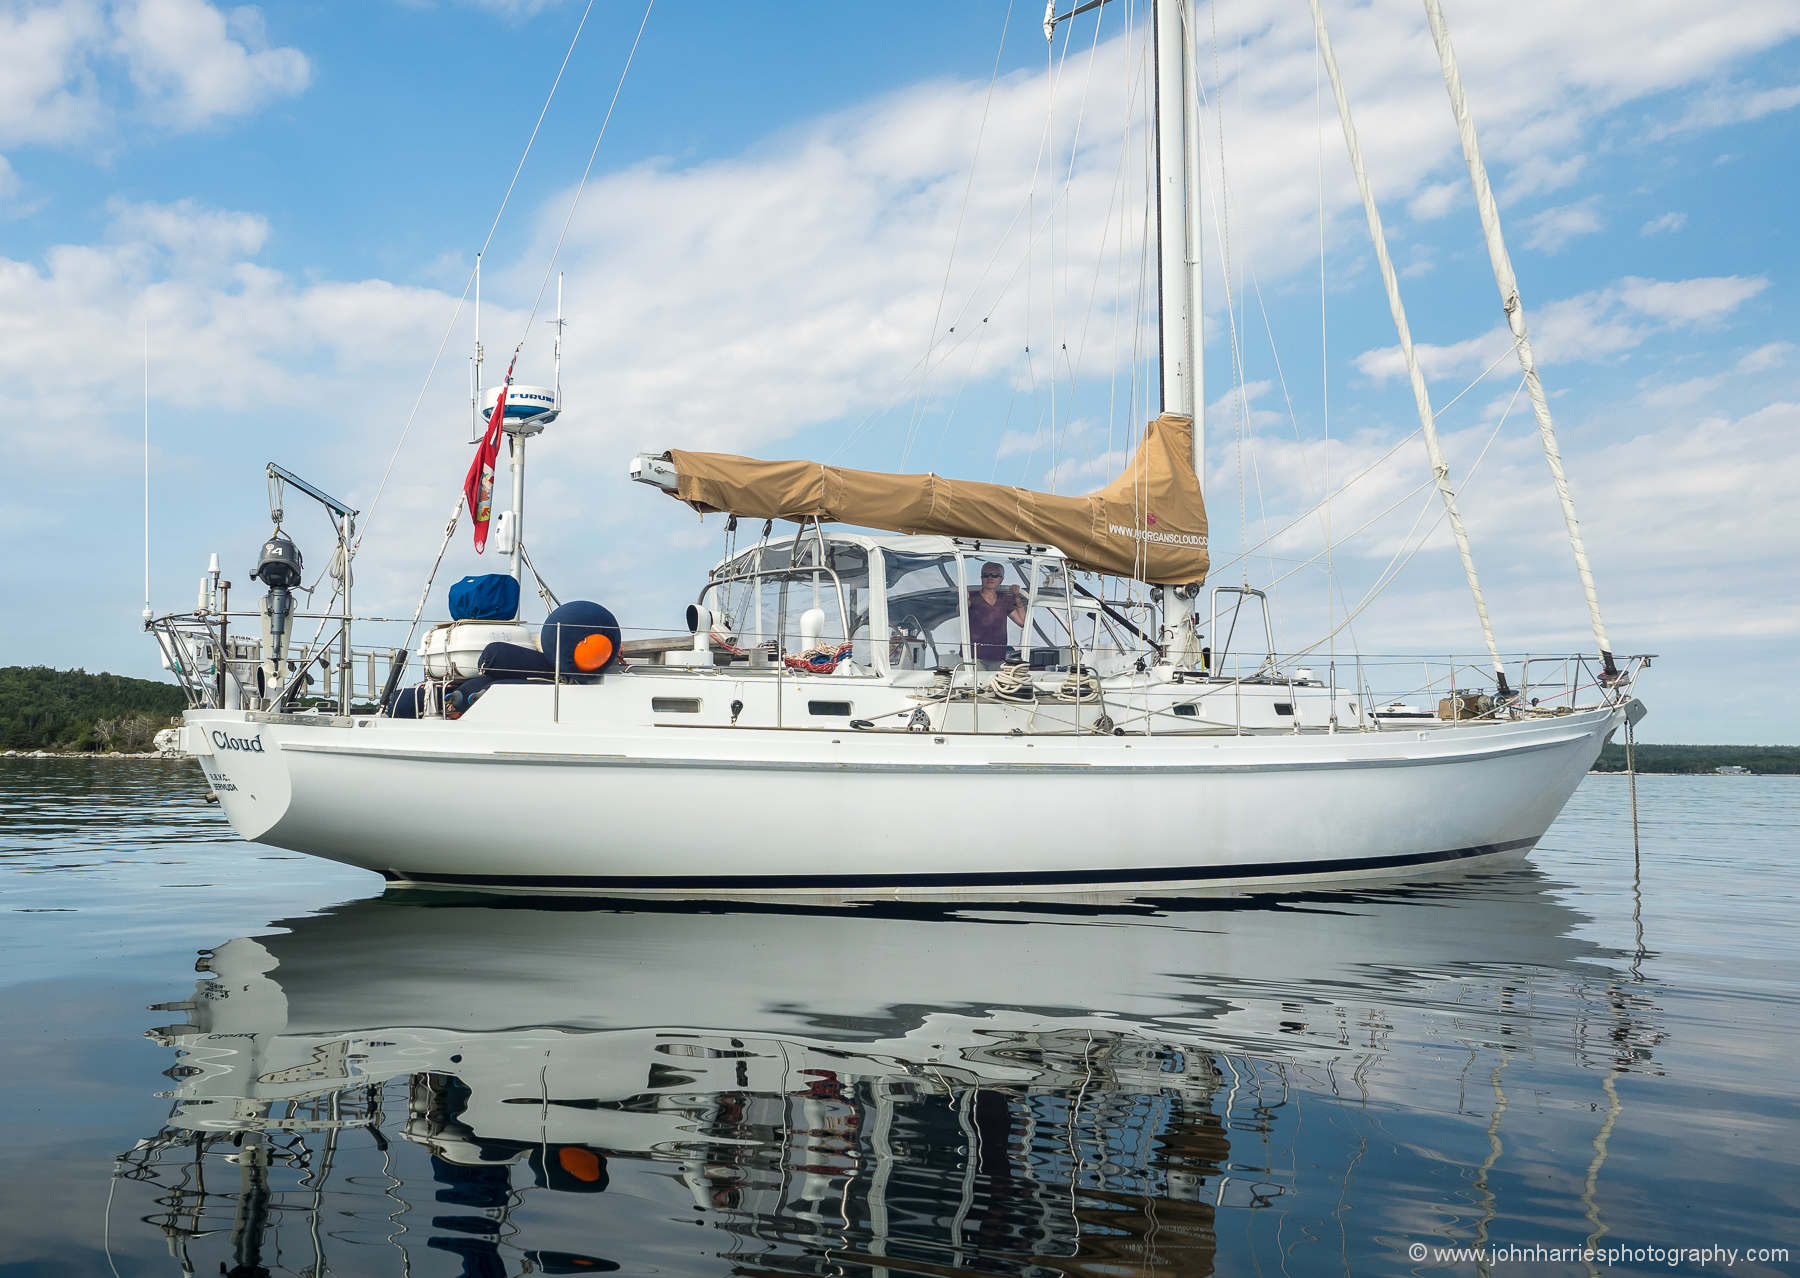
In Part 1 I wrote about my conversion from a dyed-in-the-wool cockpit enclosure hater, to an enthusiastic convert, albeit with reservations.
But not to just any cockpit enclosure. Phyllis and I wanted a sailor’s cockpit enclosure. Achieving that end was, as always with voyaging boats, all about compromises, mind set and details…lots of details.
And that’s what this post’s about, with lots of pictures of what we got right, and one or two of things that still need work.
I think this illustrates that habits of mind and of sailing are as important as construction and materials. Your willingness (and readiness) to take the enclosure apart in a blow is obvious to me, but not obvious to the many boats with enclosures I’ve seen where they’ve been buttoned up in bad weather…until they leave at an angle.
Hi Marc,
I agree, when thinking about enclosures (and most things), good seamanship does not come from gear, it comes from attitude.
Hi John,
Sounds and looks good.
For those who are designing enclosures (or already have one), a suggestion: The panels around where one exits and enters always seem to take a beating, especially the zippers. We hold ours down (see 1st part for description) with shock/bungy cord which allows for a our clumsiness exiting and entering when bouncing around under sail to be absorbed by shock cord rather than the panel fabric/plastic or, more likely, the vulnerable zippers.
And, a couple of questions: Any thoughts on how an enclosure on a smaller boat might work, say the Adventure 40 size? It seems that smaller boats are less likely to have a robust hard bimini aft or other strong tie downs to use.
My best, Dick Stevenson, s/v Alchemy
Hi Dick,
Good Question. I think that as boat’s get smaller a good enclosure gets more difficult to do, although, on the other hand, a smaller boat’s enclosure will be, in turn, smaller, so the wind loads will be lower. As to the A40, that should be easier since there is a hard dodger that will give a strong starting point to attach to. Add a couple of 1″ pipe bows securely fastened and I think all would be good.
A few thoughts, based on my experience, and also on a bunch of testing I have been doing for Practical Sailor (I’ve had test panels with ~ 30 windows up for 5 years).
1. Fold up is better than rolling or fold down (my forward windows fold down). Less scratching. Mine fold or roll down: hard to roll when cold and always a scratching risk; Forward the wind can catch them (I should add hold-down snaps–it would only take 2 each–just thought of it!) and I can step on them if careless; in they can rub on the slider.
2. Colder it gets the more chance of breaking, particularly after 5 years. I try not to move them below 50. I’ve had them shatter below freezing just from cleaning.
3. For more flexible vinyl try O-Sea. Coated like Strataglass, but better in every way. Just less used in the marine sector, but big in the high-end convertible business.
4. I like View Guard better for cleaning. Sheets the water better. I use the Imar cream.
5. You can make extenders for most fasteners. Yup, they swear the materials don’t shrink, but…. Take Sunbrella or similar, laminate 3 layers with Sika 295, 3M 5200 or similar, and then put a male in one end and a female in the other. The 3-ply laminate is easy to make and tough as nails.
Hi John,
I spent a couple of weeks on this boat bringing it up from Panama. The hardtop design worked out really well as a basis for removable panels that allowed full breezes in the heat and weather protection when needed. No reason why the same concept couldn’t be expanded to form a basis for the complete enclosure you have worked out for colder climates.
http://www.sailmagazine.com/boat-reviews/perry-59/
Hi Richard,
I think you make a good point that having a hard topped bimini and dodger, as we did, gives a much better start to building a seamanlike cockpit cover.
It may not be immediately apparent, but this design is a “super hardtop” strong enough that the traveler for a 1,000 ft mainsail is mounted on top. So no worries about it being destroyed by wave or wind impact.
Nice job John.
Just 3 points.
When we roll up the side curtains, we put a towel material in between, which prevents any scratching.
We store the rolled up curtains in a vertical position in order to prevent sagging .
We use the 3″ diam cardboard tubes to facilitate the rolling up and pull it outbefore storing,
as some curtains are 3ft or more wide.
Hi Rene,
Wow, you take it to the next level. That said, I’m not sure I could see us going through all that every time we wanted to roll the curtains up, particularly as we do that every time we sail. Also, while vertical storage sounds good, I’m not sure how we would ever find a place for that, and anyway our horizontal bags seem to support the curtains quite well.
John,
Great articles on hardtops. If you visit our website you will gain information on the Seaboard (Starboard) Hardtops that we build. We recently built one for Andy and Mia Schell on Isborn. I’ll be interested on your comments if you have a look at our product. I work with Dan Wood of Canvas Creations in Annapolis for installation and canvas finish work. We have built dodgers and biminis for sailboats and a few trawler biminis.
Thanks for sharing your article on hardtops. I hope I get the chance to learn more about your experiences as I find your work very helpful.
Best regards, Bill Creadon
We bought earlier this year a Sabre 38 named Lighten Up which has a hardtop bimini that you may have designed. The rear bimini had soft solar panels attached. It was seriously damaged in Hurricane Matthew a couple weeks ago. Please contact us to discuss repair or replacement with a soft bimini. Please call my partner and joint owner, Glenn Coe (860-490-7482), at your earliest opportunity. The vessel is at the Adventure Yacht Harbor in Port Orange, FL.
Hi John,
Yes, it is a bit of work, but in summer we don’t use the curtains much, when the sun may do most of the damage. Had not noticed your horizontal bags earlier, which will do the job too, instead of vertical storage, great idea………… thanks.
Hi John,
Great to see you have finally given in and enjoyed the luxury of a cockpit enclosure. Did you consider making it from Hypalon? We had one installed on our Beneteau 473 when we were away for a year with our kids. It was fitted by the previous owner in 2010 and has survived tropical sun with no signs of damage (apart from the threads as often happens). Our enclosure was open at the back, but was still a fantastic place to be on deck and we rarely got wet whilst on watch! We also had 2x 200W solar panels installed above the enclosure which worked a treat and generated all the power we needed including running a freezer and water maker. Like yours, ours was made from larger than normal diameter tubing making it really solid.
Thanks for the article!
Hi Rob,
No, didn’t consider Hypalon. I fact I didn’t even know you could use it for anything other than inflatable boats. That said, we are pretty happy with the material we chose and have a long history with it, see the post above under “Fabric”.
We are considering a couple of smaller panels, but they will have to fit in such a way that they don’t compromise sail handling, particularly since we like to be able to stand on both our dodger and bimini so we will have to look at whether the additional charging capability in relation to our quite heavy usage is worth the clutter, and expense.
You’ve specified the fabric and clear panel materials, but did you mention what the hard top part of your enclosure and dodger are made of? I’m planning an arch for my sailboat to mount radar, wind turbine and solar panel and wanted to have a hard top instead of canvas, since it will be pretty much permanently in place. I was thinking of using starboard but have no direct experience with it. Have you any recommendations?
Cheers,
Hi Robert,
Our dodger and bimini hard tops are made, just as Dick suggests, from cored fiberglass. Balsa core for the dodger and bruynzeel marine ply for the bimini. We can stand on both, which I highly recommend. And that’s the reason we don’t have a bunch of solar panels on them as well.
Hi Robert,
Starboard is wonderful stuff and great for many boat parts/projects, but not, I think, for a hardtop. It is very heavy (even the less dense alternative) and suffers from creep/sagging for even small areas that are unsupported. The best dodger and hardtops I know of were of fiberglass (cored and using exotics for strength and light weight) and made by skilled experienced people (homemade). I suspect there are those who make them nowadays commercially and do a good job. My take is you need a craftsman with a bit of artist in him/her as it is not easy to make them look good (and easy to make them look lousy).
Let us know how your researches evolve.
If your hardtop is more like a bimini (ie. not needing to support a person’s weight) and you want solar panels, I have always wondered about a robust frame supporting the solar panels and having no “top” at all. Let the panels provide the shade and rain protection, maybe with some sections of canvas in between. The solar panels would stay cooler that way also as it is great for them to have air flow all around.
My best, Dick Stevenson, s/v Alchemy
I’ve also been considering the possibility of using the solar panel as part of my shade device. The arch itself will comprise two 1″ or 1.25″ dia. steel tubular arches spaced about 16″ apart with rod and plate to join them together in key places, so I don’t think it’s a large unsupported span for a reasonably robust material. I won’t ever walk on it. I could also consider polycarbonate like what is used by most hatch and porthole manufaturers. I could source a shaded polycarbonate to match those of my port lights and hatches (kind of dark smoked colour) and then have it thermoformed to fit the arch curves not covered by the panel. That would give plenty of protection from sun and elements, would look pretty good I think and rigidify the parts too. Has anyone ever seen translucent or opaque polycarbonate used on a bimini?
Hi Robert,
As a bimini that will not be used for standing on (like most biminis are used) I think using solar panels for shade and having no “lid” besides the panels has real possibilities in terms of weight savings and energy generation. The panels may be able to be “butted” together which would make their function as a rain cover a bit more viable. Biminis are often not perfect rain covers anyway, especially if you can stand under them as the rain is swept under it. lower ones can be cave like but more effective. Polycarbonate and or canvas can mold over the edges to provide increased protection if wished for.
Seat of the pants thoughts.
dick Stevenson, s/v Alchemy
Hi Robert and Dick,
My general thinking on biminis is that either they should be solid and strong enough to stand on, or soft and able to fold up out of the way. The reason is that I value sailhandling ease over all else and therefore I want full access to the main boom for things like tying in a reef or fixing a problem. What I don’t want is a structure that I can’t stand on, but also can’t get out of the way. I know, old fashioned, but there it is.
Hi John,
I think many biminis are abaft the boom. I know mine is and it is completely free of sail handling operations. This may be the case mainly for aft cockpitted boats and maybe not all of those. These biminis where there is no access to the boom would have no need for a surface to be able to stand on. They would still need to be very strong as they could not be removed for storms, as I can with my soft canvas bimini. What I am envisioning is similar to the arrangement on many boats with an aft arch and solar across the arch. Extend that 2 or 3 across solar array one additional row forward stopping well aft of the boom end would work, I think, on many aft cockpit boats. It would provide a fair amount of shade, a good deal of power and some protection from the rain.
My thoughts, Dick
Hi Dick,
I agree, if the bimini is well aft of the boom end, then all is good.
This is how our solar arch works. The boom and fall of the main sheet are forward of the leading edge of the panels, which *are* the bimini. The small gaps between the panels will be spanned by strips of snap-on fabric which can be gasketed to collect rainwater. The arch is cambered to shed water easily. Add weather cloths and we are much of the way to an enclosure, but without a dodger as our aft deck is higher than most.
Hi Dick,
I thought you might be interested, as we have just fitted our new canvas Bimini designed to accommodate 4 flexible solar panels and retire our old, heavy and stupidly sited 4kVA diesel generator. The Bimini now has four bows instead of three, stronger 1 inch pipe and greater curvature (really important) on the bows to prevent water “pooling” around the panels. Two solar panels lie athwart-ship (almost meeting in the middle) between the two forward bows so they rest on canvas and are not bent over a bow causing wear to the canvass and damage to the panel. Two more panels lie between the aft two bows. There are no solar panels in the middle Bimini section, as we wouldn’t be able to safely reach in that far. The solar panel edges are zipped on (except for the inboard edge which have velcro under as they cannot be reached easily) and are connected electrically on the outboard side with snap together (watertight) connectors, again designed for easy access and removal. We then used soft flexible single core copper cable (the solar panels are wired in series), which is permanently run in the Bimini bow channels so all the cables are hidden from view and the wind (there are two custom canvas channels sewn in, running fore-and-aft, one each side). Because these connecting cables are soft (not the normal stiff solar ones) they fold up tightly with the canvas – very important to reduce windage when stowed. Finally, there are four forward facing adjustable straps holding the Bimini down. With the solar panels removed (for winter or storm) the whole Bimini folds back to the rear, and stows neatly in its cover. My test-stow yesterday took less than 5 minutes to complete alone (albeit in harbour). I was really pleased with the aesthetic result, definitely not walk on (no need since we have an aft cockpit like you ), but absolutely fold away.
My one (sailor’s) reservation was the added weight aloft with the four panels (3Kg each) and the additional bow, plus using 1 inch pipe. Even with the stronger pipe, and two additional small cross-bracing supports to the aft push-pit recommended by Doyles in Auckland, there was a disappointing level of lateral wracking that I could induce.
Since the rear bow sits neatly just forward of our split backstays, and the aft supporting legs run down between them, I thought this may provide a solution. I took two old Harken dinghy blocks, drilled out the old rivets holding the block cheeks / sheaves and replaced them with new clevis pins and split rings. I then re-assembled a block around each backstay and lashed them with equal rope tension to the connection joint of the rear most bow and the two aft leading stainless pipe support uprights. This new bracing, being up high on the Bimini, immediately reduced the wracking of the Bimini (even right forward) remarkably. Then when I tensioned the split backstay, the Bimini became almost completely rigid – like a hard top! Using the blocks I hope will prevent any chafe on our Dyneema back-stays – they certainly turn freely when I wind on the back-stay.
Cost of the new Bimini and solar panels – don’t ask but less than a re-sited new generator.
Cost of securing it all – $5.
Best regards,
Rob
Hi Rob,
I really like the way you have come at this to insure that you can easily remove the array and properly secure the boat for a blow. Un-seamanlike solar arrays that will start flying apart in a gale, or restrict proper handling of the sails, are one of the most worrying modern trends I see.
Thanks John, Dick,
It was thanks to your article John: https://www.morganscloud.com/2011/02/25/clear-the-decks-for-action/
And Colin’s:
https://www.morganscloud.com/2012/11/10/staying-in-charge-part-iii-solar-power/
that got my thinking straight on this in the first place. As long as I could reach and safely secure/detach each panel at sea, I was always confident we could control the Bimini stow since it has a symmetrical hinged design. My biggest concern was always the extra weight aloft. The backstay solution proved serendipitous, especially since I was also having a problem with our Dyneema backstay creating banshee like vibrations and noises over 20 knots of apparent wind. I was thinking of questioning Andy Schell in his series on soft rigging about this – but the new Bimini arrangement has fixed the problem completely!
Finally I should have mentioned one other important point that might be overlooked about safety of the solar array, wired in series as ours is. We regularly see solar voltages over 100V and currents up to 40 amps, so it occurred to me that standing up on the aft locker seats, at sea in sunny but windy/sea spray conditions, unclipping live power connections might not be that clever – we are fitting an isolating switch inside the lazarette.
Rob
Hi Rob,
An excellent report full of many wise decisions. Thanks for the details.You have the makings for an article which, with pics, could grace the pages of many a discerning sailing magazine.
My best, Dick Stevenson, s/v Alchemy
I’ve been contemplating (agonizing) over coming up with a hard top dodger and bimini design and am seriously considering using Starboard or Seaboard. I would plan to use .75″ on the dodger with longitudinal stringers every 18″ or so between the 1.25″ fore and aft bows and plan to stand on it to reach my mid boom area. Do you really think that .75″ Starboard would sag? As for the weight issue of Starboard, I was afraid of that too but found that a 54″x96″x.75″ sheet weighs 135# (eplastics.com), and I would probably be trimming about 25% of that off so somewhere around 100#, which doesn’t seem terribly heavy to me on a 47′ boat.
For the bimini, since I don’s need to stand on it but want to be able to easily mount my solar panels on it, I’ve been considering using .25″ Starboard with similar support every 18″, or possibly just converting our existing old sunbrella bimini to stamoid. One advantage of using Starboard here is that I could mount the solar panels directly on it, which would gain me an inch or two of standing headroom under the bimini and still have adequate boom clearance above. Or does anyone have a clever way to mount rigid solar panels very close above a fabric bimini without having leaky holes for the supports to pass through?
I’d be interested in anyone’s thoughts on the above, especially in regards to using Starboard as I’ve described? Thanks!
Jeff Totman
S/V Airmid
Hi Jeff,
I would strongly advocate against starboard. In fact I hate the stuff. The main reason is that it has extremely poor strength to weight ratio and truly terrible thickness to stiffness ratio. Also, like all plastics, it deteriorates in UV light.
Pretty much the best strength to weight and stiffness to thickness ratios come from good old plywood. For the dodger use two layers of 1/4 high quality marine ply laminated on the frame to shape. Use epoxy resin. Check out the WEST system since they have full manuals on how to do this. This will easily support your weight, and another person as well.
For the Bimini, just use a single layer if you don’t want to stand on it, or two layers if you do.
If you want a really nice finish that will last a decade or more in the sun (longer than starboard) have both painted with two part paint like Awlgrip. You can probably get this done comparatively inexpensively if you take the whole thing to a commercial paint shop and stay away from the marine painters. And for places where you will stand, use kiwicoat.
Thanks John, That sounds like it might be something that would work well and if I got it painted professionally as you suggest, could look pretty nice as well. I’m going to stop into Hamilton Marines annual spring sale this week anyway for bottom paint and Dyneema for running back stays and a few other things and will also check out WEST system because I know they have a lot of their products in stock as well as the info about how to use them.
Jeff
We experimented with what is known as the Twin Wall polycarbonate in the bronze color.
It is light, strong, effective and attainable 🙂
Good point about the boom access. The arch I’m planning is a few niches aft of the boom so no problem there. But I am thinking of including a hinged forward arch attached to the fixed portion that would have fabric and can be rotated back and affixed to the solid bits to also clear the boom when needed.
I’ll have to look up this “twin wall polycarbonate”. Thanks Rene.
Hello John, this is my first post. I just joined a few days ago. I have enjoyed your content as I do John Kretschmers. I have the only Trintella 55, which was built in England in 2004, with a complete refit just finished by the Gibson Island Boat Works. Below is a picture of the cuddy. A link with more pictures and the specs: Trintella 55C – Trintella Vriendenkring . During the refit we added cuddy fans and a chiller fan unit that provides AC or heat to the workshop/engine room as well as to the cuddy. There is as you noted a solar effect (nice on cold and cooler days) so good ventilation for hot days should be a consideration in design. The aft canvas can totally be removed. We also have forward facing hatches in the top of the cuddy. Ron Holland changed the cabin layout from what is displayed in the link. A workshop replaced the two bunks which are now a Pullman cabin portside forward of the main salon and the double is where they show the head which is to starboard now. As you have experienced we enjoy the cuddy as much at the dock or anchored as we do sailing. As you also observed we see a lot more nature. Paradigm has aft twin helm stations. We use the B&G remote autohelm and displays from the cuddy, however as you referenced in the Platino NZ accident good idea to be at the helm station when a quick response might be needed. Notice the railings from the center cockpit to the helm stations. We tether to those traversing for extra protection. I sailed on Skip Novak’s Pelagic Australis from Porto Williams Chili across the Drake to Antarctica and back. Then two months later in June 2011 from Porto Williams via the Falklands and Tristen da Cunha to Cape Town. We had a pilothouse with a short cuddy aft of the PH. We generally kept the pilothouse door open to try and hear what was happening on deck. This did create a possible down flooding issue. We maxed at 50 gust to 70 off the port quarters with 8-10 meter seas and did not have an issue, however we kept the PH door closed. It was nice to be out of the snow at night while we looked for growlers. The icebergs showed up on radar. An advantage of a hard dodger or cuddy is that there is a traditional companion way that can remain closed for down flooding issues while the crew is still protected in the cuddy providing visual and auditory contact with the vessel.
Hi Charles,
There’s a lot to like about the Trintellas. Good to see that yours has the workshop since one of the things I don’t like about many of them is the way the accommodation is emphasized over and above working areas and deck accessible storage.
By the way, you can’t just paste a photo into the comment, but rather need to use the upload icon. That’s why your initial photo does not show up.
Trintella 55 Paradigm’s cuddy picture
Hi Charlie,
A very nice set up, indeed.