© Attainable Adventure Cruising Ltd and the authors, all rights are reserved.
Nothing on this website or in direct communications received from us, or in our articles in the media, should be construed to mean or imply that offshore voyaging is anything other than potentially hazardous. Dangers such as, but not limited to, extreme weather, cold, ice, lack of help or assistance, gear failure, grounding, and falling overboard could injure or kill you and wreck your boat. Decisions such as, but not limited to, heading offshore, where you go, and how you equip your boat, are yours and yours alone. The information on this web site is based on what has worked for the authors in the past, but that does not mean it will work for you, or that it is the best, or even a good way for you to do things.
It had never occurred to me that running my 12 volt electronics from a DC-DC converter from the 24 volt battery bank, as I do, would effectively isolate them from the leak detector on the 24 volt system. I guess I could install a two-pole switch so that I can switch the leak detector between the 24 volt and the 12 volt systems.
Philip
Hi Philip,
Yes, I think that would be a good idea.
John
Thanks again for the 3 part article. Very informative though I have one questions I have been pondering. When corrosion appears under the paint in the form of blistering, what is the urgency to fix and what are the options? I have an Ovni which I have now had for 18 months. At time of purchase the top side paint was in pretty good condition though now there are increasing areas of blistering. Will leaving the blistering sealed under the paint increase the corrosion and as such should I remove the paint on the offending areas as soon as possible. Some areas I plan to total remove the paint and leave bare though if I start by just removing the blistering areas until I can remove the lot will make the side look scrappy. Though better a scrappy looking boat if that reduces pitting.
Appreciate your thoughts and advise.
Chris
Hi Chris,
As far as I know, and based on my experience with our boat, it really does not matter much either way. The great thing about aluminium is that as soon as it is exposed to the air it self-anodises by forming a film of aluminium oxide and that film prevents further corrosion.
I have heard it said that corrosion is increased under a blister because the area will not dry out due to the remaining paint, but I have never found that to be true, or at least not enough to measure.
I’m not at all educated on this topic, but my impression is that accelerated corrosion under paint seems to happen with moulded aluminium parts and way less, or maybe not at all, on marine grade aluminium plates.
I guess the moulding process might make the metal more porous or something like that, and most likely, a boat is built in way more corrosion resistant alloys. There are huge differences between aluminium alloys in corrosion resistance, strength, stiffness, and much more.
If I was getting myself an aluminium boat, I’d put a lot of nerdiness into learning more about this issue, but I assume that the serious builders have already done just that.
Hi Stein,
Yes, I think you are right. This is probably one of the reasons people are so scared of owning aluminium boats: they don’t realize that the alloys are way more robust than those used for other stuff they have owned.
I concur. Just saying “it’s aluminum” really doesn’t tell you much, without knowing the actual alloy being used. Would you say “it’s wood” without specifying the species, or even softwood vs. hardwood?
In aluminum metallurgy, even tiny changes in alloy composition can completely alter the properties of the material. Alloy 5083 is about as closely related to alloy 7075-T6 as pine is to oak.
The 5000-series plate alloys used for boat hull framing & plating are specifically designed for very high corrosion resistance in a salt-rich environment. In the absence of a stray current source, they are extremely durable and have no inherent tendency to corrode away.
Hi Matt,
Thanks for coming up on that. I think your last sentence really sums up what aluminium boat owners need to know: watch out for stray current and then stop worrying.
I have a 20 year old Ovni 32. Last winter I finally gave in to the scruffy appearance and stripped the decks of the failing Treadmaster and cut back all the areas of blistering or otherwise failing paint on the decks and coachroof. Wherever I got through to the underlying aluminium it was perfect. I did not find any pitting. So from that experience, I would say don’t worry. My boat now looks smarter, but in terms of structural integrity, I have made no difference whatsoever. But as someone who has previously owned wooden boats, I cannot get used to not having an even extending To Do list, so have to find jobs to do.
Thanks for some great information. We are looking to purchase an OVNI 445 evolution. The vessel was built in 2010 and there are numerous patches of blistering where the deck coating meets the unpainted hull. In addition, blistering is evident around a number of the fittings eg hinges. Moreover, in both cases, there does not appear to be any obvious underlying mechanism causing the corrosion. It seems that its a bit of a lottery.
If I understand you correctly, blisters under the paint are more of an aesthetic problem then something that requires immediate rectification.
Appreciate clarification.
Regards
Pat
I haven’t owned an Ovni, but every last one that I have seen has been exactly as you describe. I once saw an Ovni document recommending to repaint the hull at very short intervals. I cannot recall the time period, but I do remember being shocked at the frequency (I seem to recall that it was annually, but maybe it was every five years). The point is that I believe even Ovni would say that this is normal for a 2010 hull. One of the reasons I decided against Ovni is i just didn’t want the headache of keeping the paint (top of topsides, coach roof, deck, cockpit and coaming always seem to be painted) looking OK. If you don’t care what it looks like, and the boat is otherwise what you want, then I don’t think this should be an obstacle.
I’m a bit suspicious of painted aluminum hulls regardless. Often the paint is there to cover up filler that was used to fair the hull. Nothing wrong with filler if that’s what you like, but it’s just more to go wrong eventually and make the boat look uglier. And if the filler is used under fittings, well, then it’d get really messy — but still not necessarily a problem with the basic integrity of the hull.
Go to any fishing port where aluminum boats are the norm (at least where I have been). You’d be hard pressed to find any paint on a hull. It’s not there for a reason. The only reason to paint an aluminum hull above the waterline is because one wants it to be a certain color — to make it pretty on one’s mind’s eye. But when that paint peels and cracks, it will be far, far from pretty. A really pretty aluminum boat has not paint.
Excellent series of articles, as always. Using capacitors to lead spurious signals to earth/ground is certainly the way to go. However, a cation for anyone, unwisely, using galvanic isolators in preference to an isolation transformer (or the non-ABYC, Ovni option, of disconnecting the earth/ground lead when in harbour).
As the number of grounding capacitors, in use, increases you eventually reach a point where the galvanic isolator stops isolating and starts conducting. There are lots of “hidden” grounding capacitors in modern switched-mode power supplies (almost everything these days from phones to iPads) so it can happen quite easily.
So, don’t rely on the cheaper “Zinc Saver” option, fit a proper isolation transformer as recommended in John’s part 1.
Good point re the Ovni method of disconnecting the earth. I was never happy with that, probably o.k/good for the boat protection, but pity any poor swimmer who happened to be close to this hull if there was a fault. Doesn’t take much current flowing through the water to earth to incapacitate a swimmer. Also re isolation transformers, just had to replace my 10yr old mastervolt gi3.5 after they tell me it cannot be repaired, because they wouldn’t have the parts. Seriously pissed off.. I spent many years at sea repairing Radars/transmitters that were at least double that.
Changed times I guess.
Garry
Hi Garry,
I was not aware that the Ovnis had such a “feature”. You are right, truly scary, and not just for a swimmer in the water, also for anyone working on the boat if an equipment case goes live. The more I think about this the more I say either have no shore power or have an isolation transformer, there are no other good options.
Sorry to hear about your transformer. As you say, pretty disappointing for a piece of gear that has no moving parts to die in 10 years.
I believe Ovni’s/Alubat argument is that when afloat. The best earth path is though the hull to the water. So when afloat a short from live to the case will trip the RCD on the 220v panel, but when the boat is out of the water/ashore then the shore earth is required to trip the RCD or ELBC.
Garry
Hi Garry,
Hum, I see what you mean, but I still really don’t like that idea. Salt water is not that conductive and what if there is more fresh water around than one expects? Bottom line, the more I think about this the ever more convinced I am that an isolation transformer and then connected the boat side ground and neutral to the hull is the only way to go.
Hi Frank,
Absolutely. I’m no fan of galvanic isolators and certainly not on a metal boat.
I think your articles are very informative. I have experience with underground fuel tanks and like aluminium the steel ones have anodes on the outside to protect them from corrosion. Many owners don’t know that the corrosion protection is only for the outside skin since that’s where the reverse charge is. In the underground tank world we make sure people know to keep all the water out of the bottom of the tank because the worse corrosion is between the water fuel interface.
The other thing is I think areas of corrosion under paint is going to corrode faster if you don’t get the paint off because the failed paint is holding water in that area. And the water will become low on O2 so the protective layer will not be on the aluminium. So I would think you should remove the failed paint and corrosion as soon as possible so it won’t continue to spread and get deeper. It is best for the surface to have well adhered paint or no paint. Not in between. I have been always interested in paint and keeping it good since I was a BM3 in the Coast Guard 30 years ago. Keeping a 378 foot ship’s paint in good shape was a crew’s full time job.
Hi Ted,
I hear you on theory that aluminium will corrode more quickly under loose paint (i believe it’s called poultice corrosion) but the fact is that I have just never seen this to be a problem in the 26 years I have had the boat. This might be because (as Stein points out) the alloys used in boat construction are really corrosion resistant.
Poultice corrosion is common to see in areas without any paint but where there has been constant damp from seawater or urine. I saw this on several boats when I was searching for my own. It looks just dreadful — like a layer of fluffy puss — but I think it can vary from completely insignificant to potentially serious.
Related to this, I think it’s important to point out that not all standing water in the bilge (or elsewhere lacking limber holes, as John found) is the same: it matters if it’s freshwater, say from a leaking water pipe, or seawater, say from a dripping stern gland/shaft seal. I think standing freshwater won’t matter at all — OK, maybe after 50 years or more. Standing cruddy water — the normal combination of drippings from stern gland, engine cooling hoses, maybe a tiny bit from an errant battery a decade ago (even sealed batteries discharge sometimes), etc. That’s the stuff that’ll cause poultice corrosion — maybe more so if the proverbial copper penny is dropped in the bilge (just kidding, mostly).
One addition to my comment on poultice corrosion: For me, when searching for an aluminum boat, poultice corrosion was not a sign of an inferior boat, but rather of an inferior boat owner. It was a real turn-off because it got me wondering about what other stuff the owner didn’t care about.
Hi Paul,
I wouldn’t necessarily let a bit of white powder and goop from corrosion put you off that much. In my experience, although it may look bad at first glance, once the debris are cleaned up it’s rare for there to be any significant damage.
After 26 years of caring for an aluminium boat the biggest take aways for me are that as long as we keep stray current under control the material is pretty much indestructible and if I got worked up every time I saw a paint bubble or a bit of white powder I would have long ago driven myself insane.
To second what John says: if you are going to have an aluminum boat build, avoid paint, and for goodness’ sake don’t paint the bilge. My boat has a painted bilge, so I speak from the same experience as John. I can see the temptation: paint the bilge white and then you can keep it spotless. True — until the paint starts to come off. Ain’t worth it.
One of my top criteria for buying an aluminum boat was “no paint!” I can accept it on deck if it’s for non-skid purposes — not so tough to work on that (just get on hands and knees to scrape, sand, tape, paint, etc.). In the end I did tolerate paint in the bilge to get an otherwise cool boat. The bilge paint does no harm at all to the hull, and nobody can see it peeling there! Not so with peeling topsides. Almost the worst thing for me about owning a fiberglass boat was the insane amount of work that went into keeping the topsides looking acceptable. (I don’t even consider myself to be fussy about such things.) Give me an aluminum hull, sans paint, with a nice layer of aluminum oxide any day. Want to scuff or smudge my topsides when you come alongside. Go ahead. I just don’t care. It’s the joy of an unpainted aluminum hull. It may be ugly until you think about all the work you never need to do.
The takeaway message: Unless absolutely essential, avoid paint except for surfaces that get fouled (i.e., outer hull below waterline) and potentially nonskid on deck.
Hi Paul,
I agree!
I agree too. If it were not for the work involved, I would take my boat back to 100% bare aluminium except where anti-foul is needed. As It is, I look after the Ovni topside strake of paint and the deck/coachroof and so far the workload has not been excessive. It seems to be a matter of using good epoxy primer, undercoat system and two pack topcoat. Lasts a lot longer than a paint job on a wooden boat. And you know if it does get a ding, I does not matter. You just have to learn to live with the appearance, but as Paul says, the freedom of wondering about scuffs when coming alongside is a liberation.
Another thing I love about my Ovni is the relative lack of concern about drying out. I know that even if I do get it very wrong and sit on a rock, the worst that is likely to happen is a dent in the bottom. It will scrape off some paint, but that can wait until the next haul. A few years ago we were dried out in a small Cornish harbour and sat on the massive chains the local boats use to keep themselves off the wall in dirty weather. We left some anti foul on the chains, but could not see a scratch on the boat next time I was able to look. Meanwhile a fibreglass lifting keel yacht anchored outside and rolled heavily all night. When we ask them why they did not come in, they said they were worried about the harbour bottom. With good reason, if they had sat on the chains, it would have crushed gel coat and needed immediate attention before the after penetrated the laminate.
Ah, Colin, you list another reason for aluminum that you simply cannot get with any other material: the freedom to dry out without worry. Of course with steel you could do the same thing without any structural damage, but you’d have to attend to the paint pronto. And to do that would require a haul out to get at the area needing the paint.
While I’m on the topic, having the ability to dry out was at the top of my list of must-haves when searching for a boat. If one stays in the world of Travelifts and doesn’t mind often-extortionate fees for lifts, the ability to dry out isn’t a big deal. But if one goes off the beaten path or just hates being tied to marinas/yards/yacht clubs, having a boat that can dry out without fuss (meaning an ALUMINUM boat that can dry out) is fabulous. I love the Ovni hull, but my boat has twin keels. There’s no perfect boat (as John rightly reminds us often), but one not-so-little advantage of twin keel over lifting keel (which has its own advantages over twin keel) is that when you do dry out, the amount of bottom paint (including epoxy barrier coat) subject to being ruined is just on the bottom of the keels (and, in the case of my boat, the bottom of the skeg). In such a boat one can dry out often and the worst that happens is a sea farm growing from the bottom of the keels, instead of from the bottom of the hull (probably a larger affected area overall).
The upshot is that the only good way to do this is with an aluminum hull. With any other material one is likely to avoid drying out just to avoid the subsequent maintenance issues.
Yes there are always compromises and the flat bottom of the Ovni does mean that there are areas of the bottom that cannot be accessed until the boat is hauled. But, it does mean I worry less about finding somewhere level for three hard points to sit on.
Another plus about aluminium (as compared to steel) is that the swarf from drilling holes does not cause rust streaks. That is a nightmare with steel.
I built an alloy Dix 43, starting in 2009, launched in 2016. I painted the bilges and am very happy to have done so. I was concerned primarily with poultice corrosion in the bilges along the weld beads, stringers and frames. If you are not familiar with poultice corrosion it is created when organic material (sawdust, dog dander, skin cells, food particles, bacteria the usual unmentionable soup ) is mixed with a bit of water (condensation usually), leading to an acidic situation that just sits there in a crack or crevice and eats away at the bare aluminum. I used a Pettit system designed for painting aluminum. It involves three different coatings, the first being the acid etch primer, followed by a tie coat, then a top coat. The metal needed to be abraded mechanically just before the first primer was applied, then there was a strict schedule of following coats. It’s been about 5 years since I did this coating and not one flake of paint. If I did it again I would just use the same barrier coat system I used on the underwater part of the hull, that grey epoxy paint is tough stuff. The etching primer was the same in both systems. I did use this in the anchor locker, which I sandblasted prior to coating. Over the years (since 1983) as a blacksmith, machinist, fabricator and sculptor, I have learned that paint performs best when one follows the directions to the letter. The prep work is the key.
Hi Brian,
Each to their own, but I would still stick with my recommendation of not paining the bilges of an aluminium boat.
Our boat is now 30 years old and I have not seen any appreciable problems with poultice corrosion.
In fact, based on my own experience, I would worry more about water getting under the paint and being held on the plate by the paint.
That said, marine grade alloys are pretty resistant to poultice corrosion, so it probably doesn’t matter much either way.
Hi John: Thanks so much for this series of articles. It’s rare to find such useful information on aluminum boats in one place. We are the 4th owners of a 32 year old aluminum centerboard sloop. The condition of the hull is excellent – I think this is a testament to the care of the original builder and the caretakers over the years. We have built in hull zincs and all hardware has been carefully isolated with nylon or rubber pads. Tef-gel or duralac has been used on all fasteners. One thing I would mention – not covered in the article is the fact that all of the wiring when running in places where it is or could come in contact with the hull is run through plastic conduit or tubing. Our bildges are thankfully not painted! However, during a recent repowering I noticed some plate pitting beneath the old engine, most likely the result of 30 years of metal debris from moving engine parts combined with the inability to get under the engine to clean sufficiently. So we chose, only in that area, before installing the new engine, to apply an epoxy barrier coat after a thorough cleaning and acid etching – knowing that we too would not be able to the hard to reach places beneath the motor.
Thanks again for a great series!
Glenn
Regarding SS bolts threaded into various aluminium parts, are there any solvents useful for extracting frozen bolts? Perhaps ammonia bleach?
Hi Skylark,
I have never found anything that will do much to unfreeze a dry threaded bolt in aluminium. There are various spray on liquids that may help a bit. We carry this one: https://www.grainger.com/product/BLASTER-Petroleum-Based-Penetrant-4LRF8
But generally if the bolt is really badly seized the only answer is to drill it out and then use an extractor. Colin has a good chapter on this here: https://www.morganscloud.com/2015/03/29/dont-get-stuck-tools-and-techniques-for-cruisers/
Hi John,
It would be more accurate of you to talk about “Aluminum Alloys” rather than just “Aluminum” when discussing sailboats made from this material. Pure aluminum is a fairly rare thing and will not stand up to seawater very long. Neither will many of the aluminum alloys that are not designed for marine applications. “Marine Grade Aluminum Alloys” are actually compositions of Aluminum and Magnesium, with possible additions of Silicon and Copper. Most of these are in the 5xxx series of Aluminum alloys, with a couple in the 6xxx series. The % compositions determine the degrees of malleability, weld-ability, sheer strength etc. but it’s the addition of Magnesium that makes these alloys so resistant to seawater.
Does the history of Morgan’s Cloudinclude which aluminum alloy it was made from? I wonder what are the preferred aluminum alloys that Boreal, Garcias et al are produced from? Most likely they use a few different alloys depending on what material characteristics are most desired for that part of the vessel.
Very much enjoying this series on aluminum boat care. I’m in the process of searching out sailboat designs to build in aluminum alloy so the material options are of some interest to me in my investigations.
Best,
Our boat was built in France in 1985 out of a grade called AG4M. I know this is an alloy with magnesium. I’m not sure the exact composition. In aquiring materials in the US for modifications I’ve found the most readily available grade has been 5086. I would be very interested to know about the different grades and purposes.
Glenn, your boat is just fine: A-G4x is the just the European designation for the same material.
Here’s something I don’t understand: My boat is nominally built from 5086. All OK there. But there is one bottom plate that still has the label visible (painted on) which says something like (going on memory here, but I am quite sure this is correct) “5083/5086”. Now, 5083 is OK, too, because it’s also a common marine-grade aluminum alloy. But what I don’t understand is how it can be both at the same time. If anyone reading this has insight into this, I’d be interested to know it.
I could be all wrong about this, but regarding the loose term “aluminum,” I think it’s very common in Australia to call an “aluminum” boat an “alloy” boat. I think Americans should start using that term instead of “aluminum” simply because there’s a unfounded fear of “aluminum” among sailors there (despite its popularity with commercial fisherman). Just so we are clear here, if I’ve got this right, an “aluminum sailboat” in the USA would be called an “alloy yacht” in Australia. So if someone is trying to sell an UNPAINTED YACHT made from A-G4MC ALLOY, it’s just the ticket! (We sailors must be careful not to make terminology too simple. If everyone were to understand the terminology, we’d lose some of our mystique.)
Hi All,
I’m not going to get involved in aluminium alloy types since it’s a long way beyond the scope of these chapters (care of existing boats). Also the correct alloys to build boats from are well know and any builder with experience will know what to use. Those who want to really geek-out on this may want to buy and read http://www.boatdesigns.com/Boatbuilding-with-Aluminum-Second-Edition/productinfo/12-442/
As to what to call the stuff, ain’t going there either!
Time for me to work on new chapters that will be of use to the majority of our members who don’t have aluminium boats. Right now I’m deep into running rigging.
That said, if anyone has more questions on the care of aluminium boats I will be happy to help.
A detailed summary can be found (for free) at
https://www.almet-marine.com/wp-content/uploads/2021/07/Ch03-aluminium-alloys-in-marine-applications.pdf
Most frequently used is 5083, e.g.,
https://www.wilsonsmetals.com/datasheets/view/Aluminium-Alloy-5083-0-H111-Sheet-and-Plate_149
H321 for hull and deck – this is harder material
H111 when bending is involved (the H321 breaks in this case)
Also used but currently hard to get are higher grades such as 5383 (a.k.a Sealium)
https://www.matweb.com/search/datasheettext.aspx?matguid=b4224313f3c2433db70fd12eefd2de31
and Alustar
https://www.matweb.com/search/datasheet.aspx?matguid=1cd7843ff55043c8b9f739b57ac6dcad&ckck=1
6000 series alloys are used for tubes, profiles and flat-bar that is not exposed to seawater – 6062 harder for profiles that are not bent, 6060 is softer and easier to bend
The wire used for welding is yet another alloy.
Hi John, Fantastic number of articles. as you may recall i purchased a 50 ft alu plan from Dijstra and completed the accomodation and systems with a few shops in Sneek Hoilland.
I used my backgroundand contact in commercial shipbuilding and this gave sometimes some very conflictive but some innovative ideas .
During the building a number of issues came up ;
Biodiesel as is sold mostly in Europe is a serious issue for aluminium tanks it creates MIC corrosion , if you like i can send you a number of studies , for instance of the US Navy on this issue ( one recommendation is that tactical reserves should not be biodiesel !!!! ). microbial induced corrosion. A solution was found by coating the tanks with a specific fuel resistant paint of Hempels . The tanks were gritted vacuumed and coated in a matter of 6 hours . I am not sure if this paint is sold to the recreation boat market.
I hear you talking about bolting and fitting and tef gel all tings which i used to do as well but now there are some glues and specifically the glues like a pasta from 3M 7271. I glued low friction rings straight onto the aluminium , it requires sanding with p 36 and degreasing with isopropil alcohol but the holding power after 5 days is stronger as a weld or bolted connection . The beauty of it is that one can glue anything to alu while you create a dielectric isolation . I primed and painted around these fittings and it holds perfectly .
Ref painting etc ;
I had my hull gritted instide and outside and primed within 4 hours this is done for the outside hull and inside the bilges the fuel tamks and the drinkwater tanks . I have to say that the primers and coatings are those delivered i the commercial industry and should have a warranty of 15 years. now 5 years further on , yes i have some repairs on deck but not excessive. To my opinion and especially if i see other alu boats like french ones then I know there is a difference in the way you prepare and paint a boat.
If you are interested in the academic studies on Aluminium corrosion concerning biodiesel then please contact me .
Rgds
Patrick Piret
Hi Patrick,
Lots of good tips from one who clearly knows, thank you. The bio diesel issue is particularly worrying since most aluminium boats have integral tanks. Yes, I would like to see the studies, please email them (contact in the top menu).
And yes, we too have been gluing things to aluminium, rather than welding. We have used Plexus with great success.
Also interesting about the paints, although I think I would still leave the bilges bare.
The other thing is that when painting, or coating with epoxy, we have not found that mechanical cleaning was enough. We have always had better results using the two part chemical etch from West System, but of course that would not be practical over large areas.
Hi Patrick,
small world; we are also building in Sneek.
Would you please share what paints you are using?
Hi George,
Given that AAC is not a forum, it’s extremely unlikely that another member who has left a comment four years ago is going to see your attached reply.
See our comment guide lines for more on how comments work: https://www.morganscloud.com/2013/11/10/aac-comment-guide-lines/
Hi ,
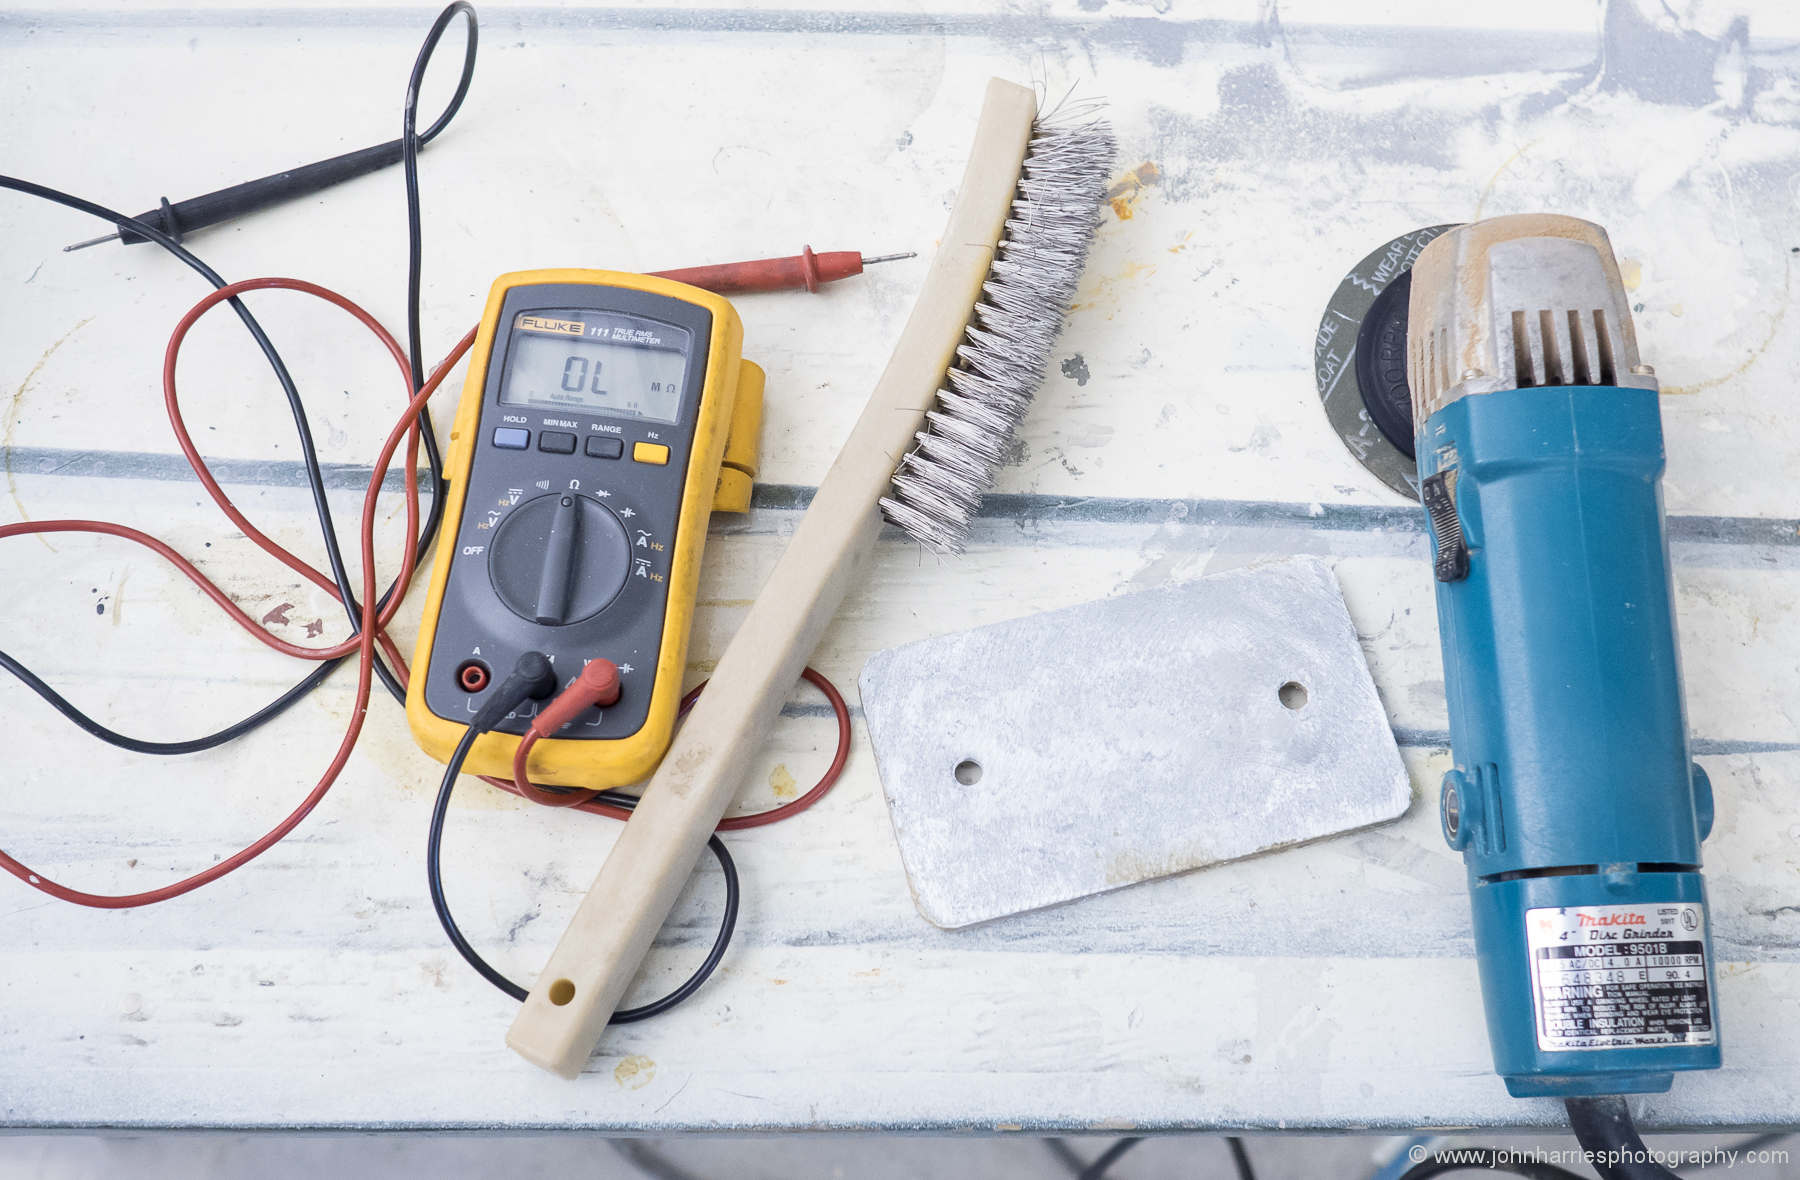
Great article John and thanks to everyone for the comments . I am just re commissioning my 1988 Ovni 41 after a 2 year refit . Have been using the Seabis leak detector and Glen there has been very helpful sorting things out and talking t my electricians . We have come across a problem with the Mastervolt battery charger . When it is in float no problem , when it goes in to bulk charge the Seabis detects a fault .
Have had a tech from BLA the Mastervolt distributors here have a look and do some testing . He had no idea and has offered to come back with a Kota battery charger and try that . Glen at Seabis commented that problems Mastervolt chargers are fairly common . We have tried a Xantrex charger and it faulted same as the Mastervolt . Anyone got any ideas ? One comment was the DC RMS was to high . I am a boat builder so don’t understand the finer points of electrics and Electrolysis and alloy boats . Yet !
As a general comment about boatbuilding materials . You can build a really good boat with all of them but all seem to require attention to detail , careful design and good workmanship for the best job . Then you have to look after them .
Hi Ian,
I think that what is happening here is that when the charger goes into bulk it is some how connecting it’s case ground to the DC negative side.
There are a lot of variables here, so a few questions:
Hi Ian,
One more thing to check, before we go further:
You should see a reading of infinity. If not the charger is defective or poorly designed.
(I hard a Xantrex inverter charger that failed this test and eventually Xantrex admitted that there was a design fault and took it back for a full refunnd.
Bottom line, the AC and DC should be completely isolated from each other in any device that mixes both (chargers and inverters).
John,
As an ex-electronic techie my thoughts on the sizing of grounding capacitors are:
1. Any physical capacitor (ie not an ideal one) can be simply modeled as three impedance components in series; an ideal capacitor with a value that’s very close to the one on the label; a small ideal resistor due to the resistance of the leads and plates, and a small ideal inductor that’s very dependent on the construction, lead type and installation.
2. It’s these latter two components, the resistance and inductance that complicate the selection. If it were not for them and all capacitors were perfectly ideal, then for this job you’d just select the biggest one you could fit into the space available (with sufficient voltage rating) and the job would be done. For EFI bypassing the lower the total impedance of the capacitor the better.
3. But in reality bigger capacitance values come with bigger internal resistance and inductance. As the frequency of the AC current being bypassed increases the impedance of the inductor will increase too. At some high frequency capacitor stops being a low impedance path to ground, the inductor dominates and the current components at these frequencies and above are no longer bypassed to ground.
4. In order to avoid this you need some sense of what frequency range the current you’re trying to bypass to ground is, and that very much depends of the nature of the equipment. In reality we aren’t going to test each piece of equipment, so we just make the simple assumption that all modern electronics has fast digital switching going on inside, and is capable of radiating pretty much anywhere in the range from say 20kHz upward to many Mhz. (Fortunately the really fast switching edges generated by CPU’s and the like will almost always be bypassed already on the PCB’s so we don’t have to worry about them too much.)
5. In this application there is no DC bias voltage which rules out using electrolytic capacitors. For this reason they’re a very poor choice (plus they tend to have high internal impedances and an unstable lifespan) and must NOT be used, even though they offer very large capacitance values in physically small packages.
6. The next big consideration is what voltage rating. For DC powered equipment this is easy, anything with a rating over 100 v or so will be fine. But for AC supplied equipment when a fault condition occurs, the entire 110/230/400 AC supply voltage may well be present, so it’s critical the capacitor is rated to handle this voltage. These are often called X and Y class ‘safety capacitors’. In this application we should be using ‘Y class’.
https://www.allaboutcircuits.com/technical-articles/safety-capacitor-class-x-and-class-y-capacitors/
All this circles pretty much around to what John has already said. For DC circuits values in the range 0.1 to 1.0 uF rated over 100v will be a good starting point. If there is still radiated interference with other equipment, then parallel this with another capacitor that is roughly two orders of magnitude smaller, say 0.001 uF. This smaller capacitor will have a much lower internal resistance and inductance at higher frequencies.
For AC powered devices the voltage rating required is much more onerous, which increases the physical size of the component for a given capacitance value, which in practical terms limits the biggest capacitor to about 0.01 uF or so.
Also keep in mind that where you mount the capacitors is important too. What we are trying to achieve here is to ensure any stray HF currents from the device are given a nice short path to the metal hull and ground. The longer the the cable between the device generating the HF current and the capacitor bypassing it to ground, the more likely it will radiate as EMF interference to other equipment.
Ideally you want the capacitors mounted as near to the device as possible; ideally within say 100 – 300 mm.
All this from dim distant memory, I’m much more a programmer these days. If anyone cares to pick up on any errors or add to this, I’d be interested to hear.
Hi Philip,
That’s great, thanks so much. I even understood it, so a great job of making the complex clear.
And here’s a piece of good news: we don’t need to worry about AC powered devices since on a properly wired boat they will all be grounded directly to the hull as per ABYC. (Only the DC system needs to remain floating to keep stray current at bay.)
So, given that, I think we are all good with your recommendations.
John,
do you have any advice on water tanks, I bought a 20 year aluminium yacht and am presently refitting it . the only corrosion that I have found is in the water tanks in close proximity to the end of the pipes used to pull water from the tank. The corrosion here is limited to a few isolated 10mm dia pits which have reduced the wall thickness in the pits to about 50% of what it should be. Unfortunately the pipes were stainless and not correctly isolated from the tank there they entered it on the tank top. The pits do not merit cutting out any plating to get to them to repair them but I do have to do something here. The tanks were coated with a international paints tank coating for FW tanks and this in a lot of areas has lifted but there is no sign of corrosion under the coatings, just large flakes that have come loose. I also opened up the merde tank which had water and effluent sitting in if for at least 4years and there was no corrosion in the tank, the coating in places had lifted ( Coal tar epoxy). This tank did not have any stainless steel fittings, they were all plastic. So if you have any advice or anyone out there has advice on moving forward with the repair of the pits I would appreciate hearing from them.
Hi Graham,
I think you can repair the pitting with WEST system epoxy thickened with 406 Colloidal Silica. Use their two part acid wash to prep and then coat with pure resin to get a good bond and then fill with thickened resin.
I had a leak in one of our water tanks some 20 years ago and repaired it this way. It is still holding today.
John,
Tks very much that. Do you recommend coating potable water tanks ? I have read a lot of conflicting information about drinking water from aluminium tanks and it would be good to get your take on this. This is a great site you are running here and the advice and information is 2nd to none anywhere else on plant earth. Keep up the good work
Hi Graham,
Yes, I would definitely coat the drinking water tanks with a food grade paint. Ours are so coated and have held up well for 30 years. Unfortunately I can’t tell you what the paint was since it was done by the original builder.
And thanks for the kind words.
It appears that the 2 part West Systems acid wash consists of Alumiprep and 1201 Alodine. This is generally acknowledged to be the best way to prepare bare aluminum for paint. Unfortunately the Alodine is a carcinogen, probably the worst chemical I have used on my boats. Be sure and read the MSDS and have appropriate protective gear. The directions call for a thorough fresh water rinse after application. I would not want any of the residue in my drinking water tank or contaminating my plumbing.
Great series albeit some of it went over my head. At times the subject appeared daunting as I embark on the construction of a new aluminum boat. I trust that the Jean-Francois’ of Boreal have got all these measures considered with their boats and that Colin will be able to teach an old sea dog some new tricks.
Hi David,
You are in fine hands with Colin and the JFs, none better for aluminium boats, so most of what I wrote about will be taken care of from the start and you will only need to maintain it.
Right on. Thanks John… very much enjoying your website!
Stephen,
Many thanks for the guidance, i was having some difficulty in getting the WEST system, it appears that it is not available in the UK but I managed to get Alumiprep 33 and Alodine 2101 from an aircraft parts supply company in germany. I will heed your advice with regard to the alodine. I just have to be sure that I have cleaned and prepped the pits properly before filling them, I dont want them deteriorating any more . The tank coatings will be reinstated with an approved International paint system for Fresh water tanks.
Garcias are made of 5086 alloy equivalent to AG4M. A few parts Are 5083 because 5086 is not available in all thicknesses and shapes. Some 6061 may be used inside where it does not get wet. 6061 is used a lot for masts
I think OVNIs and many French boats are same
If you wish to rejuvenate zinc electrode inactivated by a prolonges stay in salt-free water, it is possible to thoroughly grind them WITH SAND PAPER, never with a metallic brush which would insert metal parts on the anode.
Vers good site!!!
PV
Hi Patrick,
You may be right, but I have never had any problems with using a good quality stainless steel wire brush.
Thanks for the kind words on the site.
I have a Trisbal 36 (Rover, Iqaluit, Canada) an aluminum (5086) centreboard (+ daggerboard) cutter built by CMPF 76400 Fécamp (Chantier Maritime de Paimpol et Fécamp) in France in1979. ( https://krazysailing.wordpress.com/saturos-2/ )
> I have found a whiteish power in several areas. from my reading above it not a real concers. Curious of the cause.
> This winter (stored in the water) I found a pinhole leak, about one foot below the waterline, on a seam of one of the hard chines. Is it something I should be concerned that may be a symptom of bigger problems? Sealed with JB Weld.
> A previous owner had removed the teak decks but had not sealed the screw holes plus there a few areas (1 cm diameter) of pitting where the teak or crap contacted the aluminum deck. Is JB Weld an appropriate method to seal or should I braze seal with an aluminum brazing rod?
> I removed the engine last week ( https://krazysailing.wordpress.com/saturos-2/removing-the-engine-day-1/ ) and found extensive pitting on the aluminum under the engine. I believe the lead ballast is under this area. From my reading above the best solution is to epoxy the area.
> There are numerous area through the hull with minor pitting. My thoughts were for longevity of the boat to paint the inside of the hull with a primer like Interlux Primocon. Access would not be a problem as if I keep Rover, I need to do a interior rebuild. Your thoughts?
Cheers
David
Hi David,
Let’s take this in order:
White powder is aluminium oxide and indicates corrosion. A small amount is not usually a big deal but I would still trace it to its source and determine what’s going on.
The pinhole is probably caused by a void in the original weld, but I would still remove the paint in the area and check carefully for any signs of corrosion in case it’s an indication of a larger issue.
I have no experience with JB weld but since it’s epoxy based I probably would not trust it below the water line. (It’s very difficult to get epoxy to stick reliably to aluminium over the long term.)
Not sure what you mean by “braze seal”. As far as I know aluminium can only be welded, either MIG or TIG.
As to your last two questions, I would not coat the aluminium in either case. Aluminium is most corrosion resistant when left bare since it self- anodizes. Also, getting paint or epoxy to properly bond to the bilges of an old aluminium boat will be near-impossible and a poorly bonded coating will actually promote corrosion, not fix it.
And if any plate is badly enough pitted to be structurally weakened, it should be cut out and replaced not just covered over.
Rather than coating it’s better to find the source of the corrosion and fix that. For example, my guess that the problem under the engine is from dissimilar metal fragments dropping onto the plate over the years. A better fix would be a pan under the new engine to catch this stuff.
Hope that helps.
Just a quick point relating to galvanic isolators and isolation transformers and capacitors. And their differences.. An isolation transformer is used to isolate any ‘galvanic DC’ from the live and neutral wires, leading from shore to the boat. Either +/- 110 or +110 and N. To isolate these a transformer is ideal. The ‘Copper’ power ground wire is not isolated. The transformer will not isolate the ground wire.
The way isolation is achieved for the ground wire is to use large, power diodes. They allow the conduction of large surges of current as long as the voltage is over ~0.5volts. Silicon diodes turn on at 0.5volts… in their forwards conduction mode. Two in series will turn on at 1.0volts. Three at 1.5v etc, etc. Thus, surges in dangerous current are passed only when this voltage is exceeded. Transistors could also be used to both sense and turn on, then the voltage exceeds a set value of perhaps a volt or 2. ie., if the ‘galvanic voltage’ difference between two metals, with dissimilar electro-negativities is perhaps ~0.6volts (Copper @1.9v – Aluminum @ 1.3v) then a couple of power diodes in series will block this ‘corrosion current’. But if the voltage surges to 50volts, the diodes conduct the dangerous current away to ground.
Hi Peter,
Actually a properly wired isolation transformer does isolate the shore ground from the boat. There is no need for diodes or a galvanic isolator.
The way it works is that the shore ground is terminated on the case of the isolation transformer and then one leg of the boat side of the transformer (secondary) is designated the neutral and grounded to a central and single point together with all the neutral and ground wires from all loads.
This results in total DC isolation of all three shore wires, and a safe situation on the boat.
You can check this with both ABYC and ISO wiring standards for isolation transformers.
Also see https://www.morganscloud.com/2017/11/11/22-aluminum-boat-care-tips-part-1/ #8 and #10
That said, you are correct that one does see boats with isolation transformers wired with the boat and shore grounds connected, but that would be a very bad idea on an aluminium boat.
Great series and very reassuring [mostly].
Our 30 year old alloy hull has painted bilges with extensive areas where the paint has fallen away. Do I understand you in that you basically ignore these areas ? I had been laboriously scraping back the damaged paint and attempting to reseal.
Hi Ted,
What I do is scrape off the loose paint and vacuum it up. That said, I don’t get crazy about this.
You definitely don’t want to try to repaint these areas. The bottom line is that aluminium is happiest when unpainted, clean, and exposed to the air. Adding paint, particularly in a damp area, just potentially increases corrosion because it traps moisture and debris next to the metal as soon as it starts to lose adhesion, which, in the bilge, it always will.
Hello John and Phyllis
I’m hoping that you and other members may be able to comment on an issue with the rigging on our aluminium cat. I would really appreciate your opinion on this and whether you have ever experienced anything like it.
The boat (unfitted internally) was rigged and launched in September last year. She was then sailed 600 miles south to her home port near Sydney Aust. By November it was noticed that the stainless rigging was beginning to “tea stain” with some deposits noted and the rigging yard was notified with little response. These deposits will not wipe off with a cloth and appear to be stuck fast to the rigging. Xmas and holidays then intervened and the rigging gradually progressed to begin staining the hull. There have also been several red dust storms occurring in the area with some red dust (most likely agricultural) on the deck. All parts of the wire rig are affected except the seagull striker and the bridle wire that connects the inner forestay to the hulls. Other boats in the vicinity on inspection have clean rigging.
We both work full time and live 4 hours from the boat; we only visit her every few weeks and have not been as speedy in communicating reports to the riggers, especially where photos aloft are required. The rigging company is arranging an inspection by the Korean wire supplier; I have also sourced a highly regarded professional specialist in marine electrolysis.
The house and engine banks were pre launching professionally installed however I have connected up a handful of other electrical components for essential navigation and life aboard (inverter, fridge, bilge pumps etc). The rigger (one of the largest in Australia) has me concerned that perhaps there is a stray current issue causing the corrosion, though he has only ever seen the extent of one similar to this once before. I have been very careful but am not a marine electrician although I understand and have observed the importance of a floating DC system.
On the delivery south, during an electrical storm, the wiring bundle which exited the mast base (unattached and coiled at floor), was sparking and arcing to the alloy floor for around several minutes. We are uncertain of any storm damage as mast instruments have yet to be hooked up – though the LED anchor light is fine. Could this event have possibly compromised the performance of the stainless rig in any way?
Very much appreciate your response – so much to learn… that’s why we subscribe!
Cheers Euan
Hi Euan,
First off I should say that I’m no expert on metal corrosion.
That CYA out of the way, I really don’t think the problem is electrical. For stray current corrosion to happen, particularly this quickly, the metal in question needs to be immersed in salt water, or at least regularly bathed in it. That might be true low down on the rig, but not higher up. That said, I would check that electrical system is indeed isolated. (See tips in this series for how to do that.)
I’m sorry to say my best guess is a bad batch of wire that was either made from sub standard steel or contaminated with non stainless steel fragments when it was formed into wire rope. (I had a batch of rod rigging with exactly the second problem: contaminated by the machine that “relaxed” it from a coil. With rod it was easy to fix with polishing, but that won’t work with wire.) The smoking gun here is that the seagull striker is not so affected. My guess is that said wire was made and installed earlier in the build and came from a different batch and/or manufacture.
If I’m right about this, there’s nothing for it but to replace all the standing rigging with wire from another manufacture. Before doing so I would buy a copy of Brian Toss’s Riggers Apprentice and see if he has any recommendations on wire types and manufactures.
Euan,
We had our standing rigging replaced in Perth in July. By December we were experiencing the same problem as you. We don’t have the lumps, but, our staining looks worse. Wire was made by Arcus Wire Group, we were assured it was all 316 and the best we could get in AU. Unfortunately, we are on the move and unable to follow up the problem with our rigger. Interested to hear whether your wire was made by the same company and how you make out with your investigation.
I should have said Arcus was the supplier of our wire, the manufacturer was KOS “Korea’s original stainless”.
Same here, had both backstays and two lowers replaced about 12 months ago in Townsville on our elderly Adams40, and the tea staining was both immediate and persistent. Compared to the 18 year old wires right next to it the difference is remarkable.
The riggers are entirely at the mercy of their suppliers here, but this seems to be a really common problem in Australia (as far as I am aware) and no-one is taking any ownership.
Euan,
Can you eliminate the possibility that this was caused by somebody welding or grinding carbon steel near the wire before it was installed. If that happened it would hit the wire on one side at any given position along its length. If you looked at the back of the wire in the first photo would you see the same lumps of rust? If you scrape one of those lumps off what is underneath? Does it look like the wire itself is corroding or the material is stuck on top of it? There is something very strange about the way those lumps are distributed with almost clean wire between them.
Philip
Thank you for your reading and comments.
Firstly a reply to Phillip:
No I cannot eliminate this. The deposits appear closer to the deck yes. They appear at any point around the circumference in patches. The brown deposits on the wire when scraped off are gritty (when chewed) suggesting these are dust bonded to the stainless. There is patchy discolouration (staining) right up to the masthead. We will scrape off & report. We will polish a section and see if remains polished/time. We will check obvious electrical leaks via 12v wire junction inspection, Silver Chloride probe readings (limited expertise), and underwater inspection of props & 4 x block anodes.
This issue is particularly complex and it is easy to draw early and false conclusions. So much of our research is inconclusive or contradictory, which makes this all the more challenging of who to believe and trust. We can find no evidence of damage of this sort attributable to lightning strike from web sources or a handful of riggers – but I’m open to incoming info. The tactic is therefore one of elimination. This leaves stray current or substandard wire manufacture – the former we have much to learn of, but have a plan; the latter is perplexing in that both the wire, the lock nuts and the turnbuckles are suffering – close inspection of the images show chrome plating is lifting on the turnbuckle, and indeed a hole has appeared inside a s/s lock nut face.
I am sorry to hear of others disappointments. I have had an opportunity to discuss our issue with Arcus (on recommendation from the rigger), both are resting on evidence that the identical sister ship in Darwin now shows no ill effect, so leakage, not the wire is first culprit – however, this (Darwin) boat has been hauled out on the hard over the summer, unlike our boat, so leakage may not have been given a chance to act. Arcus tells me that though nobility of metals suggest zinc > aluminium > s/s would suffer in that order, that leakage actually effects metal bodies with the lowest conductive passage (cross sectional area) regardless of their nobility. Rigging wires therefore suffer first. Is this right? Many examples were given of repeated failing rigging, all attributable to stray current !? (though the scientific link has NOT been demonstrated to me which I find disappointing so far in my capacity as an environmental scientist).
Power systems on both boats were identically professionally wired, though basic switchboards & inverters would differ. Our next course of action is to: employ the best Australia has to offer in electrical leakage consultancy to deliver: a) detailed leakage testing, b) learning of any active issues, c) learning of any potential issues, and d) pick up on how best to complete the build and manage her afloat. (on the public domain: http://www.logixgroup.com.au). A great service but expensive. Will report back. Thank you all so much for the collegiate discussion I will be more than happy to share the findings as we progress, though I have to add no fingers are being pointed at this stage.
Euan
Hi Euan,
I’m going to be a bit harsh here, but it needs saying. The stuff you are being told about stray current is, in my opinion, total bullshit. And do keep in mind that as an electronics technician who has owned an aluminium boat for 25 years, I do understand this stuff fairly well.
Even if current were flowing through the rig there is no reason that would cause corrosion unless the wire was immersed in salt water and together with another metal that was more noble. (Power transmission wires carry thousands of amps without corroding like this.)
The other issue is that the mast and wires are all connected to an aluminium hull so they are my definition at the same potential. And without potential difference there can be no current flow—basic ohms law: https://www.morganscloud.com/2016/05/24/one-simple-law-that-makes-electrical-systems-easy-to-understand/
Sorry to be so harsh but just enrages me when manufactures make up stuff to get out of standing behind there products.
And further the fact that the other boat does not have the problem means nothing since the wire could be from a different batch that was not contaminated.
And finally, we have three other members with the same problem with wire from the same source. These wire makes have a big problem and they know it, but are trying to wiggle out of it.
As to checking for a current (amp) leak. This is not rocket science. Just use a good quality multi meter on the amps scale and connect the leads between the battery positive and the hull. Turn all the gear on. Start at 10 amps and go down to the mili-amp scale. If you read more than 10 mili-amps chase down the leak.Then do the same on the negative to hull.
The key thing to understand is if you read current from the positive to the hull the problem lies on the negative side, and vice versa.
All that said, even if you do find a leak, I still don’t believe that it’s the root of your rig problem.
I dug up one of my old texbooks: ‘Corrosion and Corrosion Control’ by Uhlig & Revie. The chapter on Stray-current corrosion begins: “Stray electric currents are those that follow paths other than the intended circuit… If currents of this kind enter a metal structure, they cause corrosion at areas where the currents leave again to enter the soil or water”. In other words, as you say, a circuit is required; there is no obvious way this process would cause corrosion in the atmosphere.
Hi Phil,
You got it. This is fundamental. No potential difference=no current flow=no stray current corrosion.
I’m interested in any who has experienced stainless rigging which has suffered apparent corrosion within the first year. Have any experiencing these issues tested for stray current? Thank you others for sharing lessons of first principal science – this will be invaluable in helping me ask the most appropriate questions. We have polished up a small section of the rig wire to see if it re tarnishes.
Hi Euan,
I’m not sure how anyone could tell you with any certainty that their rig corrosion was the result of stray current. Point being that stray current corrosion is one of the most misunderstood maintenance issues on a boat and that goes double for the so called professionals who often use the term without even a basic understanding of electricity and circuits, and often as a cop out for another problem.
That said, to check if you are being BSed simply ask the person in question to draw you a diagram of how the current is flowing from one side of the power source (battery) back to the other side and through the rig. If they can’t do this they are full of it. Also, if they tell you the current is flowing to ground or earth they are equally deluded. This last is one of the most frequent misunderstandings of how electricity works and is a sure sign of someone who does not know what they are talking about.
Euan,
Our steel Adams 40 (inline spreaders) rig was done with Dyform in 2001 and was still mostly in perfect condition as of last year. However a couple of the stem balls needed replacing so we replaced the two backstays and two of the lower intermediates.
Side by side the new Dyform started tea staining immediately while the old wires stayed perfect.
In the end I did nothing about it (I was still travelling out of country for work) and just cleaned up the worst of the problem with stain remover a couple of times. If it’s any consolation after about 14 months it looks like the problem has stabilised and isn’t getting worse.
I’m an ex-electronics techie as John is, and I honestly agree with him. Stray currents are not the first place I’d be looking for a solution here.
Philip
Cheers all for your latest comments. Would just like to report on what we have discovered on our last trip to the boat.
We used a multimeter as you suggested John and discovered a leak of 6A when tested from the house bank positive to the hull. We went through the process of isolating gear being fed by the house bank bus bars. On removal of the positive lead at the dc to dc charger, feeding from the engine circuit breaker (to duct dc charger) we eliminated the leak. (Please see attached link to diagram). Reconnecting this lead and throwing the circuit breaker had the same effect. A + cable then connects the circuit breaker to the + isolator switch and on the same pole a cable then connects to the engine solenoid. When the isolator is switched in, it connects the engine battery + to the solenoid & dc to dc charger…. in this way if the dc to dc charger senses additional power is needed for the house bank it switches in alternator power, thereby charging the house bank. However, there was a direct permanent link between the dc to dc charger (engine in) and the solenoid. When removing the + cable to the solenoid the leak was eliminated. It appears there was a circuit to the engine solenoid, and thereafter who knows? Note: Isolator switches are used for both + & – for house power, anchor winch, and both engine batteries.
Action: We inserted an additional isolator switch to break the + connection between dc to dc charger and the solenoid. This eliminated the leak – though it just means when wanting to fire the stbd engine up we engage 3 not 2 isolators.
We tested voltage levels (mV) using a silver chloride probe connected between hull and sea water at various locations. Readings were consistent at -930 mV regardless of the 6A leak being induced. Does this suggest the leak is not conducting through the hull? A concern would be passage through the engine, this having a – lead from its casting to the – battery isolator switch. The engines are Yanmar 3YM30AE’s with substantial rubber mounts, the shaft passes through a PSS floating seal (rubber gaitor) and rubber lined cutlass bearings. What damage may this have caused to it and how do you check? How can the leak be going through the solenoid and creating a circuit? So for now the positive lead is isolated but not the negative.
Diving on the boat revealed normal slaking of 4 x block anodes (6mths), normal erosion of 1″ shaft anodes (quality is not what it used to be). Bronze 2 blade folding props were fine.
https://500px.com/photo/297644261/razoo-leaktest-map-by-euan-belson
Hi Euan,
6 amps is a hell of a leak, so I would be checking the boat very carefully for damage. One thing I would definitely do is pull both propeller shafts and check the (I presume) aluminium shaft tunnels for damage.
As to the reading on the silver chloride probe, this measurement is good for telling you whether or not your zincs are working, but I have never found it useful for tracing stray current, so I would ignore that and concentrate on getting both sides of the electrical system totally isolated from the hull.
Bottom line, either nothing on the DC system should be connected to the hull or the negative side should be connected to the hull at a single point. The second option is not my preferred one, but many aluminium boats are wired that way. See these three articles for more on that and the advantages and disadvantages of both.
By the way, even though you found this leak, I still don’t think it’s the cause of your rig rust problem.
Hi Euan,
If you are getting a 6A current flow from the house battery positive terminal to the hull that means you have a low resistance connection between negative and the hull. You are making the circuit with your multimeter so you normally only have the potential for a leak to ground not an ongoing leak. The fact that this negative to ground connection goes away when the DC-DC converter engine side positive is not connected to the engine implies that the negative to hull connection is on the engine side of the system not the house side. I would: 1. Double check it’s 6A not 6mA, 2. Check it happens with the engine battery isolator switches off and the solar panels disconnected. 3. Disconnect the house battery positive terminal and see if the 6A is from the battery terminal or the wire. The only scenario I can come up with that fits your description and diagram is that the engine is grounded to the hull and the DC-DC converter is somehow connecting solar power and/or the engine battery through to the house bank when the engine is off.
Just found this on my aluminium rudder when hauling out the other day.
Not sure if is should just prime and paint or if the problem is more serious. I do not have a zink on my rudder and wonering if that might be the reason.
Photo: https://photos.app.goo.gl/gddMfjnCgyCD9cfa7
Do I need a special primer for mu aluminium boat?
Hi Sebastian,
That is definitely not a good sign. Something is cooking somewhere. I also don’t like the look of the pitting in in the surrounding area. If could just be paint related, but it looks more like something has gone on underneath and then been covered up.
The first thing I would do is remove the paint down to bare aluminium for a couple of square feet to see what the surface of the metal looks like. I would also remove the rudder, to inspect the pintal, and then remove all the paint from around the bad area to access how much damage has been done. Assuming that’s the bottom pintal, we are looking at, it’s a high load area.
Second, you need to start from tip number one in the above series and go through the whole boat to make sure everything complies with good aluminum boat practice. (Tip #17 covers the rudder.)
As to paint, the whole system needs to be right for an aluminium boat so, If you are not sure what was used, and particularly if you find pitting of the plate when you strip a test area, I would consider stripping the whole bottom and starting again.
Hi John,
Thank you for the thorough reply.
There was no anode helping the rudder, so I am looking into either attaching a cable inside from stem to hull or attaching anodes on the rudder
You were right regarding the pitting. I have now found pitting in the primer on big areas on my boat. Some are completely fine, but others look like this. https://photos.app.goo.gl/GpckcEU3zThgPhiv8
I spoke with a proffesional aluminum boat builder who advised not to do a full new bottom priming but to keep as much of the good old primer since it had a lot of phophates etc. in it that are now illegal in boat products.
I have purchased a JOTUN primer compatible with aluminum and my plan is to clean the pits with a powerdrill wirebrus and apply the primer.
Does that sound like a reasonable plan to you?
Hi Sebastian,
Sounds like a good plan. That said, all of that is fixing the symptoms, you also need to dig in and find the cause. Something must be very wrong to cause that kind of damage, either electrically on the boat, or in the form of incompatible coatings.
Hi John,
I very much enjoy this sight it has been helpful to me over the years. Currently a dear friend of mine, with one circumnavigation under his belt, is looking for a used boat to do it again. He has been using me as a sounding board, which is fine when it comes to fiberglass boats, but he is also considering aluminum which I know nothing about. Presently he is considering a boat in the mid 40 foot range and when he told me the scantlings I was alarmed (3/16″ topsides, 1/4″ below the waterline and 5/16 garboard/keel). I am curious would you mind telling me what Morning’s Cloud scantlings are?
Thanks, Tom Gilmore ude.uycremg@t.eromlig
Hi Thomas,
We are a bit heavier, but then bigger too. That sounds fine to me, as long as the internal structures are right. If you continue to worry, buy a piece of 5083 1/4″ aluminium plate and start beating on it. You will stop worrying. Point being that it sounds thin to someone coming from the GRP world, but it’s actually incredibly robust, particularly since aluminium boats have lots of stringers and ribs inside.
Great article series, and really good discussion.
Just wanted to link to a good source of information on aluminium as a boat building material, including an explanation of the commonly used alloys and their properties:
http://www.kastenmarine.com/scantlings.htm
The same website offers an extensive discussion on all kinds of aspects of alloy (and metal in general) as a boat building material, including things such as bonding, electrical systems (suggesting floating DC), zincs, coating of integral tanks etc.
http://www.kastenmarine.com/metalboats.htm
Hi Vesa,
Great links. I have read a lot of Kasten’s stuff on other subjects, but had missed the stuff on corrosion. Very interesting although I do have to say that based on nearly 30 years of aluminium boat ownership I think he makes the subject more complex than it needs to be. We have simply followed the simple tips above and our boat just passed survey with essentially no plate wastage.
Also, unless I missed it, he misses a key issue in the steel aluminium debate and that is that most all of the saving from the lower cost of steel will be eaten up with the cost of keeping coatings on the material particularly if we look at lifetime cost. Also, experience seems to show much better longevity for aluminium in that most 50 year old steel boats need substantial structural work, or are a rusting heap in the corner of some boat yard.: https://www.morganscloud.com/2012/07/01/one-tough-old-aluminum-boat/
I just spent a good part of my vacation reading pretty much everything on Kasten’s site, and even the cost savings on paint is there:
http://www.kastenmarine.com/aluminum.htm
Next up, your tough-old-boat article 🙂
Hi Vesa,
Oops missed that. Read it last night—exactly my thinking. Thanks for the pointer.
I am in the process of having my yacht re painted and when done will need to re fit all the bolts. My yacht is aluminium and most the fittings have no nuts and just thread into the aluminium deck. What is the best way of bedding these in to make them waterproof. Obviously using butyl may not work as when tightening the bolt it will remove most of the butyl due to the bolt turning motion.
Also, I am using A4 stainless bolts, is it worth changing them for aluminium bolts or will A 4 and TelGel do?
Any ideas?
Hi Richard,
This was our approach on our McCurdy and Rhodes and we had good results over 25 years:
We had no leaks and no corrosion between the bolts and aluminium and did not need to change to aluminium bolts.
We were also able to easily unscrew the bolts when needed, even after 20 years.